How to Create a PHPInfo File and check PHP Information?
Last Updated: February 2, 2022

PHP is an important coding language that’s especially popular among Back-end Developers and WordPress users. To build and maintain a website, an understanding of PHP language is essential. People with little or no knowledge about web development can manage their websites if they understand PHP basics. However, if you have little knowledge of how PHP works, it isn’t easy to find basic information. Fortunately, suppose you spare a few minutes. In that case, you can create a single-page website and determine PHP information using a single-liner code such as default configured PHP version, PHP modules, etc.
Want to learn more? Read the following comprehensive guide about phpinfo to build a phpinfo page for your website.
What is phpinfo() Function?
phpinfo() is a function or a code snippet to determine the website’s PHP configuration. Here is some information that the PHP function displays after running phpinfo(),
- A version of PHP the website is currently using.
- Server information and environment.
- Operating System version information.
- The PHP environment.
- HTTP headers.
- Modules and extensions.
- Master and local values.
- Paths along with php.ini location.
- The PHP License.
Using the function highlights this information on a single page. However, some parameters highlight specific information. These parameters include:
- INFO_GENERAL: Using this function displays the web server, configuration line, Operating System, and more.
- INFO_CREDITS: This function highlights PHP modules and developers’ lists.
- INFO_CONFIGURATION: This command exhibits the local and master directives.
- INFO_MODULES: Check all extensions and their settings using this function.
- INFO_ENVIRONMENT: Use this function to check environment variable information.
- INFO_VARIABLES: This function gives access to all predefined variables such as Cookie, POST, Server, and GET.
- INFO_LICENSE: It shows the PHP License.
One of the simplest methods to use the phpinfo() function is by creating a phpinfo page. Later on in this post, we will discuss how you can create a phpinfo page. However, if you want specific information, use the above functions to check details without a hitch.
For WordPress-based blogs/sites, you can confirm your web server details, memory limit, and PHP version using WordPress Site Health feature in version 5.2 and above. Navigate to Tools, then Site Health, Info, and Server. After using this feature, you can find the following data.
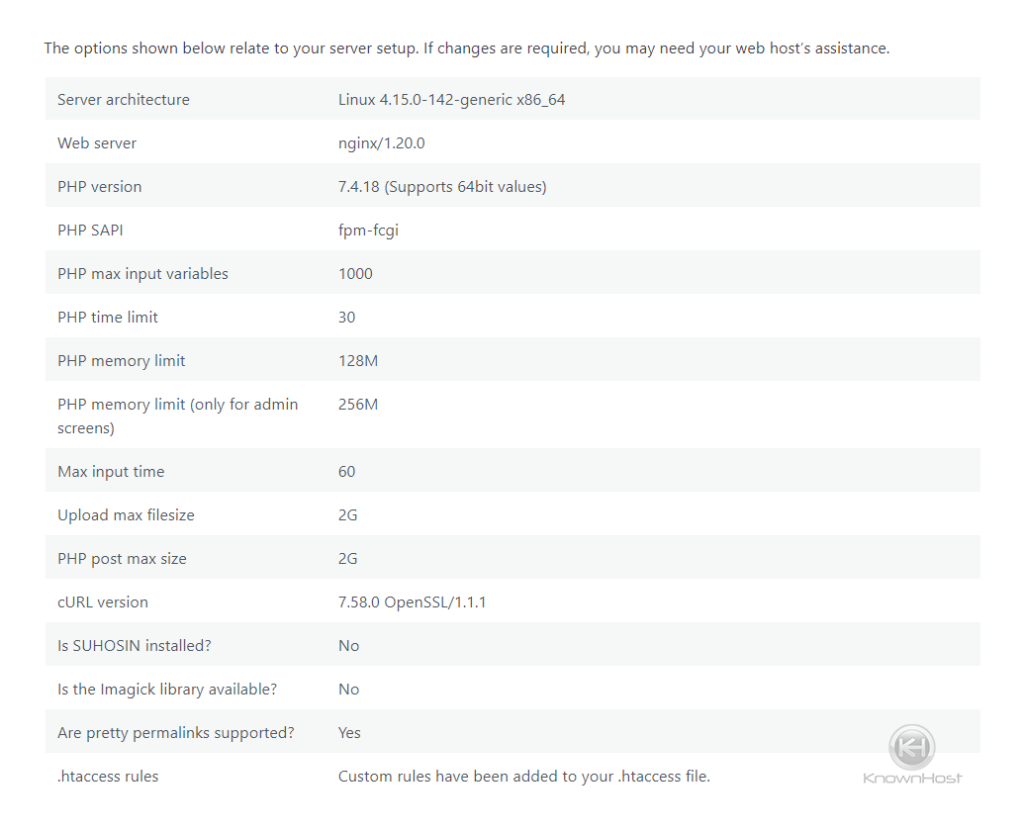
But, instead of individually checking this information one by one, use the phpinfo() function to find all details at once. It generates EGPCS data, which is beneficial for debugging attempts as well.
How to create and use a phpinfo file?
Creating a phpinfo() File is a kind of very simple procedure. You must have File Manage access or FTP access of the server on which you would like to run the test. Here, we are covering the FTP method as it is useful for everyone who might have or not doesn’t have direct access to any control panel.
Step 1
Open Notepad application (notepad.exe), paste the below code in it and save the file as phpinfo.php.
<?php
phpinfo();
?>
Should you need too, you can use the above-mentioned parameters in parentheses to find individual information.
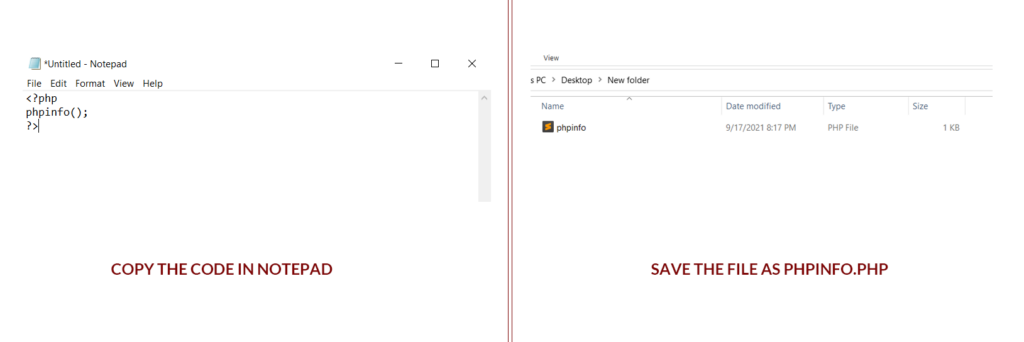
Step 2
Use any of your favorite FTP application (Such as FileZilla), login to the server > Navigate to root directory > Upload the file phpinfo.php.
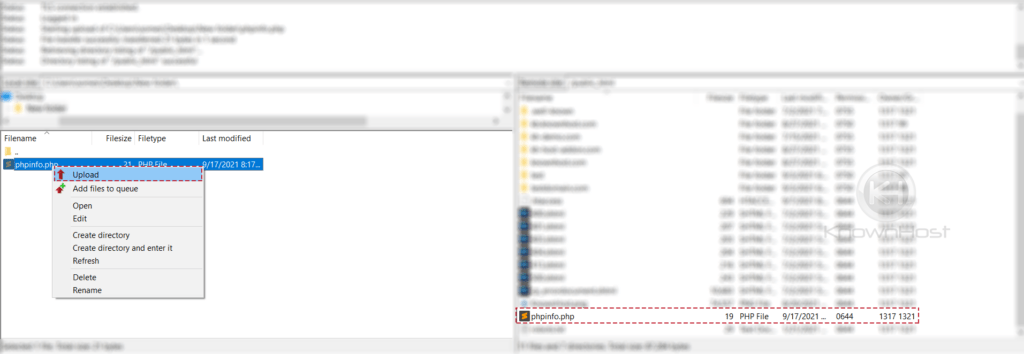
Step 3
Browse the file /phpinfo.php through the browser, and you will be able to see all the server end PHP information such as System, Build Date, Server API, Virtual Directory Support, php.ini path, etc.
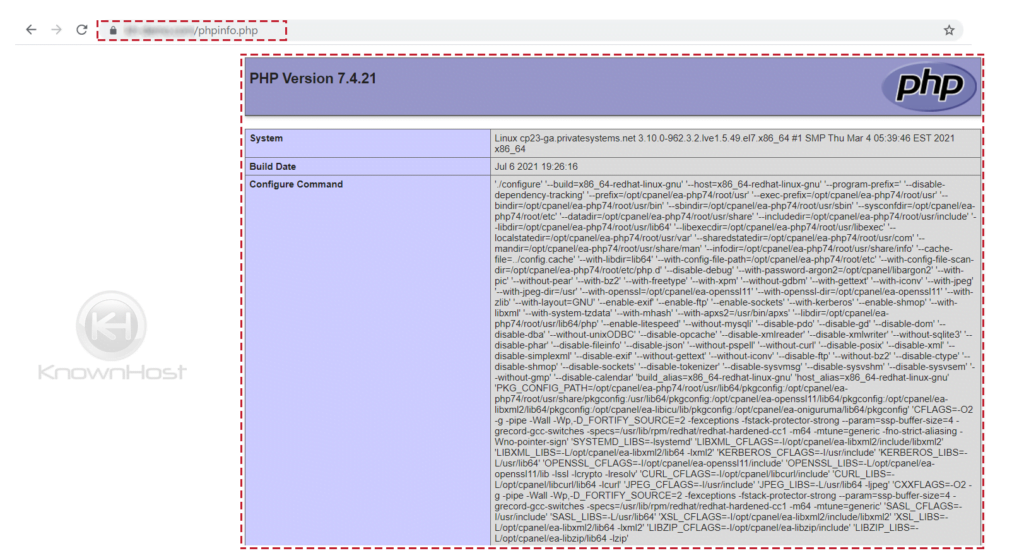
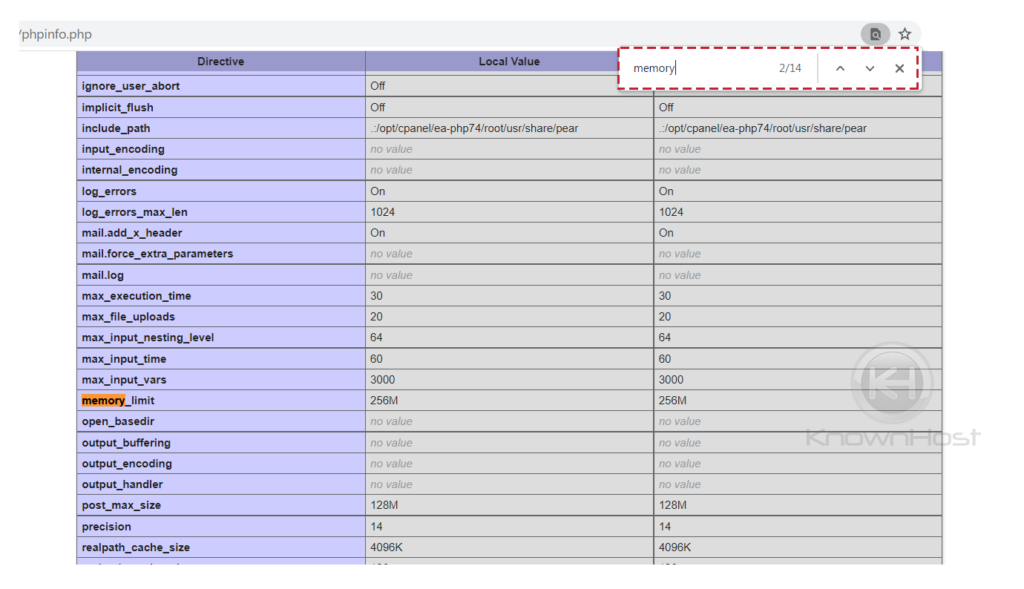
If you chose to view complete information about the web domain and didn’t mention the parameters, this page will be quite long. Once you open the page, locating and checking specific details become easier. Find details using a search function (CTRL or CMD + F)
Delete or Rename phpinfo Page (Recommended)
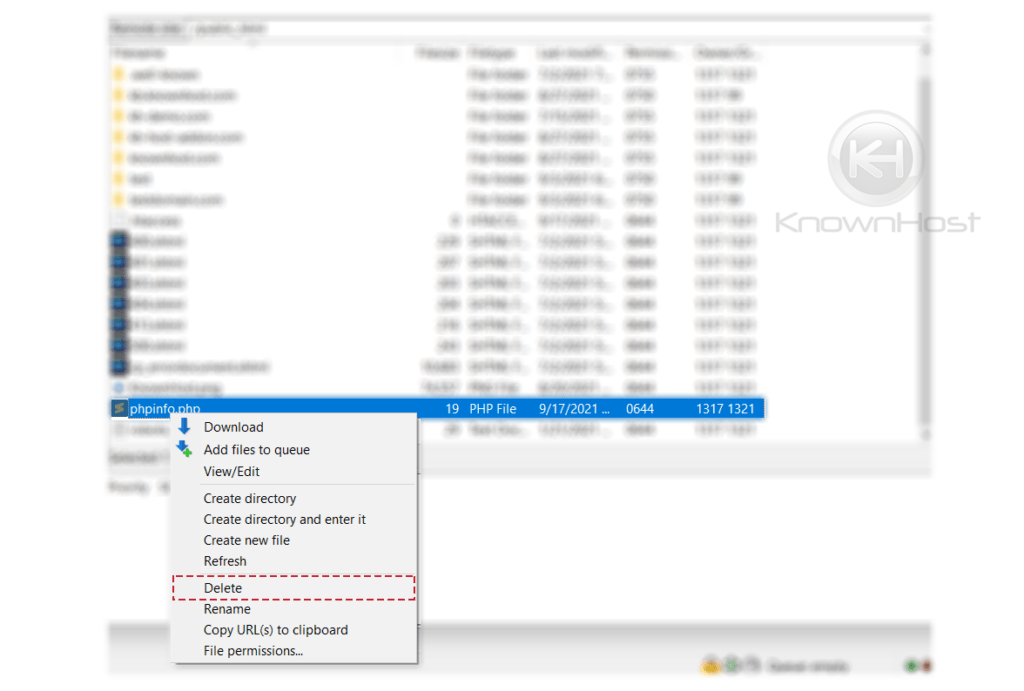
As we already mentioned, once you create and place phpinfo.php in the public_html folder, the details become publicly available. An unfortunate result of this is that a malicious hacker can access the information and use it to infiltrate security. As some information on this page is sensitive, it can increase the probability of cyber security risks. To exploit the server, attackers can use bots to search publicly available phpinfo pages. Therefore, it is essential to delete the page from the folder before the threat can access the server. For that, return to the FTP client, connect with the server, and open public_html. Now right-click on the phpinfo.php file and delete.
Many users rename their phpinfo page to protect it from hackers. Include random numbers or letters so cyber criminals cannot recognize the file. Renaming the file also changes the way you access the file. Therefore, remember the name you assign to your phpinfo page. That way, you can secure access as well as reach the page whenever you want. However, this isn’t a guaranteed solution. Hackers can still recognize the file and breach security. So, it is advisable to create a new page every time you want and delete it once you are done checking the information.
Conclusion
The phpinfo () function offers extensive information about the server to help in debugging. Create a phpinfo page to easily access information. To sum it up, here are the steps to create and access the phpinfo page,
- Using a code editor, create a phpinfo.php file. Then, upload it to the server via FTP.
- Using your web browser, view the phpinfo page.
- After checking the information, rename or delete the file to prevent a security breach.
For troubleshooting server-end PHP problems, the phpinfo page can surely give you enough back-end information to get started with the resolution. In addition to checking the limits and resources configuration specific to PHP through the same phpinfo page.
Have website? Looking for a robust hosting providers? Check out KnownHost and all we have to offer for your site!