CloudLinux | Installation & Setup – Part 2
Last Updated: May 24, 2022
So far, in the first part, you have learned how to install and configure the CloudLinux OS as per the requirements for your shared server. In this particular part 2, we continue through each of the features CoudLinux offers, such as NodeJS, Python, PHP Selector, etc.
PHP Selector
PHP selector is one of CloudLinux OS’s features for the shared environment. Using PHP selector user can select the PHP version and the PHP modules as per the requirements. PHP selector sits above CageFS, which cages every individual user’s process to avoid interrupting other users in the shared environment.
Server End Configuration,
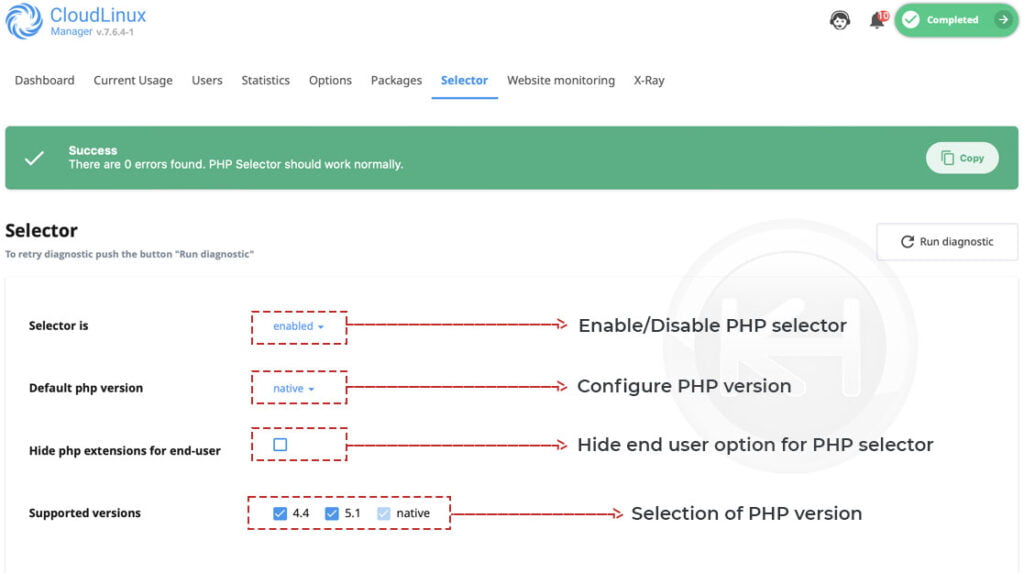
You can configure the PHP selector settings through CloudLinux → Selector. Using the same interface, you can configure the global settings for the PHP selector. Disabling/Enabling the PHP selector, selecting the Default PHP version, hiding the PHP selector’s extensions for end-users, and selecting supported PHP versions,
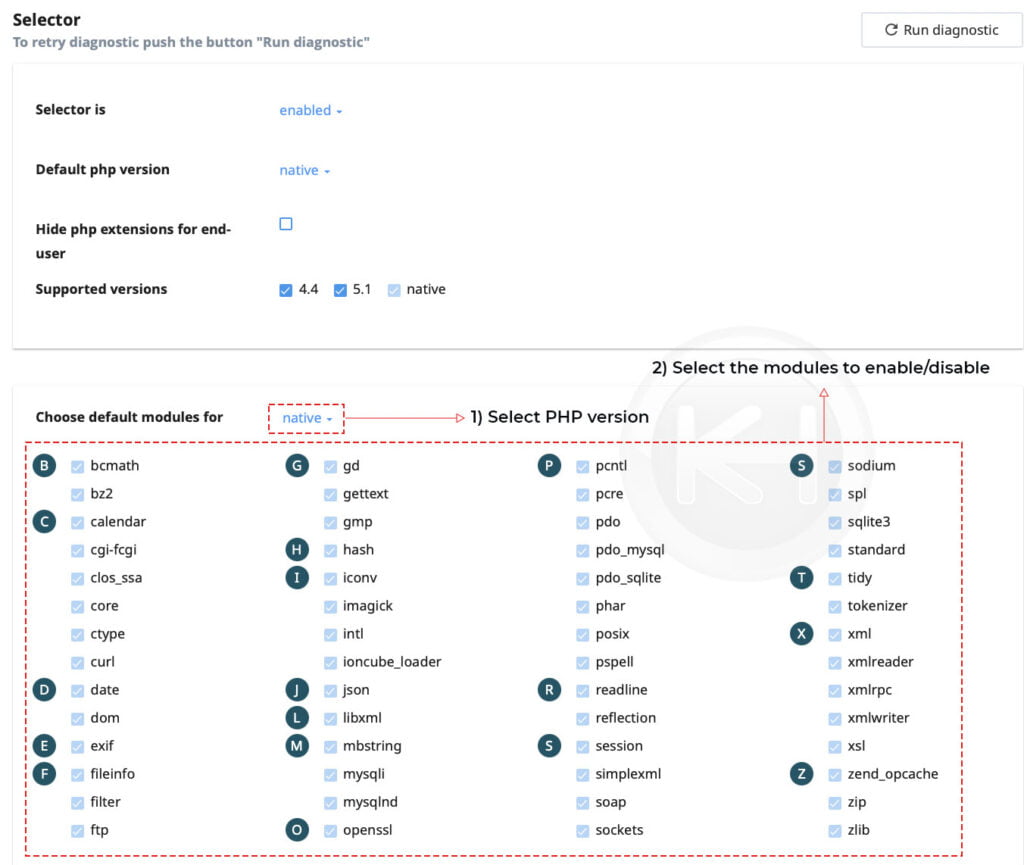
Furthermore, by selecting each PHP version, you can decide which of the PHP extension/module you would like to enable for the end-user globally,
Python Selector
Python is another supported application you can enable for your shared users on a shared server using CloudLinux OS. Due to its versatility and ease of use, Python Hosting, also known as Django hosting, is taking grip of the web hosting market.
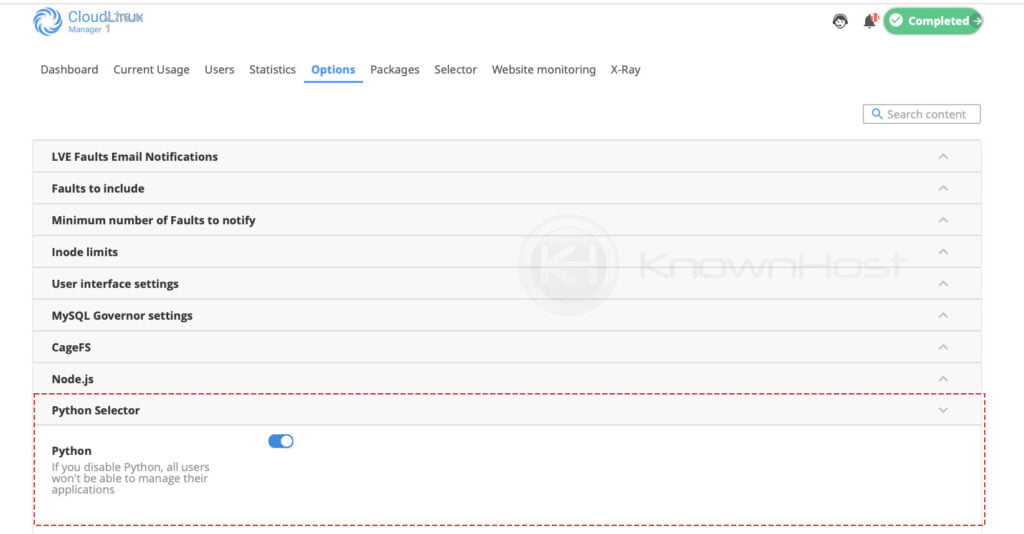
Navigate to CloudLinux → Options → Python Selector.
For better understanding, we have noted each part with a number (1, 2, 3, etc.) below the image, and according to that, you will find the explanation just below the following image,
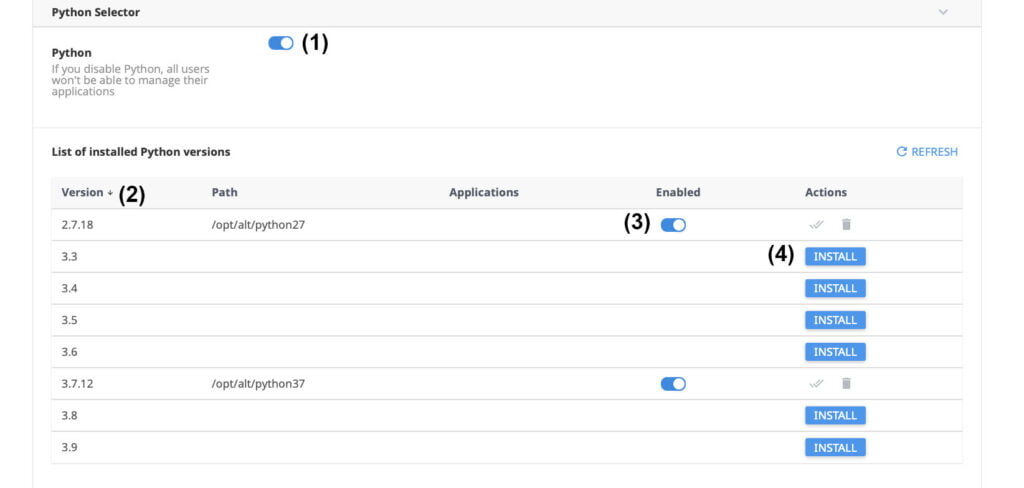
1) Using this option, you can control Python. To enable/disable the Python selector, enable/disable this option.
2) Here you have list of available Python versions which you can Install/Use on the shared server.
3) If you have a bunch of Python versions installed, we have 2.7.18, and 3.7.12 versions installed that you can enable/disable with this option.
4) You can see 3.3, 3.4, etc., versions we have on the server are not yet installed, and to install any specific version as per the requirements, you can do it individually by clicking on the INSTALL button.
In the Application column, you can find all the Python Apps installed on the server with their respective Python versions.
To access the Python selector at the user level for cPanel & DirectAdmin, navigate to the following location,
cPanel/DirectAdmin → Setup Python App
NodeJS Selector
NodeJS is a JavaScript runtime environment that runs on the V8 engine. CloudLinux offers primarily every NodeJS version, which you can use to deploy the NodeJS project easily.
Navigate to CloudLinux → Options → Node.js
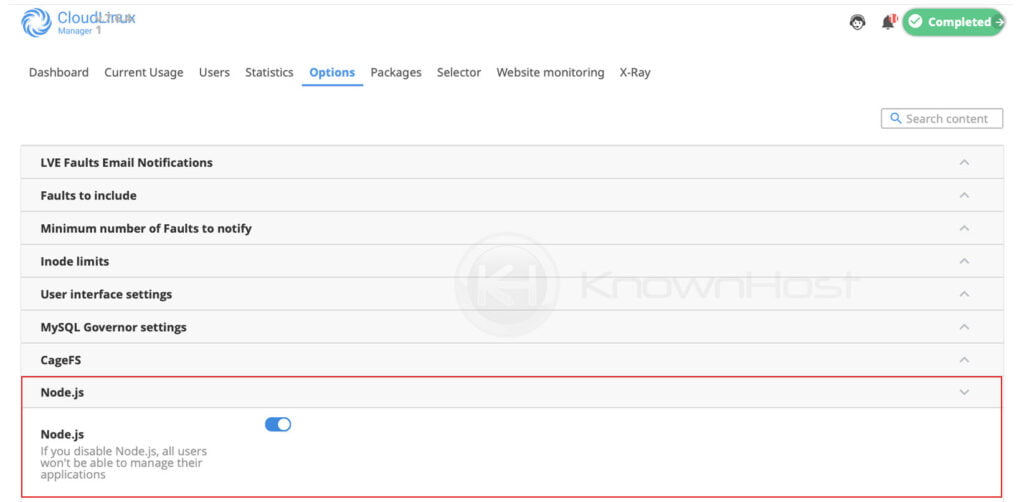
For better understanding, we have noted each part with a number (1, 2, 3, etc.) below the image, and according to that, you will find the explanation just below the following image,

1) Using this option, you can control Node.js. To enable/disable the Node.js, enable/disable this option.
2) Here you have a list of available Node.js versions which you can Install/Use on the shared server.
3) If you have a bunch of Node.js versions installed, we have 10.24.1, and 11.15.0 versions installed that you can enable/disable with this option.
4) You can see 6, 8, 9, 12, 14, etc., versions we have on the server are not yet installed, and to install any specific version as per the requirements, you can do it individually by clicking on the INSTALL button.
In the Application column, you can find all the Node.js applications installed on the server with their respective Node.js versions.
To access the Python selector at the user level for cPanel & DirectAdmin, navigate to the following location,
cPanel/DirectAdmin → Select NodeJs Version
MySQL Governor
MySQL governor is one of the best features offered by CloudLinux to eliminate SQL abusers. Let’s learn how to configure MySQL Governor with CloudLinux.
Navigate to CloudLinux → Options → MySQL Governor Settings.
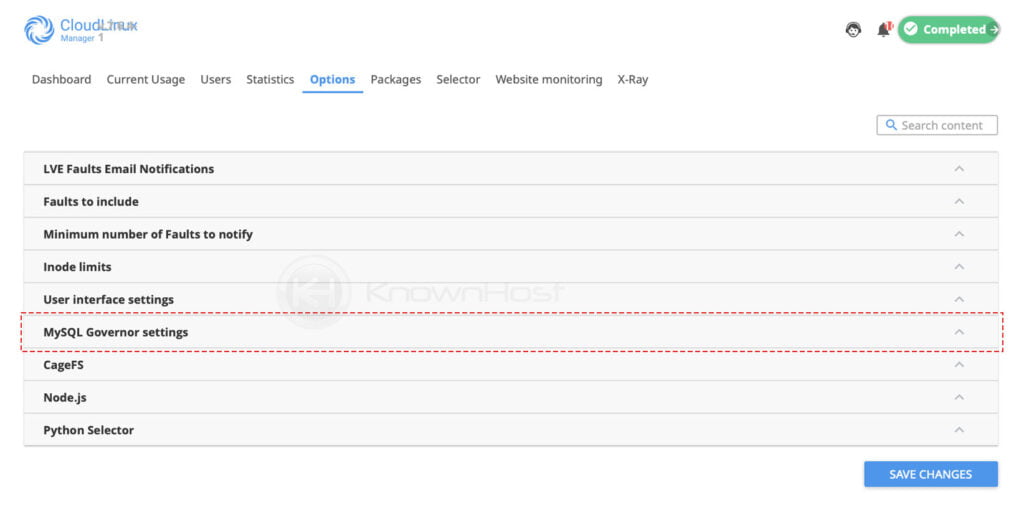
Furthermore, you can configure the following configuration using the same interface of MySQL Governor Settings,
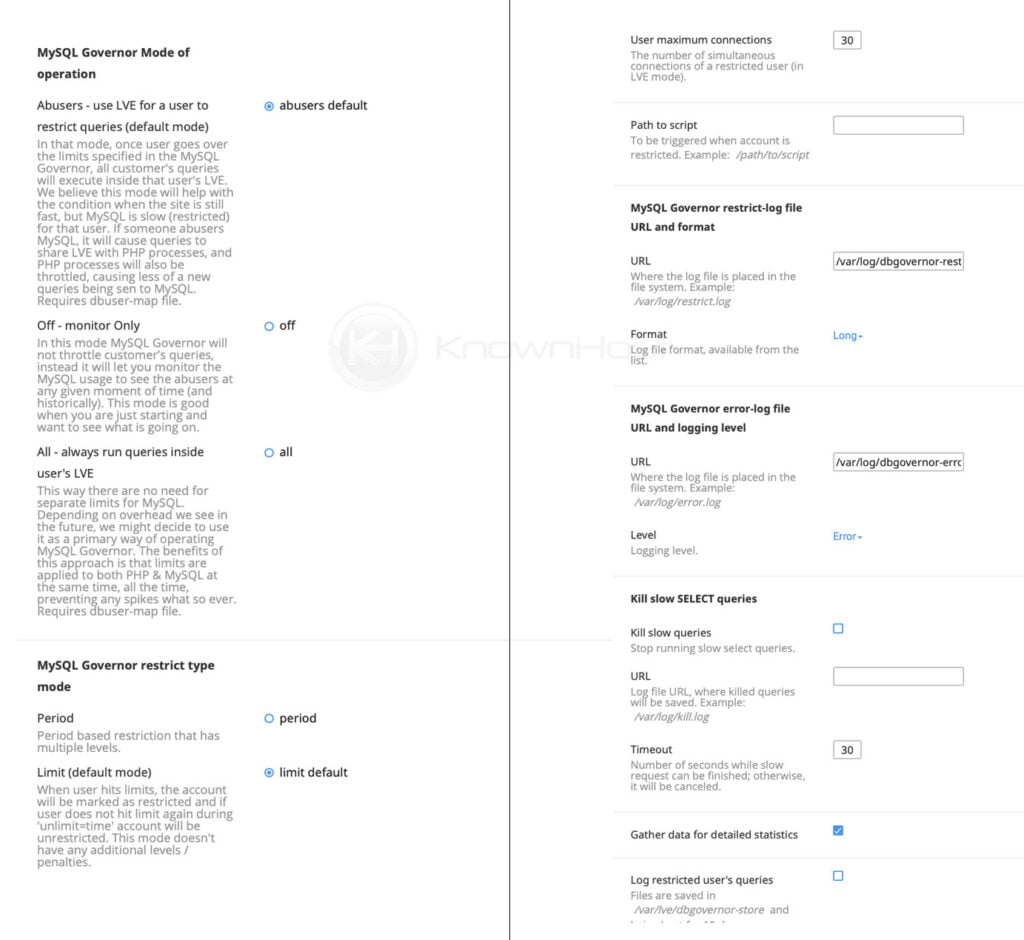
MySQL Governor Mode of operation,
Abusers – use LVE for a user to restrict queries (default mode): In that mode, once user goes over the limits specified in the MySQL Governor, all customer’s queries will execute inside that user’s LVE. We believe this mode will help with the condition when the site is still fast, but MySQL is slow (restricted) for that user. If someone abusers MySQL, it will cause queries to share LVE with PHP processes, and PHP processes will also be throttled, causing less of a new queries being sen to MySQL. Requires dbuser-map file.
Off – monitor Only: In this mode MySQL Governor will not throttle customer’s queries, instead it will let you monitor the MySQL usage to see the abusers at any given moment of time (and historically). This mode is good when you are just starting and want to see what is going on.
All – always run queries inside user’s LVE: This way there are no need for separate limits for MySQL. Depending on overhead we see in the future, we might decide to use it as a primary way of operating MySQL Governor. The benefits of this approach is that limits are applied to both PHP & MySQL at the same time, all the time, preventing any spikes what so ever. Requires dbuser-map file.
And more settings such as MySQL Governor restrict type mode, Restricted time periods, MySQL Governor restrict-log file URL and format, MySQL Governor error-log file URL and logging level, Kill slow SELECT queries, Gather data for detailed statistics, etc.
CageFS, Fault Notifications, Inodes Settings
We have learnt how CageFS works and it help you to secure the shared environment from possible consequences in What is CloudLinux article.
The global settings for the CageFS you can manage it from CloudLinux → Options → CageFS.
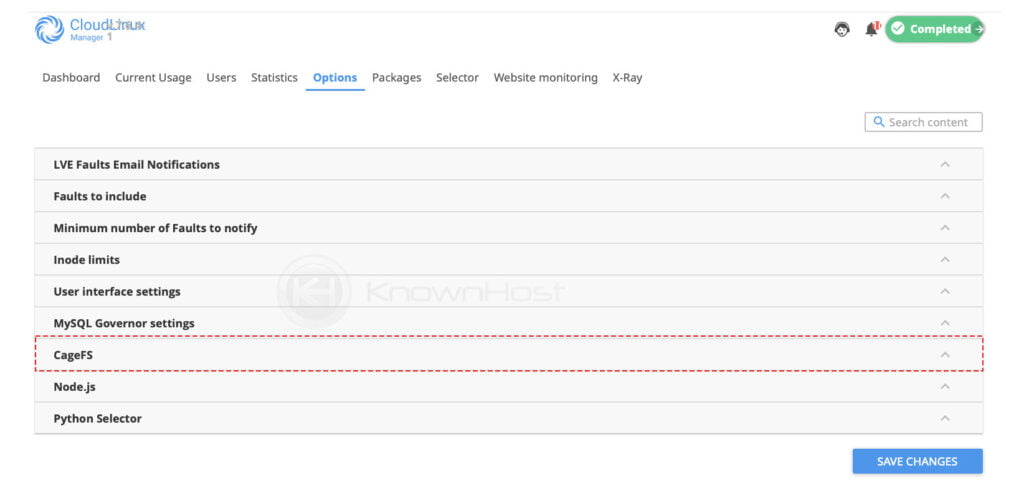
Here you have following options,
1. Enabling/Disabling the CageFS.
2. Updating CageFS skeleton to re-configure all the users properly in Cages.
3. The option to enable/disable the CageFS functionality for newly registered users.
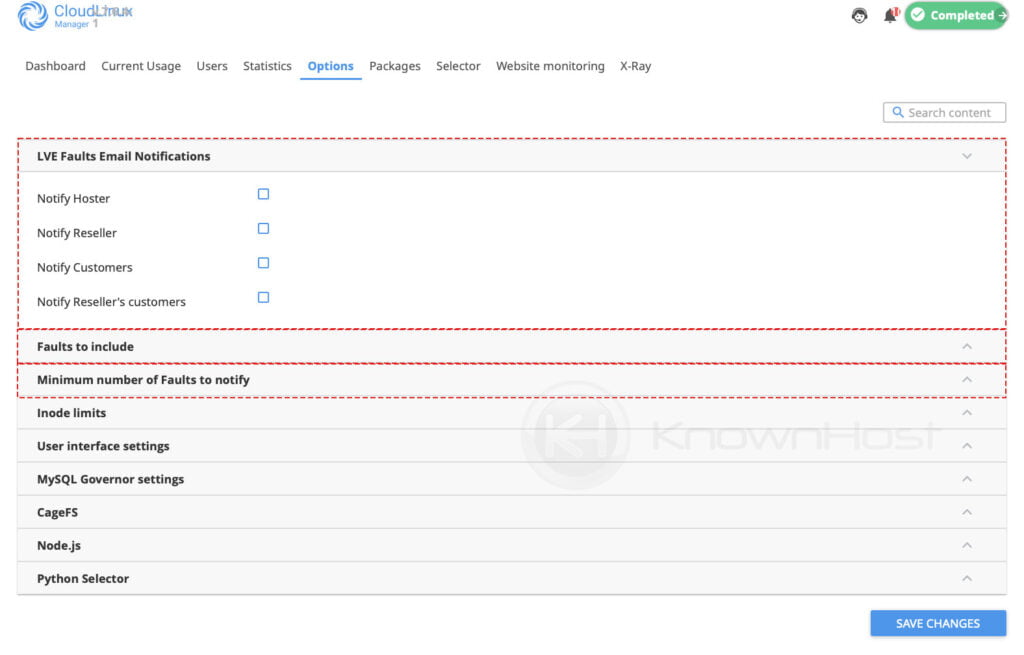
Notification allows the host, resellers, and the end-user to get regular updates on the heavy usage. Notification configuration you can find at CloudLinux → Options → LVE Faults Email Notifications and the Fault configuration you can perform using CloudLinux → Options → Fault To Include & Minimum number of Faults to notify.
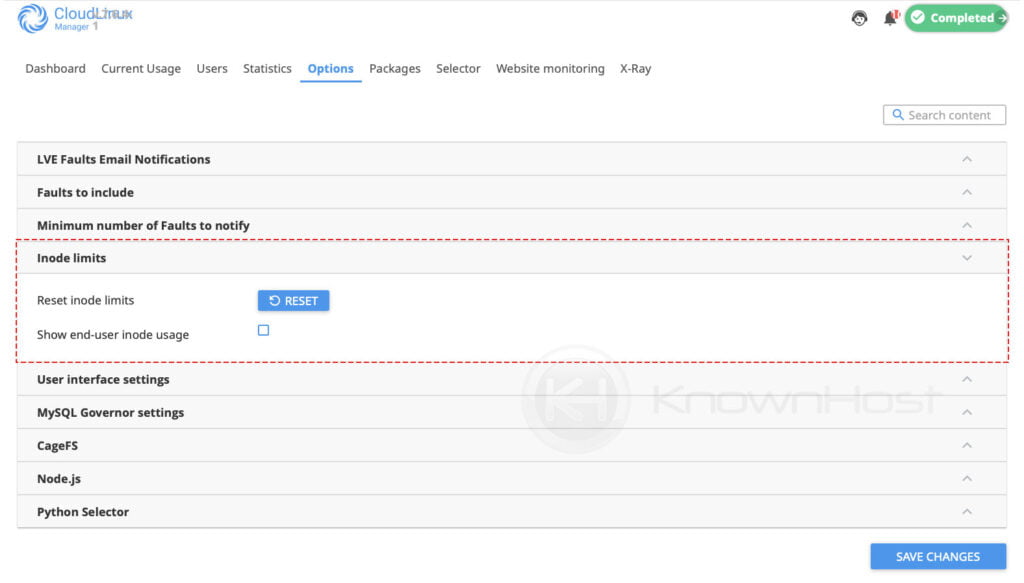
Inodes are nothing but the count of a number of files hosted on the server. CloudLinux offers functionality to restrict the users per the Inode limits (Number of files hosted under a single shared hosting account). Using the CloudLinux → Options → Inode limits, you can Reset the Inode limits and enable/disable view the usage of Inode.
Conclusion
After all complete server end installation of the CloudLinux next step is to configure the CloudLinux OS as per the requirements enabling the additional support of NodeJS, Python hosting, and MySQL Governor to eliminate the SQL abusers. We have also covered the steps to configure Inode and fault notifications.
KnownHost offers 365 days a year, 24 hours a day, all 7 days of the week best in class technical support. A dedicated team is ready to help you should you need our assistance. Are you not using KnownHost for the best Webhosting experience? Well, why not? Check with our Sales team to see what can KnownHost do for you to improve your web hosting experience.