How to Compress and Uncompress Files with cPanel
Last Updated: January 23, 2026
Introduction
When transferring files to or from your server, it’s always best to compress them to make the transfer slightly smaller, and most importantly guard against corruption during the transfer process.
What is compression?
Any Windows, Linux and Apple computer are able to compress files. There are several different kinds of compression, but we’ll focus on the three most common compression file types: .zip, .tar, and .gz. Zip is a compressed archive (for multple files, usually) while tar is used for a single archive of a file. Gzip (.gz) is the compression of a file or multiple files.
You’ll find that most files that are compressed on a Linux server are using the suffix “.tar.gz”, while PC’s will use the “.zip” compression. Windows and Mac computers have the “zip” utility by default, just like your server. So we’ll work with that file type.
How do I compress a file?
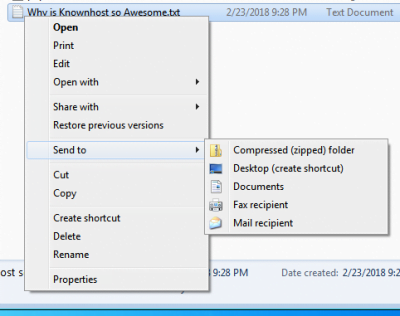
On a Windows 7 PC (single file or folder)
- Single Click + <Control> on a file or folder.
- Click on “Compress <file name here>”
- This will compress the file automatically, and highlight the compressed file or folder.
- If you want to rename the archive:
- Single Click + <Control> on the archive.
- Click on “Rename”
- Type in the name you wish to rename the archive to, and hit <Return>.
On a Mac (multiple files)
- Click on a file, then press and hold “<Command>”.
- Click on each file you want to add to your archive – you can add as many as you want.
- Once done, let go of <Command> and Single Click + <Control> on one of the folders or files you have selected.
- Click on “Compress <#> Items”.
- This will compress all of the files automatically, and highlight the compressed file or folder.
- If you want to rename the archive:
- Single Click + <Control> on the archive.
- Click on “Rename”
- Type in the name you wish to rename the archive to, and hit <Return>.
How do I uncompress the file once I transfer it?
Once you transfer the file to your server using FTP, or via the cPanel File Manager ((cPanel » Home » Files » File Manager) you can uncompress the file(s) you compressed on your computer, and they’ll retain the same directory structure in the location you uncompress.
Uncompressing an archive using cPanel’s File Manager
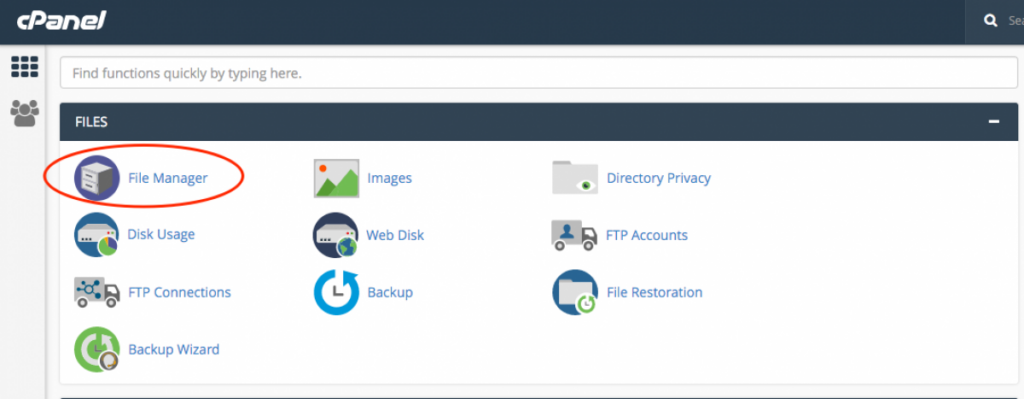
- Login to your cPanel account located at domain.tld:2083
- Navigate to “Home > Files > File Manager” and click on the File Manager Icon.
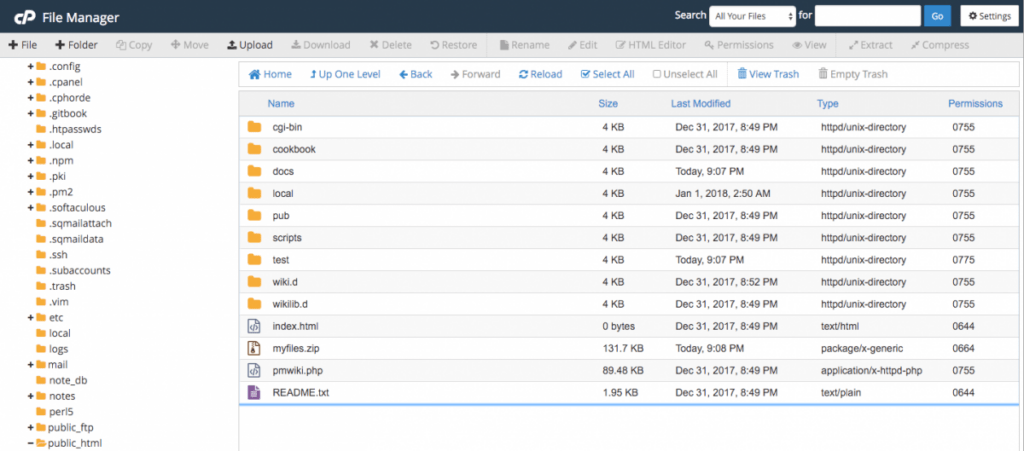
A new tab with the File Manager should open on your browser. - On the left side, navigate to the location you transferred your archive to, and click on it.
- In the center pane, the location of the folder you clicked on should open. Locate your archived file.
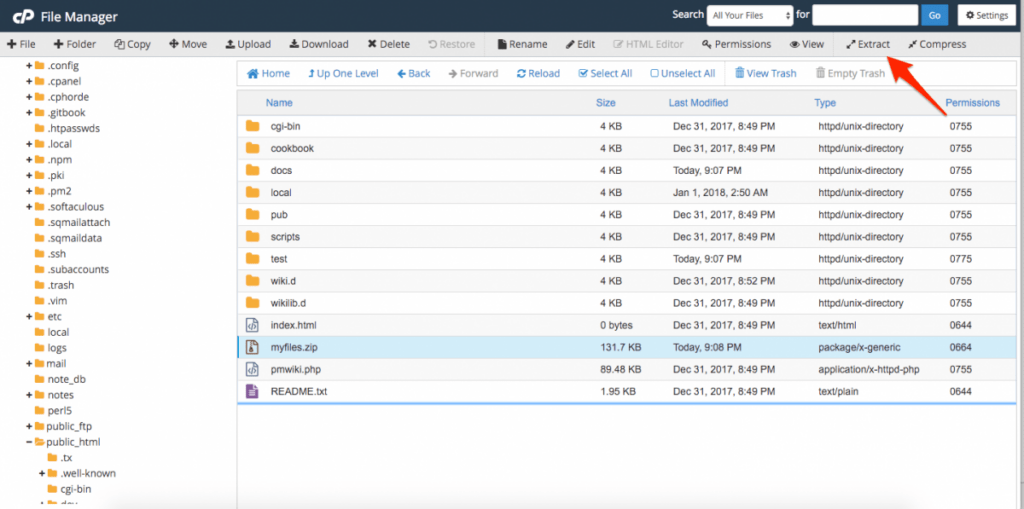
- Single click the archived file.
- On the top bar, just below “Search” & “Settings”, is a row of commands. Locate “Extract” and press it.
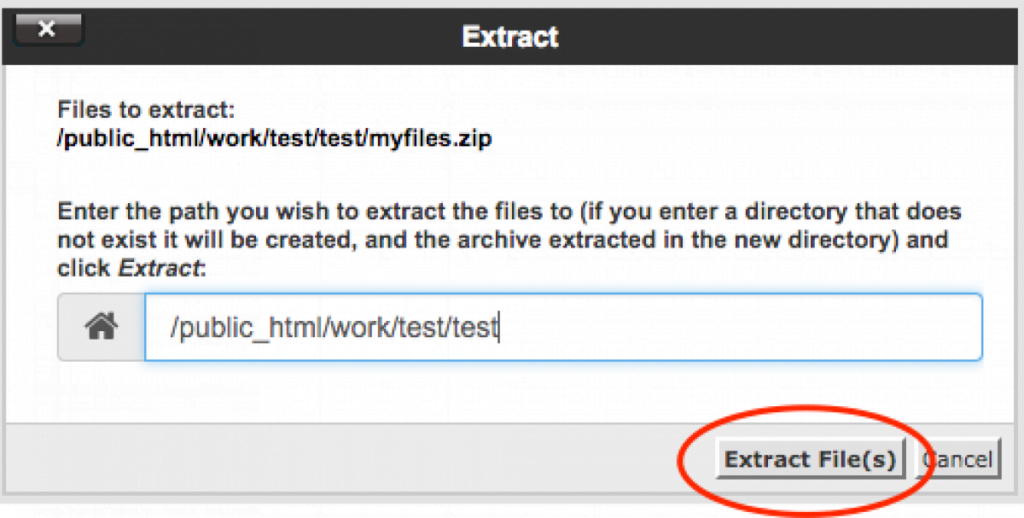
- A popup titled “Extract” should appear. If you want to change the path of where the files will uncompress to, type in the location. Otherwise, leave the edit box in the middle un-modified.
- Click on “Extract File(s)”.
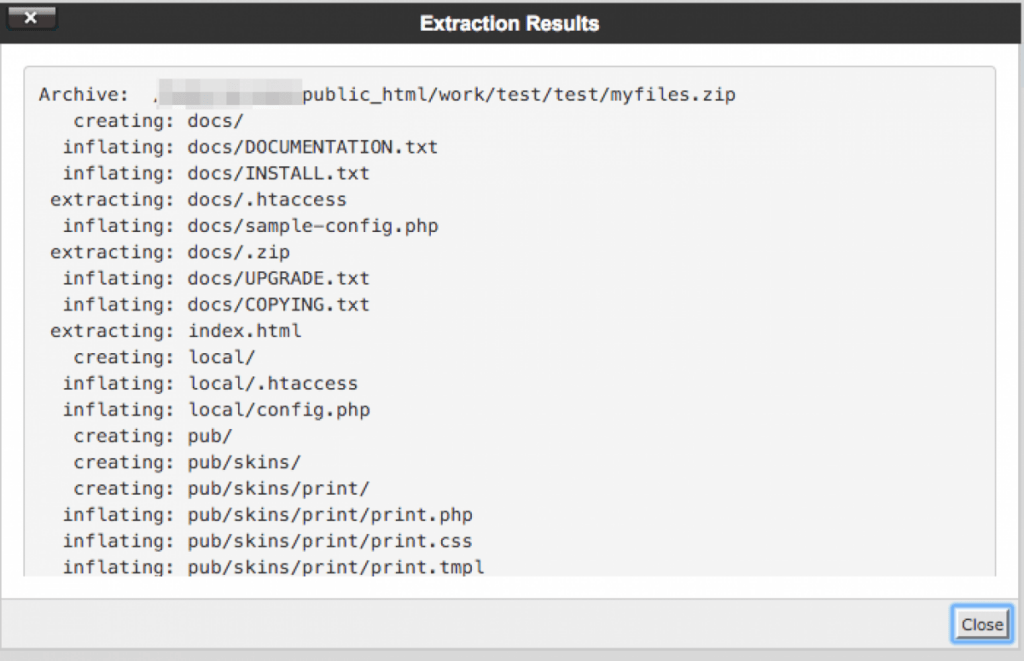
- Once done, a new popup with the title “Extraction Results” should pop up, describing the uncompression.
Uncompressing an archive using SSH
- Connect to your server using PuTTy or terminal command line “SSH”. Remember to edit the port to point to the correct one.
- Navigate to the location where your archive is.
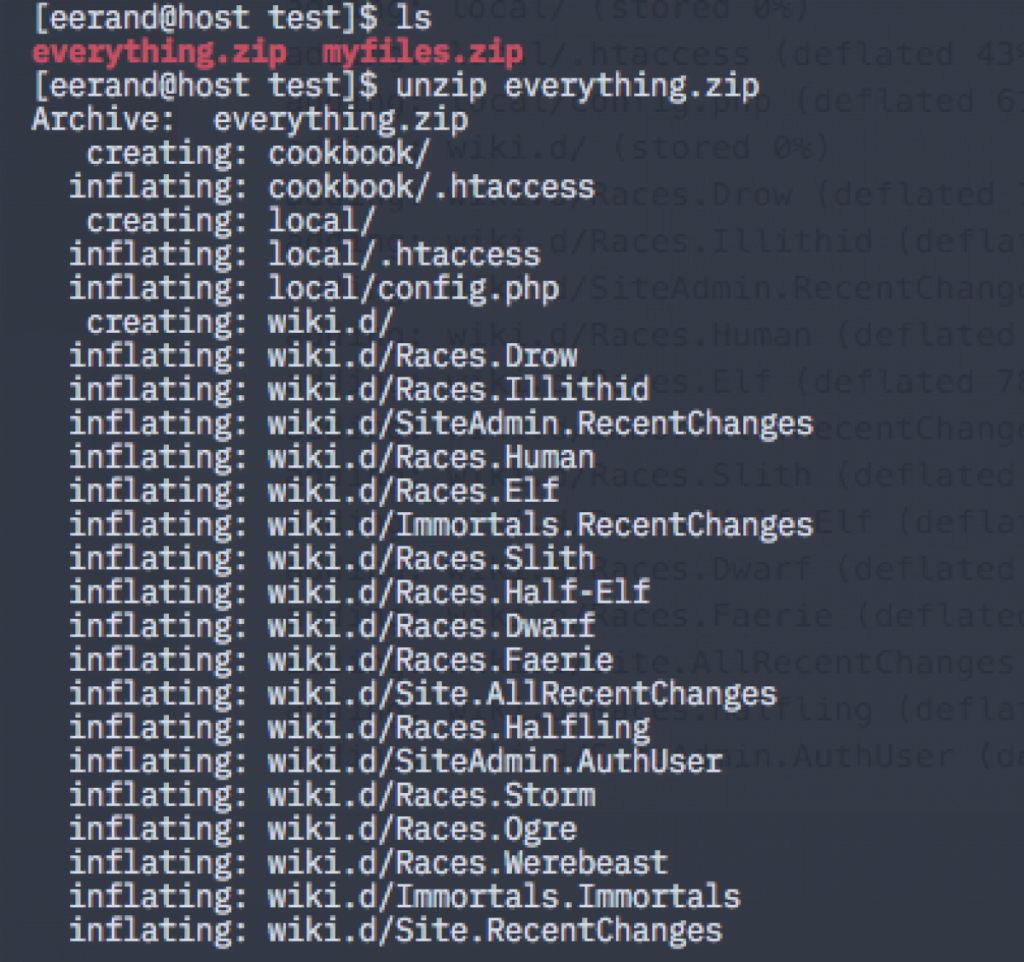
- Use the command “unzip <name of your file>”.
- Once done, the command will scroll and describe the uncompression.
How do I compress a file on my server?
You can compress a file on your server just like you can from your computer, though it’s a little different. There are multiple ways to do this, but we’ll focus on SSH and the cPanel File Manager.

Compressing file(s) and folder(s) in cPanel’s File Manager
- Login to your cPanel account located at domain.tld:2083
- Navigate to “Home > Files > File Manager” and click on the File Manager Icon.
A new tab with the File Manager should open on your browser. - On the left side you can navigate to the folder(s) or file(s) you wish to compress.
Keep in mind you can only compress folders and files in the same directory with the File Manager. - Click on the file(s) and folder(s) you wish to compress.
If on Windows, you can press <Ctrl> and click multiple items.
If on Mac, you can press <Command> and click multiple items. - On the top bar where “File, Folder, Copy, Move” commands are located, the command “Compress” is located at the end.
- Press on “Compress”.
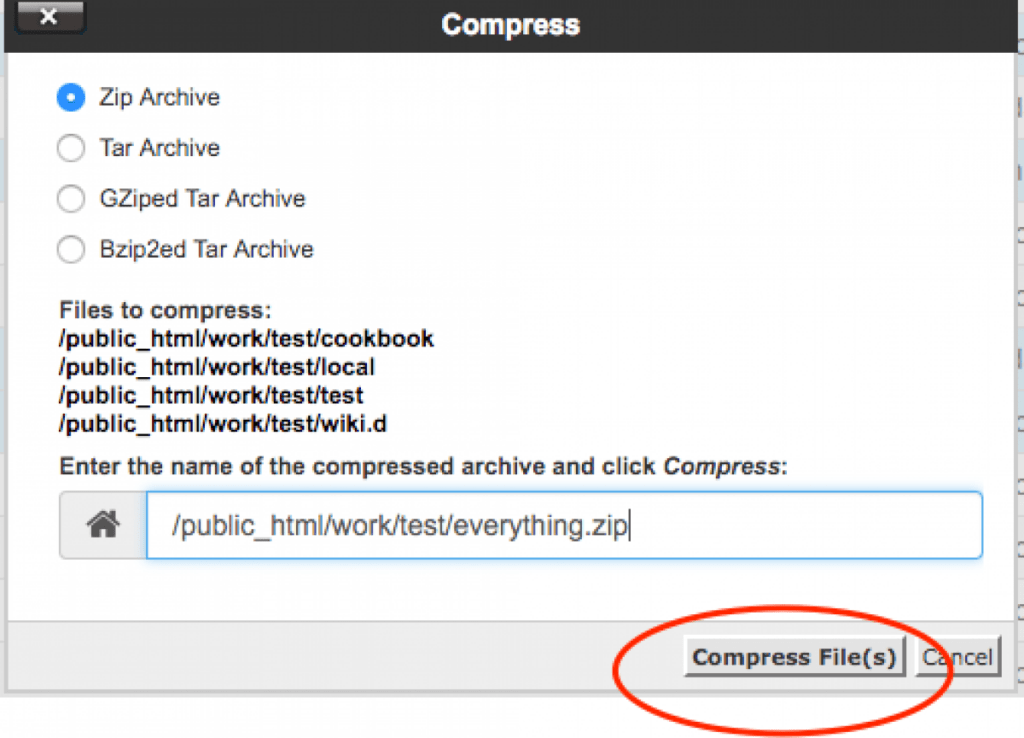
- Select Compression Type – you should choose “Zip” since Mac and Windows both have these utilities installed by default.
- Enter the name of what you want the compressed file to be, and press “Compress File(s)”.
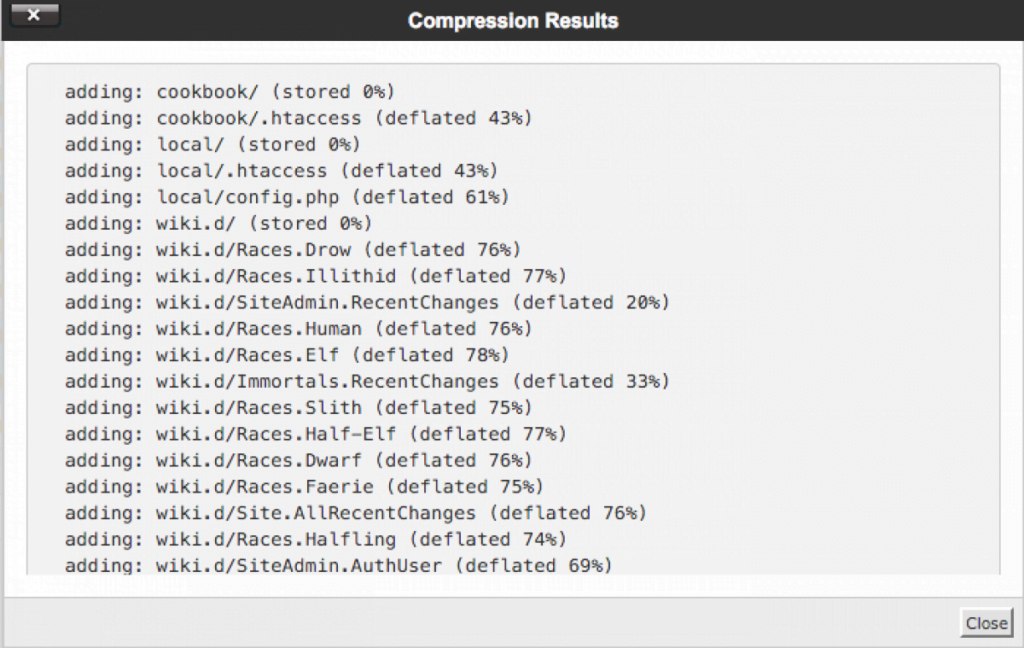
- A popup named “Compression Results” should appear, descriibing the compression.
Compressing file(s) and folder(s) via SSH
- Connect to your server using PuTTy or terminal command line “SSH”. Remember to edit the port to point to the correct one.
- Navigate to the location where you want to compress your file(s) or folder(s).
- Use the command “zip” to compress the files:
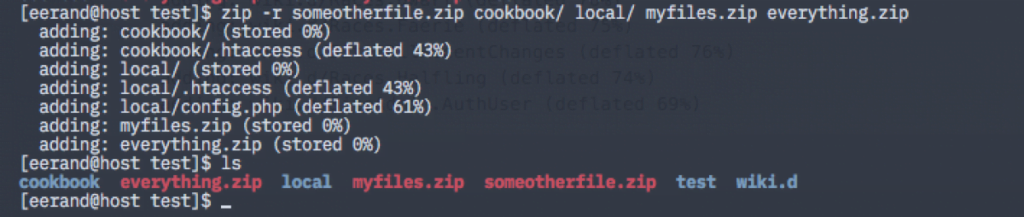
To compress multiple folders or files, you should always use the “-r” option, which stands for “recursively”. This will ensure all folder contents are compressed along with the folder, and not just the folder. - Once done, the command will scroll and describe the compression, and creating the archive in the process.
Example: zip -r myfiles.zip docs/ myfileone.txt public_html/ knownhostisawesome.txt php.ini