How to Manage Users on Accounts
Last Updated: April 8, 2026
We’ll be going over how to add/invite new ‘managers’ into your account as well as explaining what the differences are between Managers and Added Contacts with the permissions available to them. This feature will allow users who resell and/or provide services direct to their customers the ability to manage their customers and their customers helpdesk without multiple logins.
Differences between “Managers” and “Added Contacts”
Let’s go over the distinctive differences between “Managers” and “Added Contacts” before we dive into the adding/removing and managing of said users for your KnownHost Account.
Managers: This is intended to be used for those who are not directly part of your organization but you want them to have access to support tickets on your behalf without being given other access.
Possible users such as:
- Server Administrators
- Developers
- Other types of users
Added Contact: This is intended to be used for those who are a direct part of your organization and you want them to be able to access more account related features beyond support tickets; such as billing related decisions. Think of this as if you were adding a partner or an employee.
Adding Managers
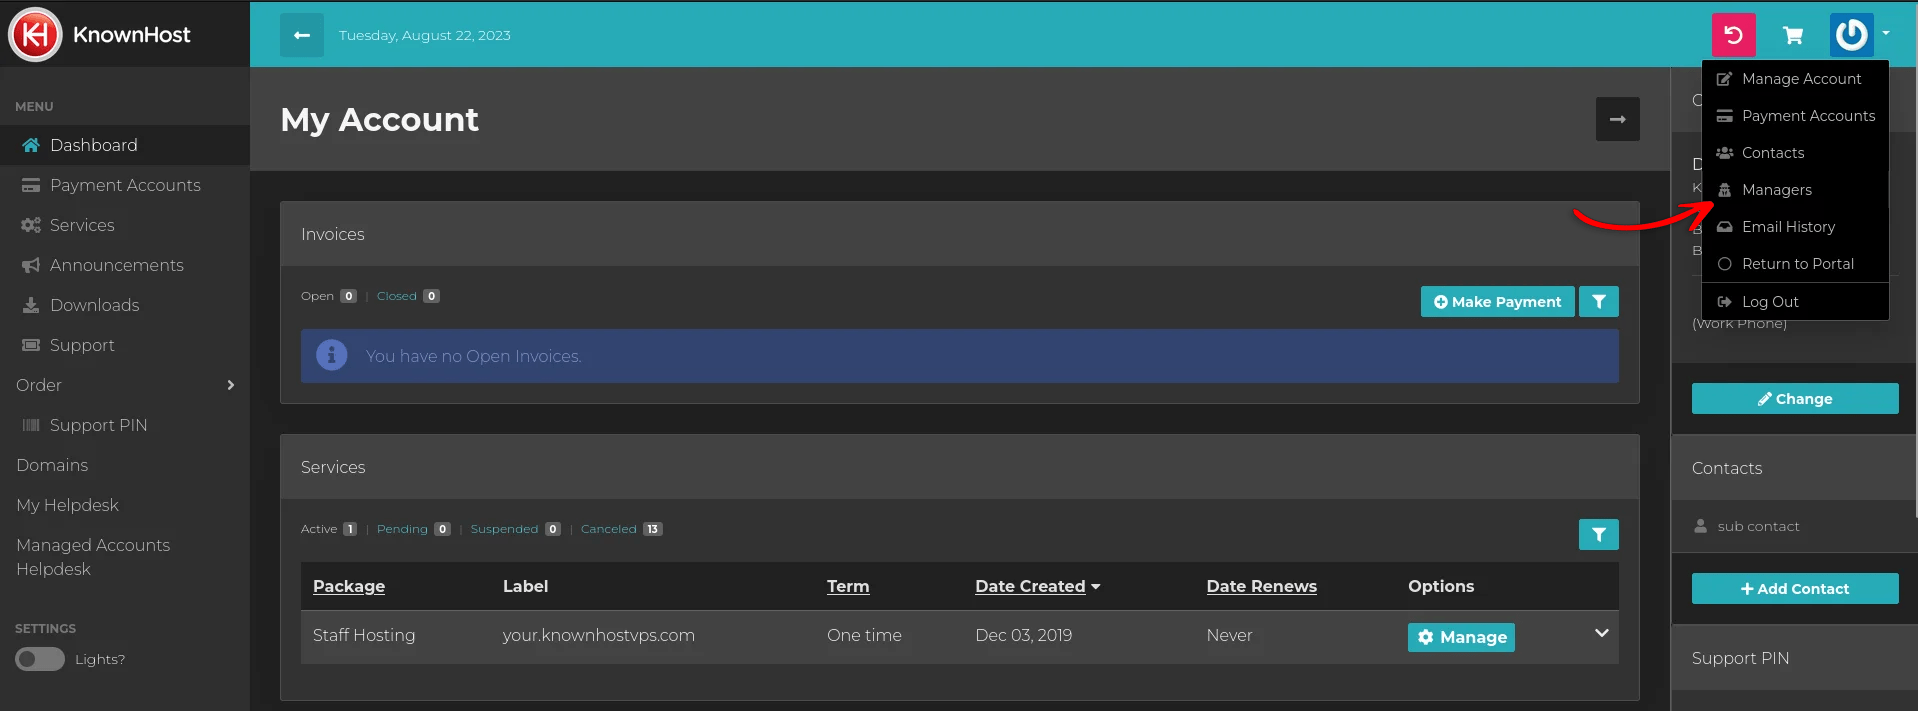
To add a guest user; you’ll want to login to your KnownHost account at https://my.knownhost.com. Once within your dashboard, you’ll want to navigate to the upper right hand corner. When you click the power button symbol, it’ll drop down into several option. “Managers” is the one you will to click.
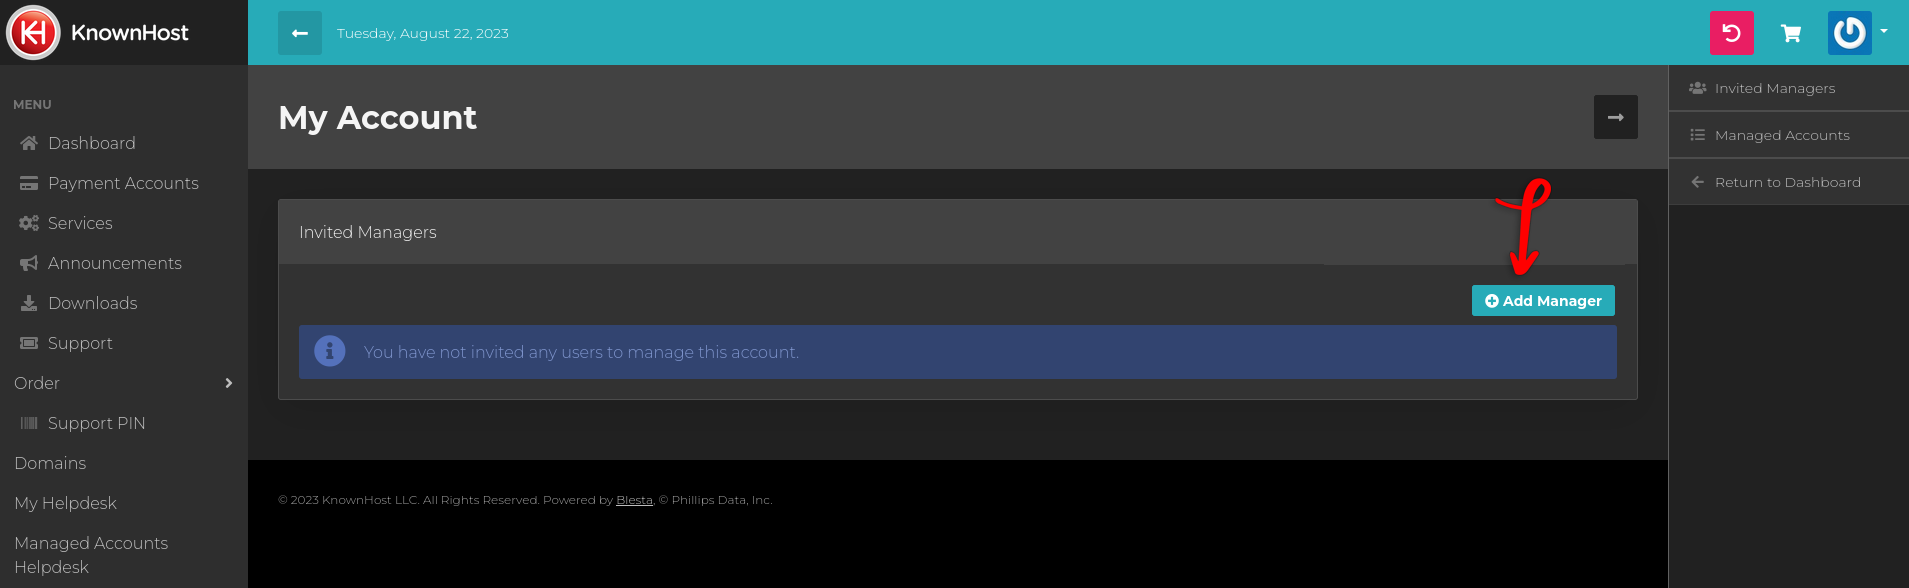
To add a user, we’ll click “Add Manager” — which will take us to the next screen to invite our user.
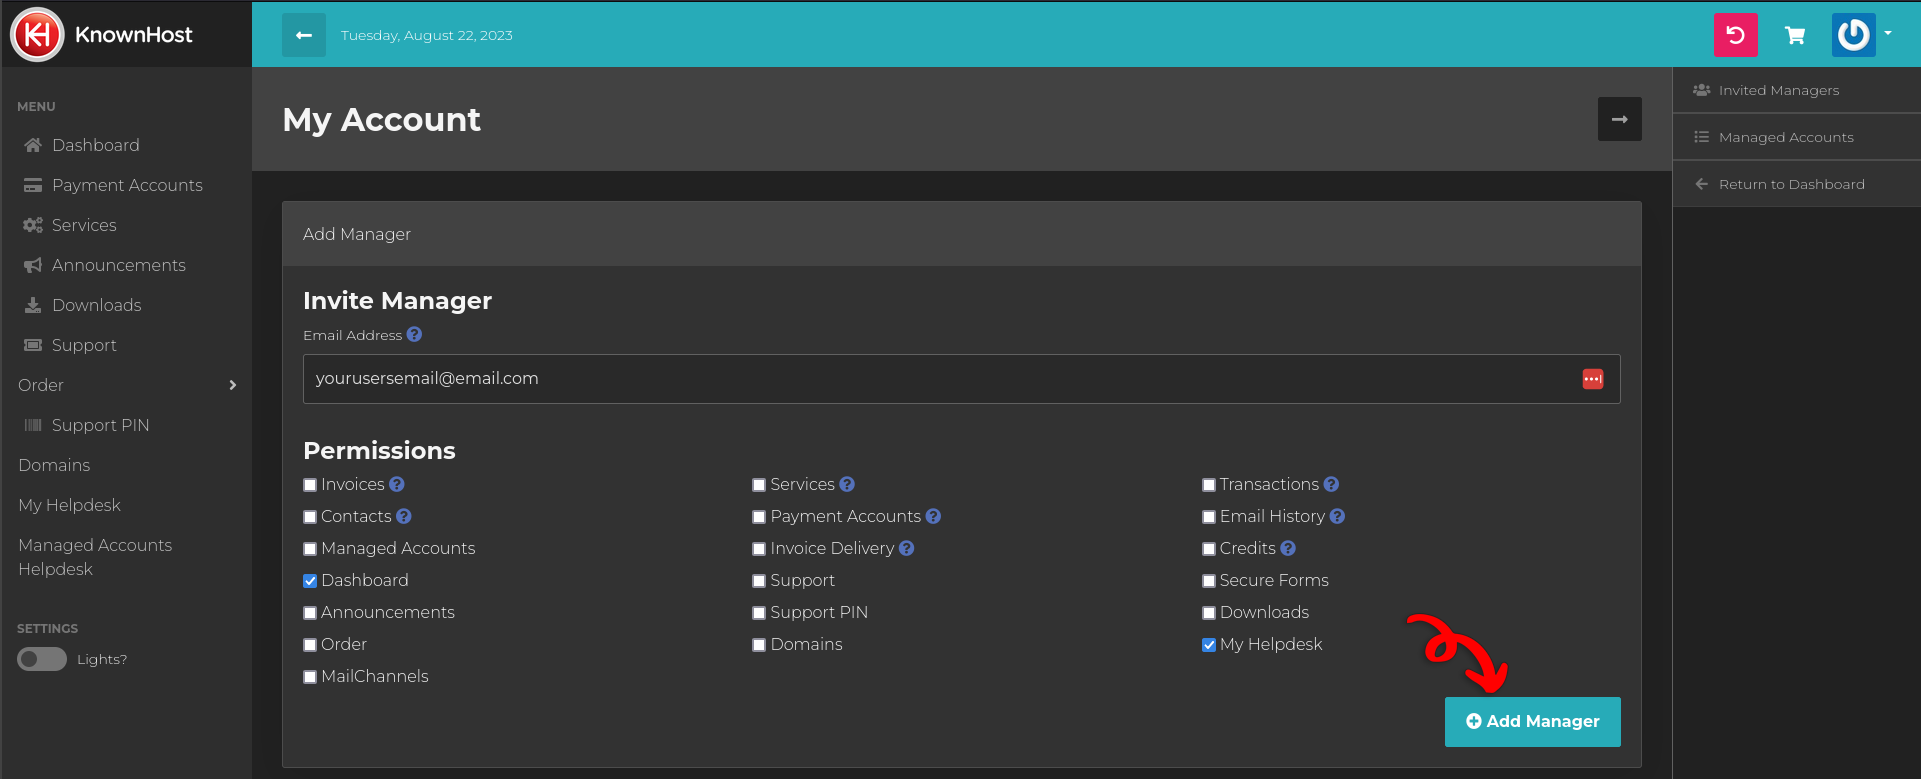
Enter the email of the user you want to invite, once you invite them and select your permissions (here we chose Dashboard and Helpdesk) they’ll receive an email with an link to accept the invite and then use their own My KnownHost account to login.
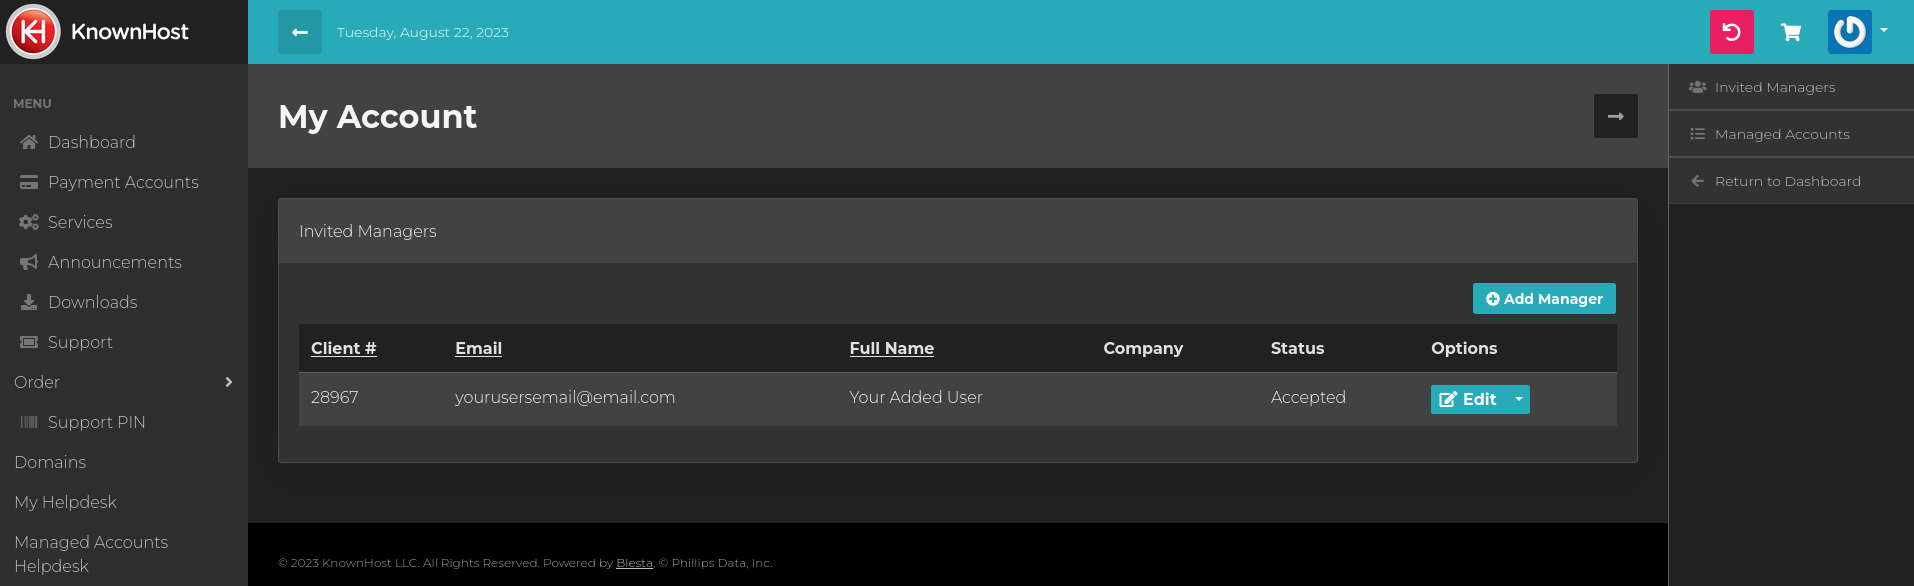
Now that they’ve been invited, they’ll show up in your Managed Users dashboard likely with the ‘accepted’ if they clicked and created their own account. They’ll be able to manage your dashboard and helpdesk tickets from their own login. Seeing your tickets as well as tickets they create.
Removing Managers
If you need to remove a user, it’s just as simple as revoking their access; click the “Edit” button under ‘Options’. It’ll drop down with “Revoke”. Once clicked, that users access to your account will be disabled and they’ll no longer be able to manage any aspects of your account.
Explaining Permissions
It should be taken with great care on what sort of permissions are given to your Guest Users when it comes to letting them manage/access your account related information as enabling too many permissions can give them a lot of access.
We’ll go over what each permission is and what it means when it’s added to your user and what it allows them to do.
Invoices: Display Invoices on the dashboard, as well as any payment reminder alerts. This allows the managed user to view any of your invoices.
Contacts: This allows them to add/remove contacts on your account, giving access to others.
Dashboard: This lets them see your dashboard and overall information, if other options such as services, invoices and domains are enabled — they’d see it here.
Announcements: Allows KnownHost related information to be seen at the top of the dashboard.
Order: Allows them to place orders through your account.
MailChannels: If you have an active MailChannels service, they’ll be able to manage it.
Services: Display Services on the dashboard, and allow them to be managed.
Payment Accounts: Allow Payment Accounts to be managed.
Invoice Delivery: Allow the invoice delivery method to be viewed and changed.
Secure Forms: Forms used for submitting information such as identity verification or credentials for service access.
Downloads: Area for accessing software downloads such as WHMCS.
Helpdesk: Support helpdesk access.
Transactions: Allows the viewing of invoice transactions.
Email History: Displays the listing of emails sent to the account.
Credits: Displays the amount of in-house credits on the account.
Domains: Shows the domains on the account
Managed Accounts: Gives access to the managed accounts section
Support PIN: Provides the PIN for verification purposes.