How to enable maintenance mode in Managed WP
Last Updated: October 7, 2021
Every now and then you need to take your website down for back-end updates, changes, or other various reasons that require the website to be temporarily disabled.
With the WordPress toolset provided in our Managed Hosting for WordPress — you can easily enable “maintenance” mode to place your website in a temporarily disabled state to prevent your users from viewing your website during such actions.
To enable it — simply click the toggle switch where ‘Maintenance’ is:
This will change the display of your website that gets captured to help indicate that maintenance mode is enabled.

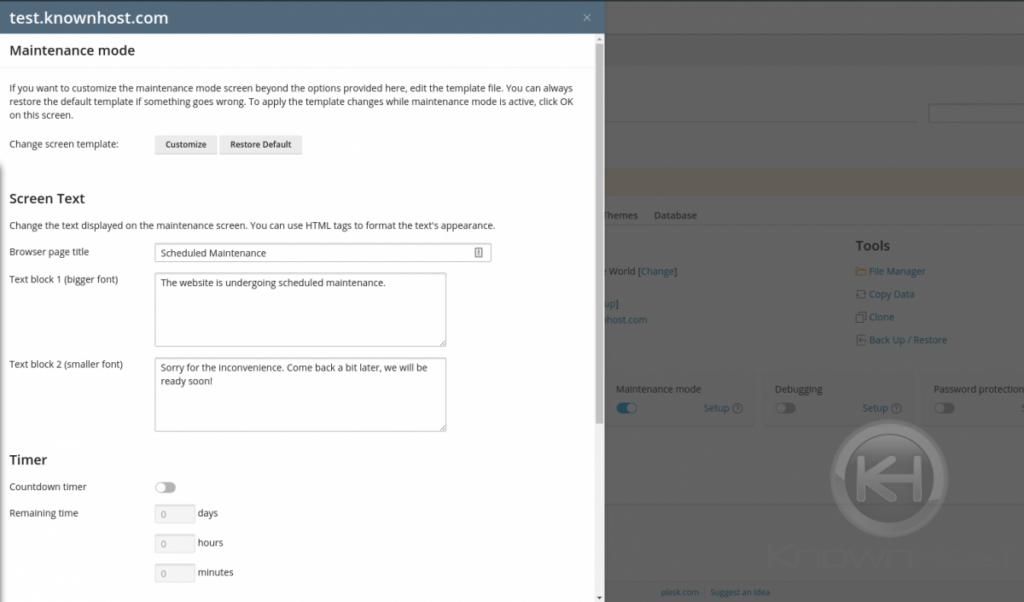
Should you require any specific configuring, the WordPress toolset allows for specific configuring of the maintenance settings. These configurations allow you to control what is displayed for your maintenance page and provide other alternatives to reach you.
Configurations such as:
- * Changing screen template (image)
- * Page title
- * Text block for initial maintenance message
- * Text block for reason for maintenance
- * Timer to control how long it shows up
- * Social Network control for facebook, twitter or instagram links.
These options are shown after clicking the “Setup” link near the “Maintenance” toggle.
You’ll be provided with a window that provides information and further detail regarding the aforementioned options.
With this easy-to-use interface, enabling maintenance for WordPress troubleshooting has never been easier, no plugins necessary.