How to install Imunify360?
Last Updated: September 12, 2022
After the great success of the CloudLinux OS, which is now being considered the #1 operating system for the shared hosting environment, the CloudLinux team introduced Imunify360 – The all in one security solution for shared server.
Licensing
Licensing for the Imunify360 is pretty straightforward, and it is based on a number of accounts hosted on the server.
| No. Of Accounts | Price |
|---|---|
| Single Account | $12/mo |
| Upto 30 Accounts | $25/mo |
| Upto 250 Accounts | $35/mo |
| Unlimited Accounts | $45/mo |
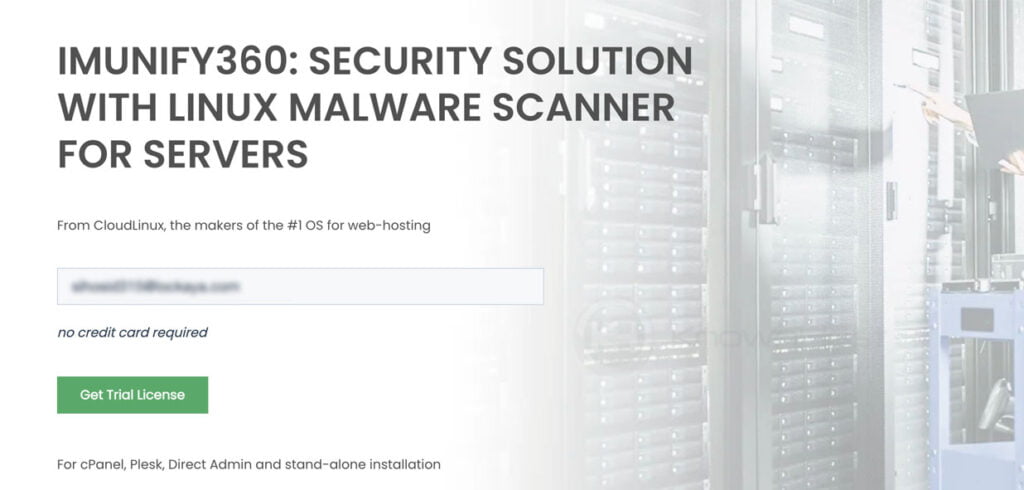
Just like CloudLinux, Imunify360 also offers a trial period of 14 days. Follow the below steps to register and receive a trial license,
Visit: www.imunify360.com/imunify360/ and enter your email address,
Installation
Supported operating systems:
- CentOS 6, 7 & 8.
- CloudLinux OS 6, 7 & 8.
- Ubuntu 16.04, 18.04 & 20.04.
- OpenVZ/Virtuozzo 7.
- AlmaLinux 8.
OpenVZ/Virtuozzo 6 are not supported with Imunify360.
Supported control panels:
- cPanel/WHM.
- Plesk.
- DirectAdmin.
- CyberPanel.
Hardware requirements:
- x64.
- Min. 512 MB RAM.
- Min. 20GB Disk Space.
Panel based installation (cPanel, DirectAdmin, Plesk)
For Key based installation run the following commands,
wget https://repo.imunify360.cloudlinux.com/defence360/i360deploy.sh
bash i360deploy.sh --key <license key here>
For IP based installation, run the following commands,
wget https://repo.imunify360.cloudlinux.com/defence360/i360deploy.sh
bash i360deploy.sh
Configuration
Installation should take 5-10 minutes, depending on the server’s performance and the network speed. Once the installation is completed, you can find the Imunify360 option in cPanel/WHM and DirectAdmin control panel,
cPanel/WHM: WHM → Plugins → Imunify360.
DirectAdmin: Admin → Extra Features → Imunify360.
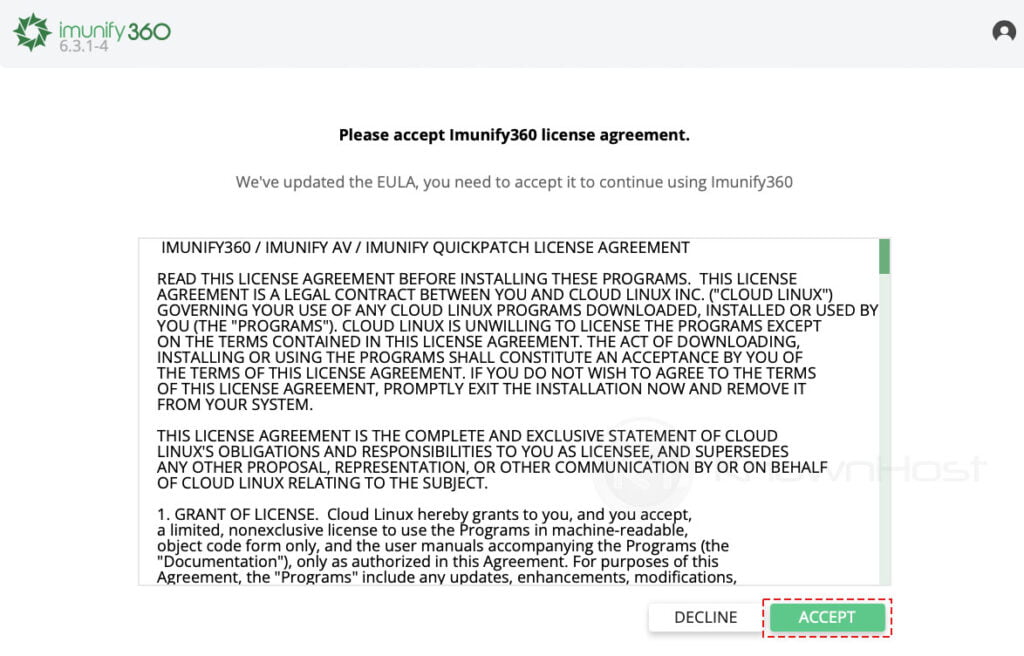
At the first time, you need to agree the TOS → Click on ACCEPT.
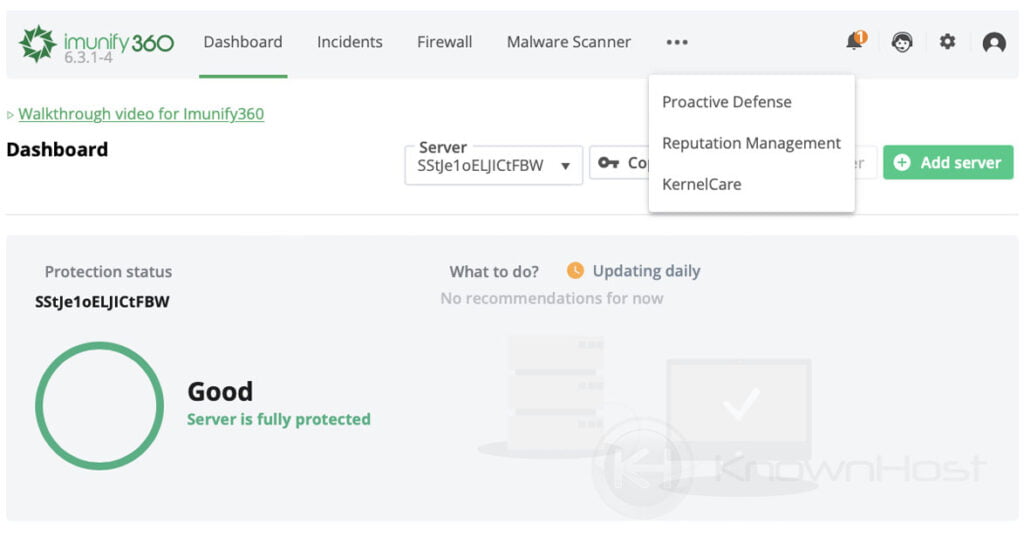
First thing first, let’s get learn more about the tabs,
Dashboard: This is the centralized tab with a summary of all the information about Imunify360 incidents, malware scans, attacks, etc.
Firewall: Imunify360 has its firewall, and it’s capable of handling all the blacklisting/whitelisting of IPs and Ports.
Incidents: As its name states, these tabs will help you track all of the real-time incidents occurring on the server. Such as failed logins, flagged IPs, etc.
Malware Scanner: Using a malware scanner, you can view the infected files per account and start the malware scanning for a particular destination.
Proactive Defense: This is something new that CloudLinux introduces. The proactive defence will help you prevent PHP attacks, and you can configure using this tab.
Reputation Management: Using the google algorithm, this tab will help you catch the domains affected for social engineering, spoofing, etc.
Firewall
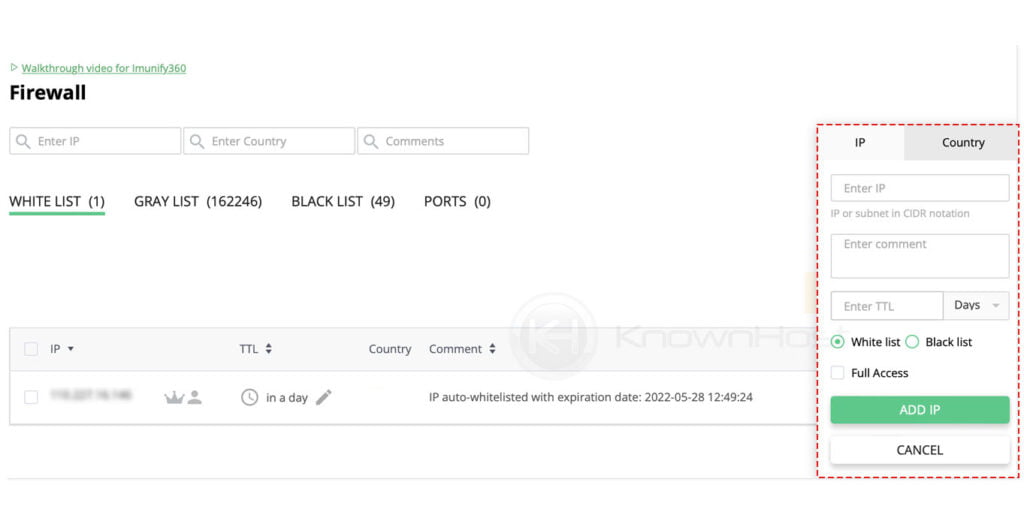
Once you navigate to the Firewall tab, you have a list of all the White Listed, Black Listed and Grey Listed IP addresses.
To White List a perticular IP or a range of IPs → Navigate to WHITE LIST → Click on ADD.
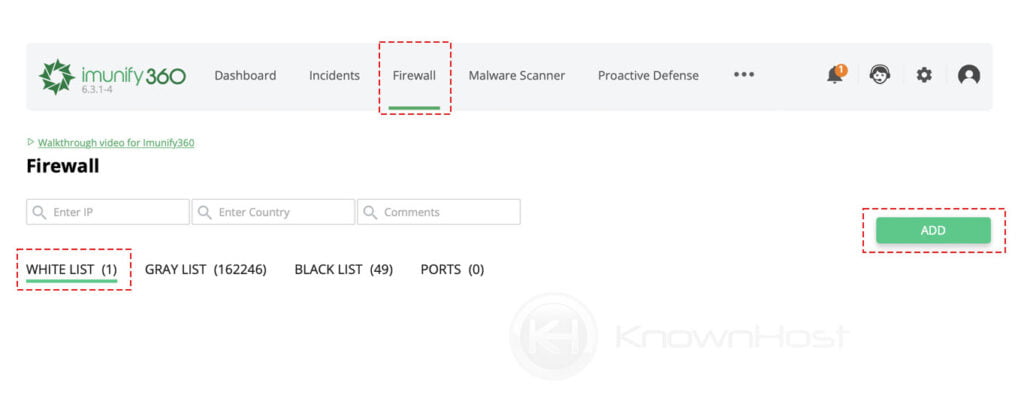
Next, enter the IP details (IP Address in CIDR format, Select White List or Black List, To grant full access-select the Full Access) → Click on ADD IP.
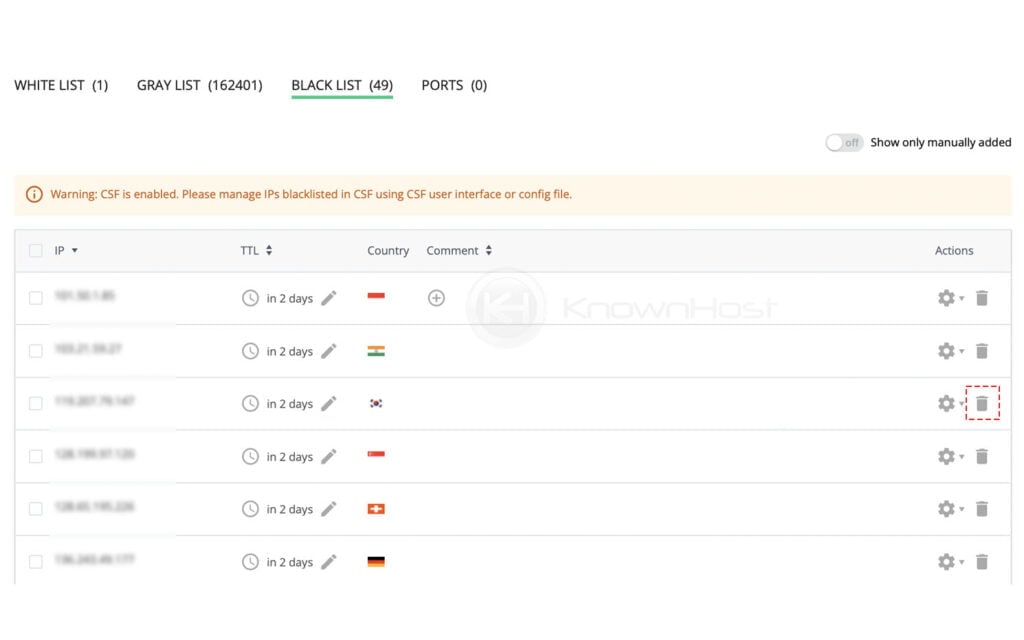
To remove IP from the black list, navigate to BLACK LIST → Find the IP → Click on Trash Icon. Using the same procedure you remove the IP which got flagged Grey listed by navigating to the GREY LIST.
Malware Scanner
Here you have a multiple tabs,
USERS: This contains the list of users and the count of the number of infected files under each account.
MALICIOUS: The tabs have a list of infected files with a path irrespective of the user.
History: It does contain the history of scanning automated or a demanded one.
IGNORE LIST: You can configure the paths of directories/folders to ignore it from scanning done by Imunify360.
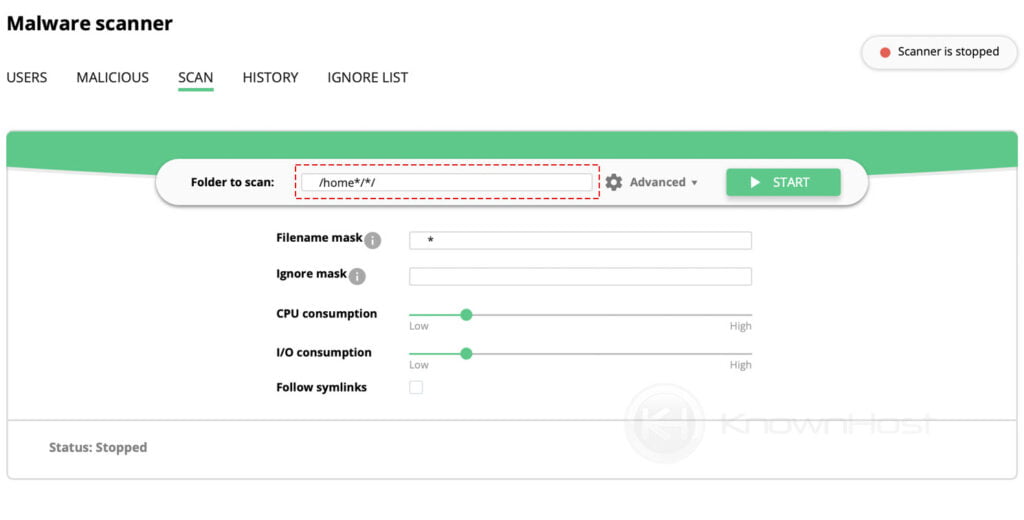
SCAN: Using this option, you can initiate a scan for a file/directory/folder. Follow the below steps to understand how you can initiate a custom malware scanning for the folder/directory using Imunify360.
Enter the folder/directory path → Click on START to initiate a scan. Advanced options enable you to configure the additional settings such as Filename mask, Ignore mask, CPU/IO consumption while performing the scan,
Proactive Defense
Specially disgned this feature to kill the PHP attacks. By default, Kill Mode is enabled which will elminate every process which is possible PHP attack.
You have following modes you can configure with Proactive Defense,
Log only: Only events logging.
Kill Mode: Terminate the script as soon as attack is detected. Guarantees the highest level of protection.
Disabled: To turn off Proactive Defense.

Settings
Using this interface, you can configure the settings of Imunify360. Here, you have various sub-options GENERAL, MALWARE, BACKUPS, DISABLED RULES, FEATURE MANAGEMENT, & NOTIFICATIONS. Let’s explore each one of them individually,
GENERAL
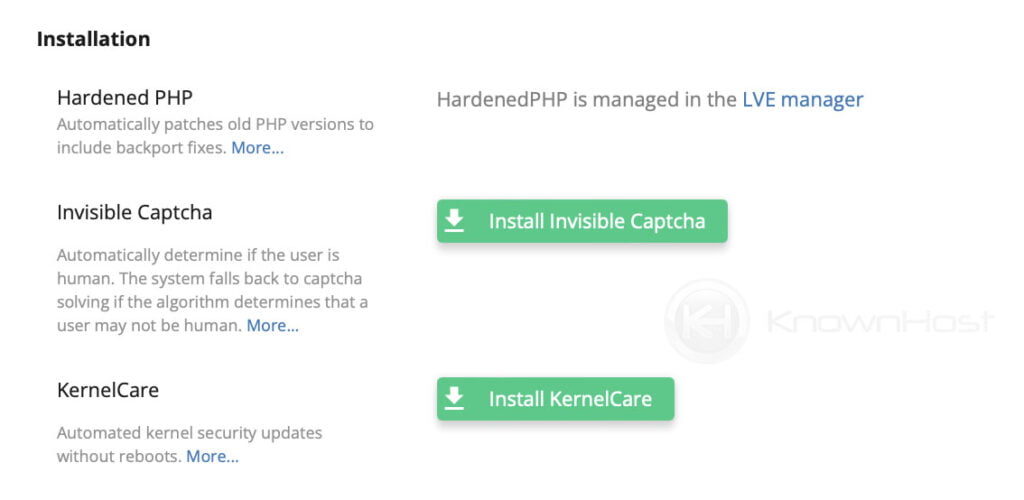
Installation
Invisible Captcha: Automatically determine if the user is human. The system falls back to captcha solving if the algorithm determines that a user may not be human.
Kernelcare: KernelCare is the product of CloudLinux and that you can install by simply clicking on the Install KernelCare option.
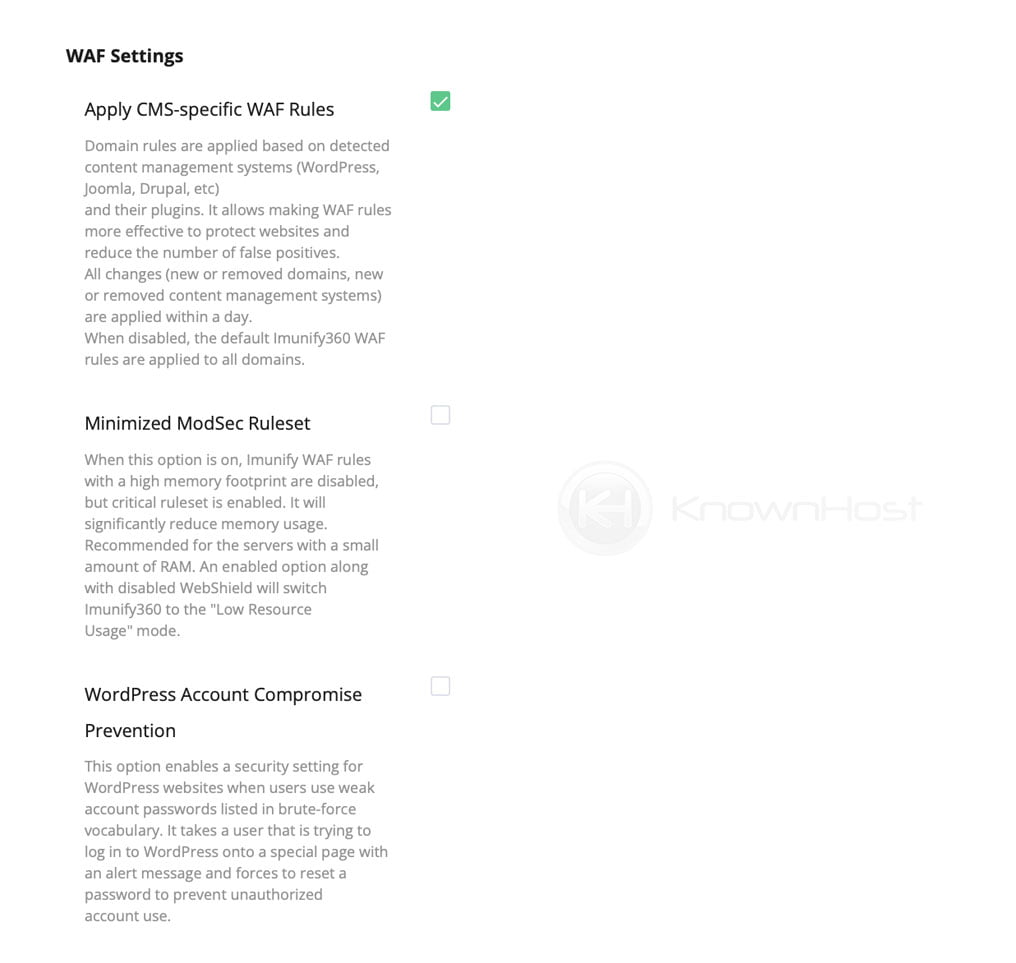
WAF Settings
Apply CMS-specific WAF Rules: Domain rules are applied based on detected content management systems (WordPress, Joomla, Drupal, etc) and their plugins. It allows making WAF rules more effective to protect websites and reduce the number of false positives. All changes (new or removed domains, new or removed content management systems) are applied within a day. When disabled, the default Imunify360 WAF rules are applied to all domains.
Minimized ModSec Ruleset: When this option is on, Imunify WAF rules with a high memory footprint are disabled, but critical ruleset is enabled. It will significantly reduce memory usage. Recommended for the servers with a small amount of RAM. An enabled option along with disabled WebShield will switch Imunify360 to the “Low Resource Usage” mode.
WordPress Account Compromise Prevention: This option enables a security setting for WordPress websites when users use weak account passwords listed in brute-force vocabulary. It takes a user that is trying to log in to WordPress onto a special page with an alert message and forces to reset a password to prevent unauthorized account use.
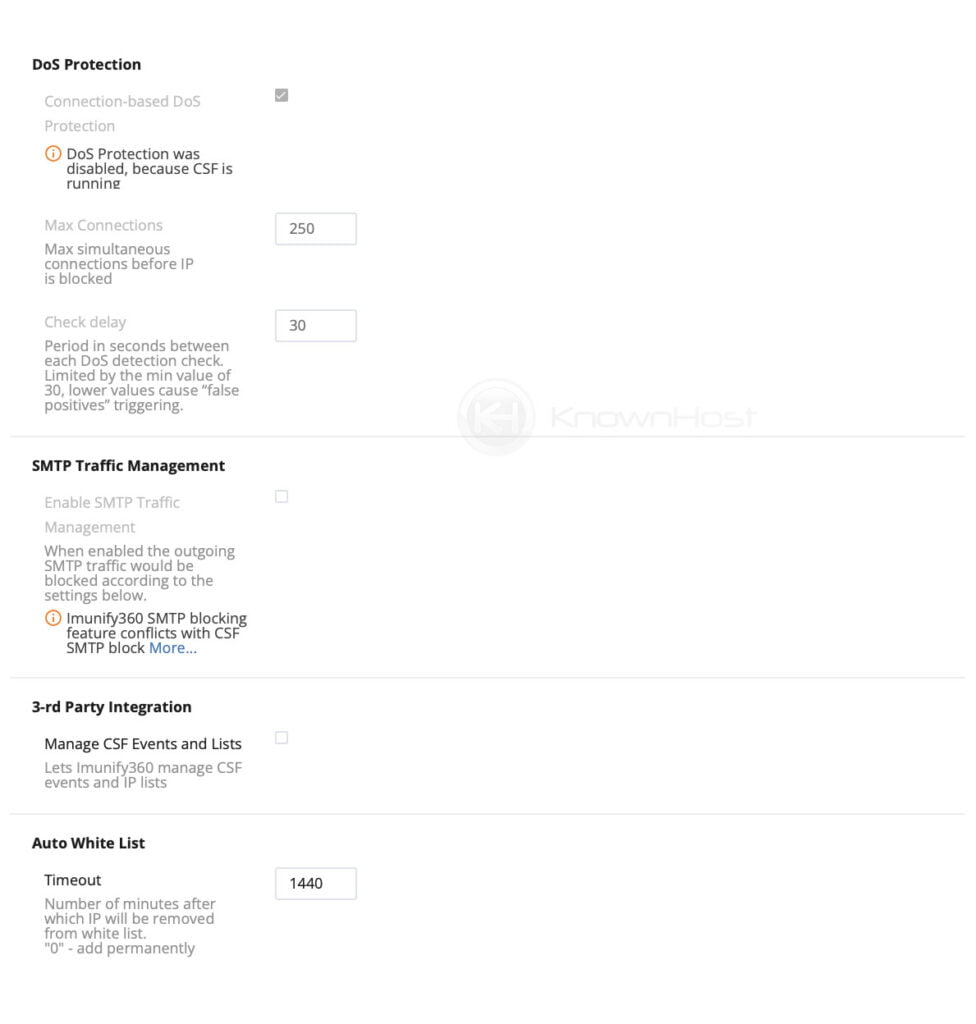
DoS Protection
Max Connections: Max simultaneous connections before IP is blocked.
Check delay: Period in seconds between each DoS detection check. Limited by the min value of 30, lower values cause “false positives” triggering.
SMTP Traffic Management
Enable SMTP Traffic Management: When enabled the outgoing SMTP traffic would be blocked according to the settings below.
3-rd Party Integration
Manage CSF Events and Lists: Lets Imunify360 manage CSF events and IP lists.
Auto White List
Timeout: Number of minutes after which IP will be removed from white list.
Moreover, you can over the Incident logging, Webshield, Ossec, PAM (Bruteforce attack protection), Error Reporting and contact details using the same interface.
MALWARE
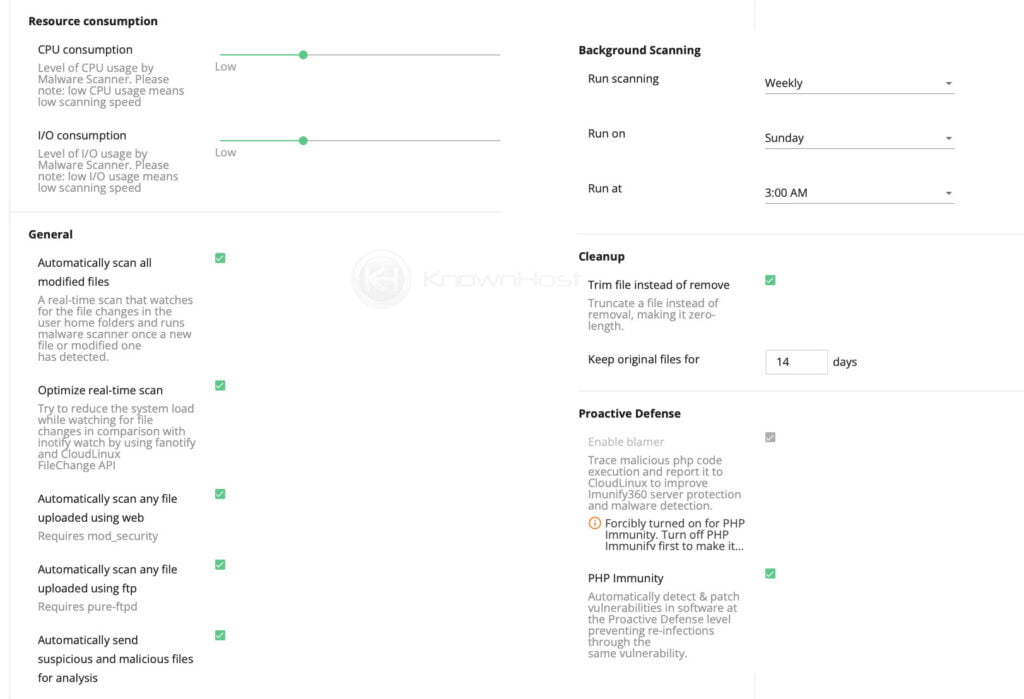
Resource consumption
CPU consumption: Level of CPU usage by Malware Scanner. Please note: low CPU usage means low scanning speed.
I/O consumption: Level of I/O usage by Malware Scanner. Please note: low I/O usage means low scanning speed.
General
Automatically scan all modified files: A real-time scan that watches for the file changes in the user home folders and runs malware scanner once a new file or modified one has detected.
Optimize real-time scan: Try to reduce the system load while watching for file changes in comparison with inotify watch by using fanotify and CloudLinux FileChange API.
Using the same interface you can configure the Background Scanning, Cleanup, Proactive defense.
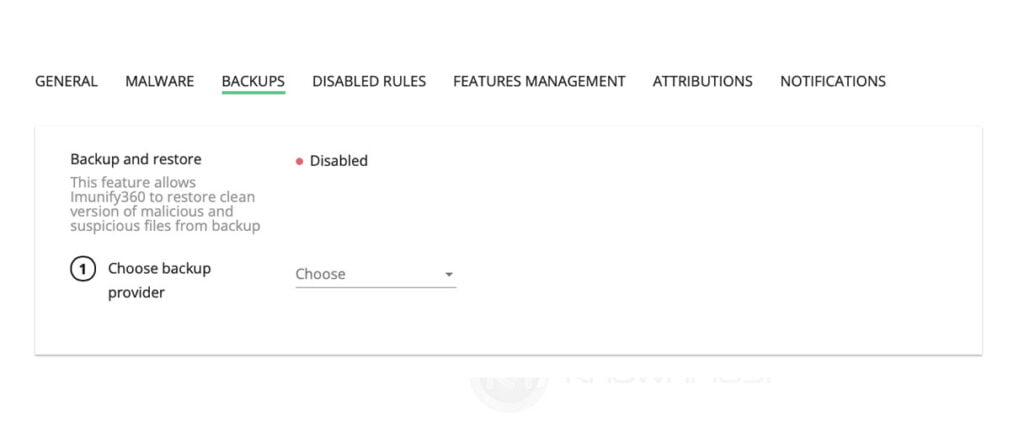
BACKUP
Using this interface, you can configure the backup destination. If the files are infected, it will try to recover the clean (unaffected) files from the backup.
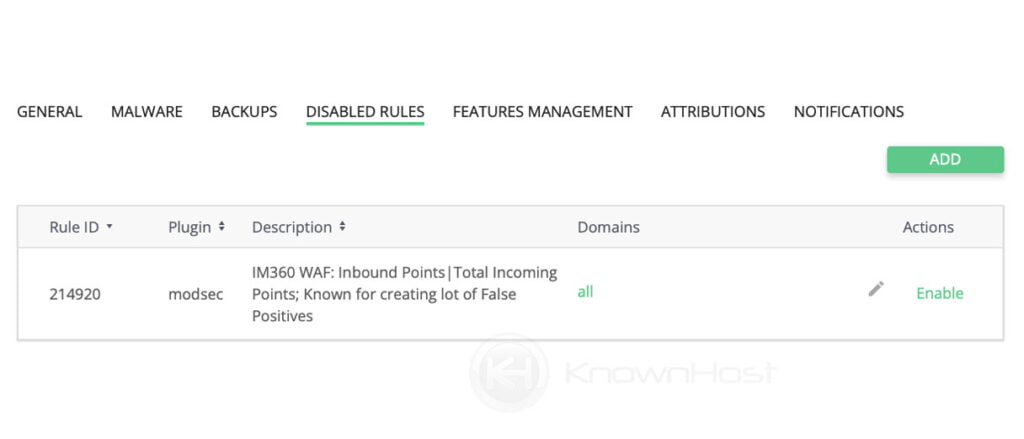
DISABLED RULES
Using this interface, you can add the WAF rules for the Imunify360 to disable. You can add the new rules using ADD option.
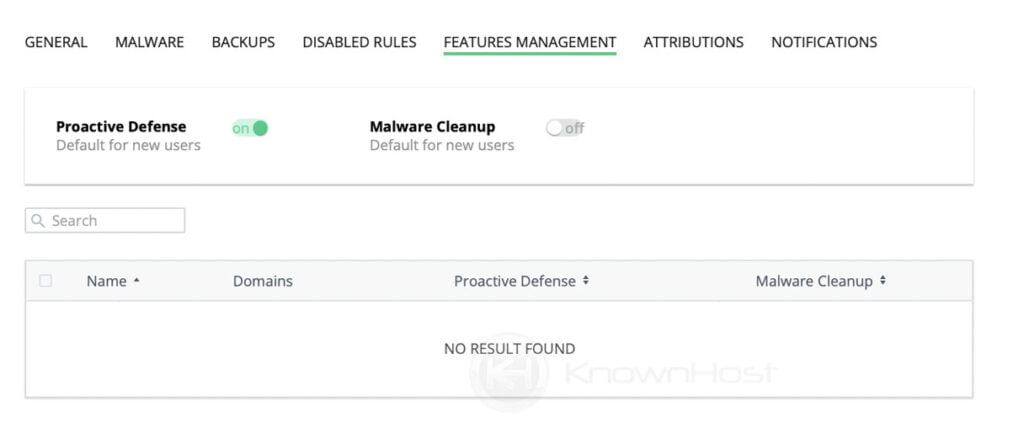
FEATURE MANAGEMENT
This interface enabled you two options to enable/disable Proactive Defense and Malware Cleanup; that you can control with the toggle option.
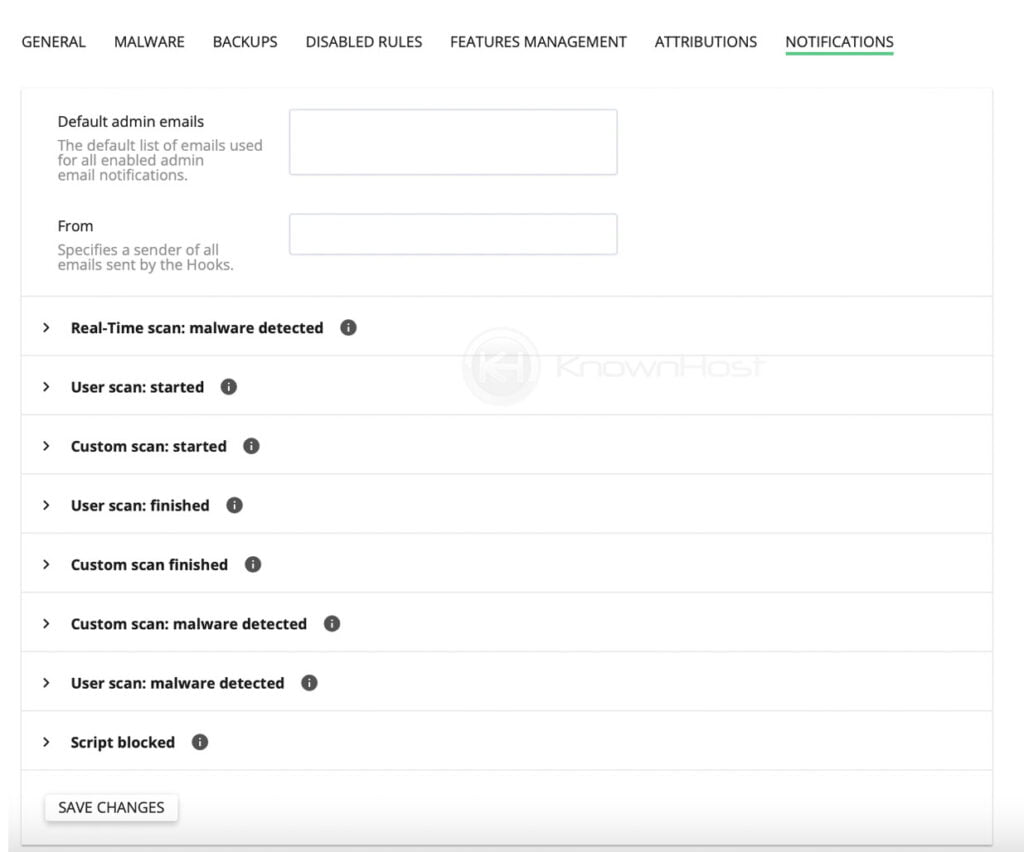
NOTIFICATION
Everytime if something happens server administrators needs to be get updated and the user level notifications needs to be get delivered to the end user’s registered email address. These all notification related configurations you can do from this interface.
Conclusion
Imunify360 is an all-in-one solution for your Linux server, which will handle firewall and malware attacks. In this article, we have explained the installation and configuration of Imunify360.
KnownHost offers 365 days a year, 24 hours a day, all 7 days of the week best in class technical support. A dedicated team is ready to help you should you need our assistance. Are you not using KnownHost for the best Webhosting experience? Well, why not? Check with our Sales team to see what can KnownHost do for you to improve your web hosting experience.