How to change MX Records in DirectAdmin?
Last Updated: January 21, 2022
In the DNS, we have many types of records available, and each record serves the different purpose. MX Record, also known as Mail Exchanger DNS records, are responsible for receiving incoming emails on the email server/hosting server. Do you want to configure the custom MX records? Let’s see, How to change MX Records in DirectAdmin?
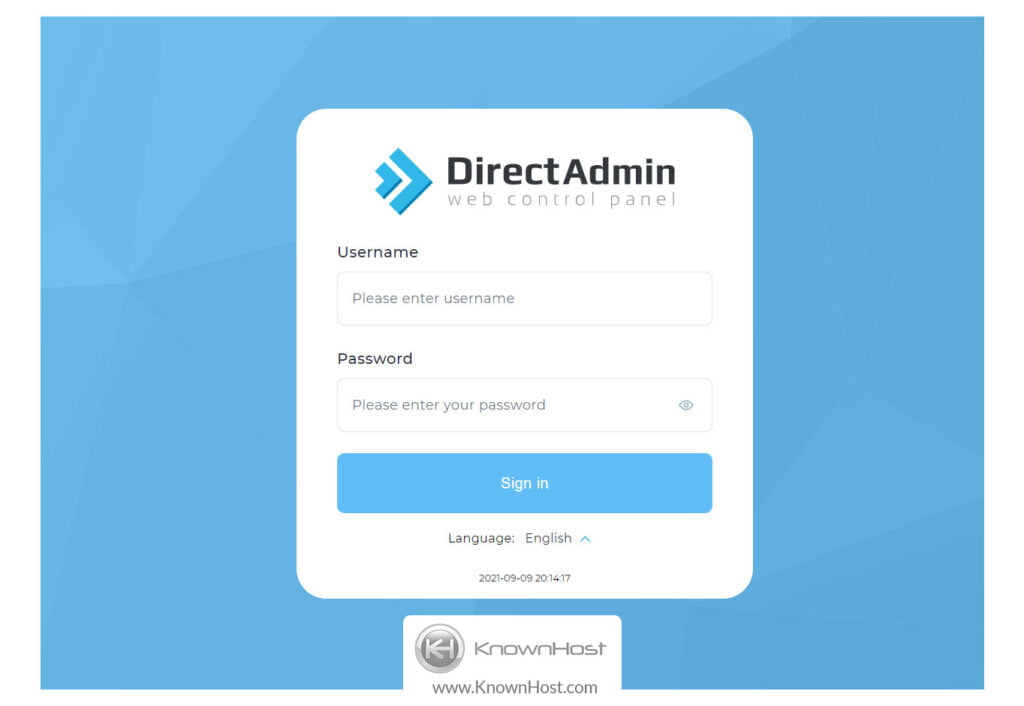
1. First, to login into DirectAdmin control panel visit,
https://your-domain.com:2222 or https://IP-address:2222 or https://server-hostname:2222.
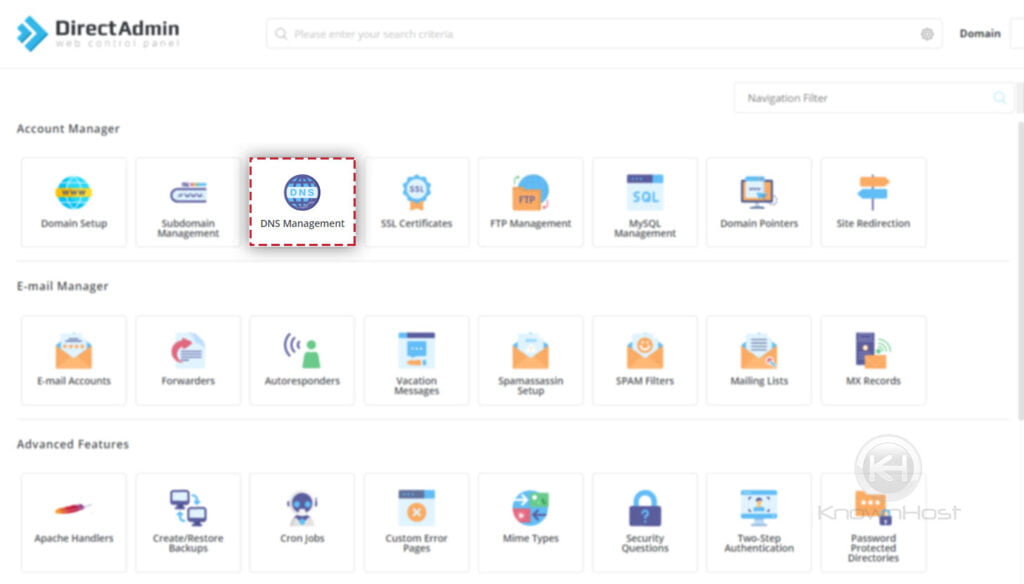
2. Navigate to Account Manager → DNS Management.
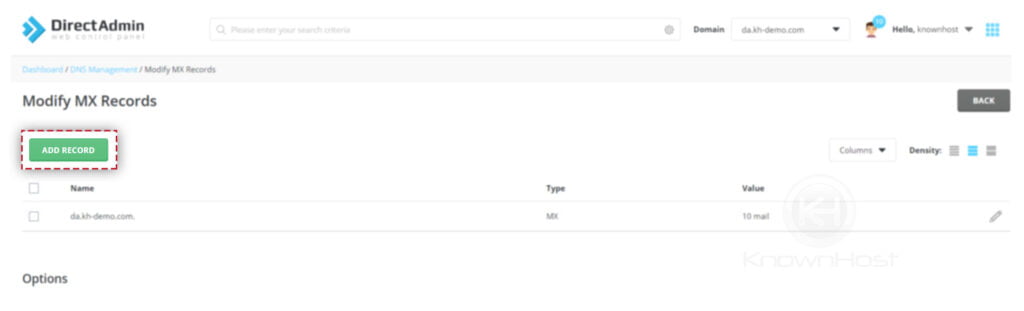
3. Now click on Modify MX Records.
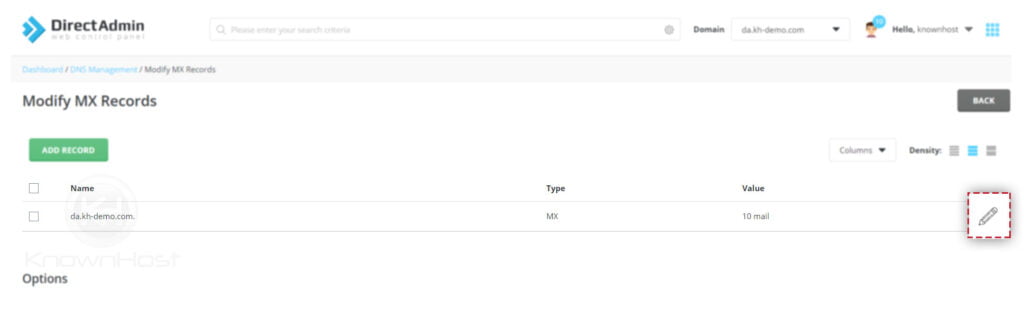
4. To modify existing MX Records → Click on “🖊️“.
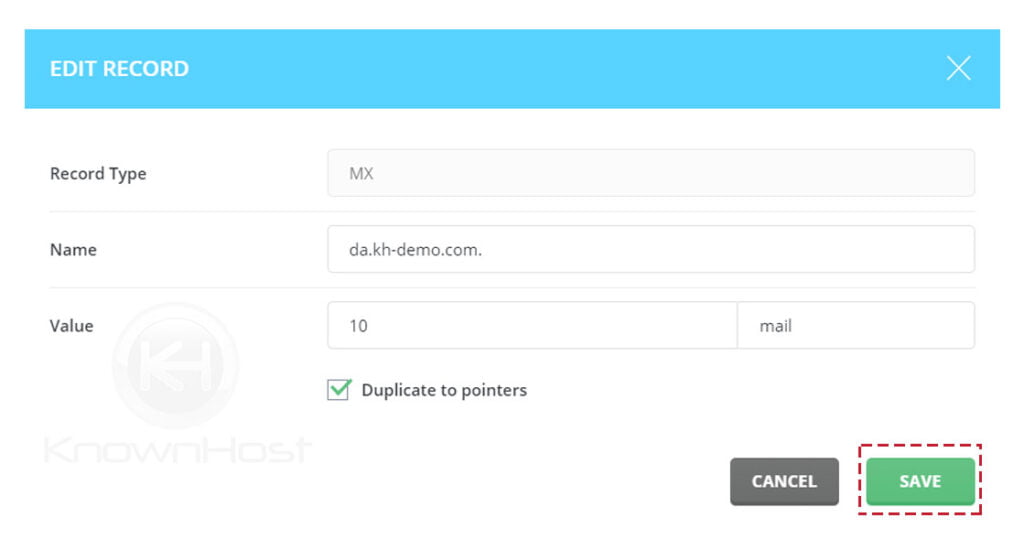
5. Make the required updates → Click on Save.
6. To add new MX Record → Click on ADD.
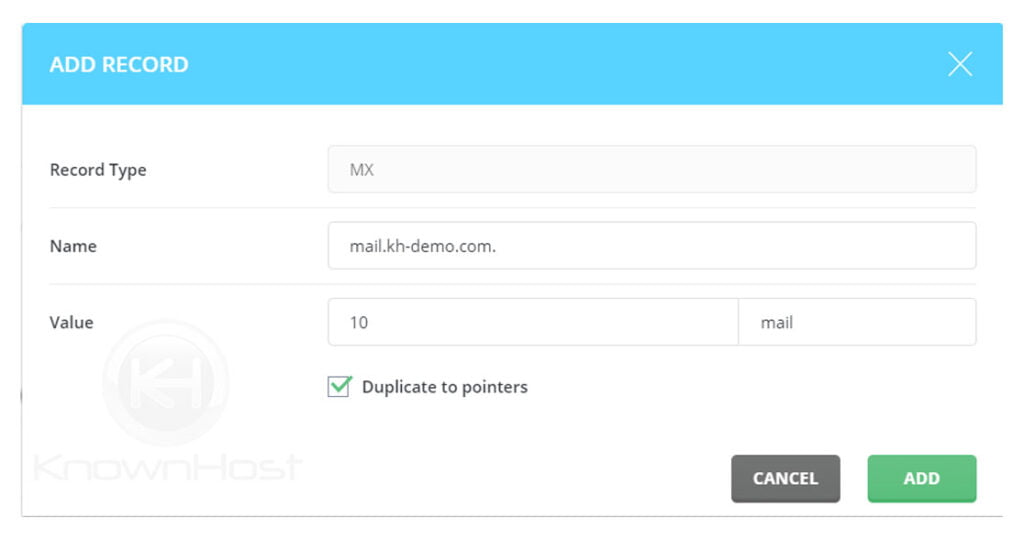
7. Enter the required details (Name, Value) → Click on ADD.
8. Congratulations! You have successfully added and modified MX records in DirectAdmin. If you would to add more MX records then, follow the same steps.
Conclusion
Now that we’ve gone over how to change MX Records in DirectAdmin. If you would like to use the third-party email service to receive the emails, you must add/update the MX records in DirectAdmin.
KnownHost offers 365 days a year, 24 hours a day, all 7 days of the week best in class technical support. A dedicated team ready to help you should you need our assistance. You’re not using KnownHost for the best webhosting experience? Well, why not? Check with our Sales team to see what can KnownHost do for you in improving your webhosting experience.