How to install an SSL Certificate on DirectAdmin
Last Updated: March 14, 2022
So, you’ve purchased an SSL Certificate and now you don’t know what to do? Don’t worry, we’re here to help! If you’ve purchased a standard DV certificate, an OV certificate or an EV Certificate, it doesn’t matter, no stress! We’ll help explain things to help make it easy for you to install your SSL certificate on DirectAdmin.
Whether it’s an automated SSL or a paid certificate within this guide we’ll be going over the steps needed so that you can learn how to install an SSL Certificate on DirectAdmin.
We hope this guide helps you with this relatively easy process.
Installing your DirectAdmin SSL Certificate
You’ll need to login to your DirectAdmin user through the DirectAdmin Panel – or if you’re the Administrator, you can drop in through the admin user.
Once at the user level, go to “Account Manager” and click “SSL Certificates”:
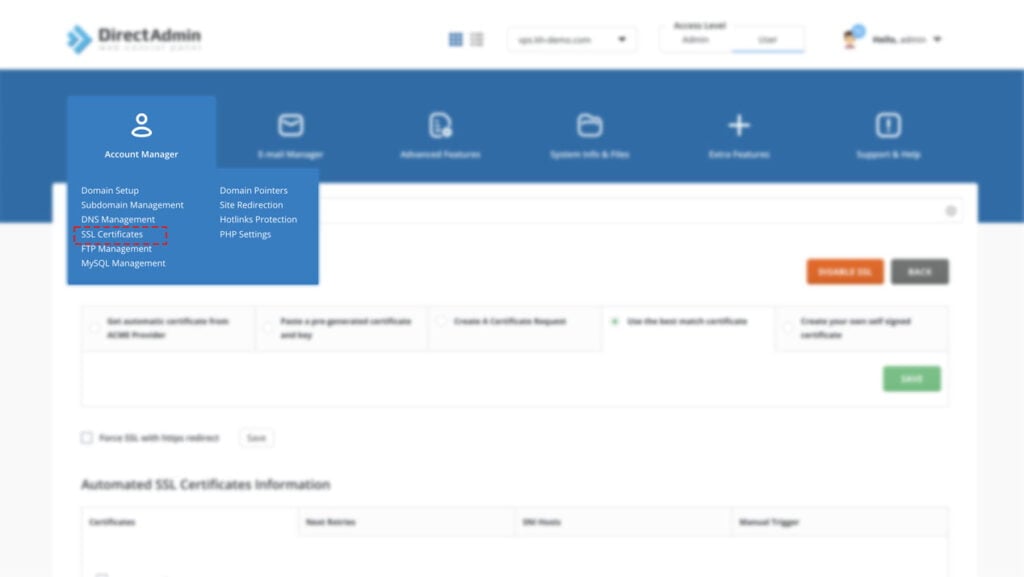
Once inside the SSL Certificate area, you’ll see many different choices:
- Let’s Encrypt
- Paste pre-generated
- Certificate Request
- Self Signed
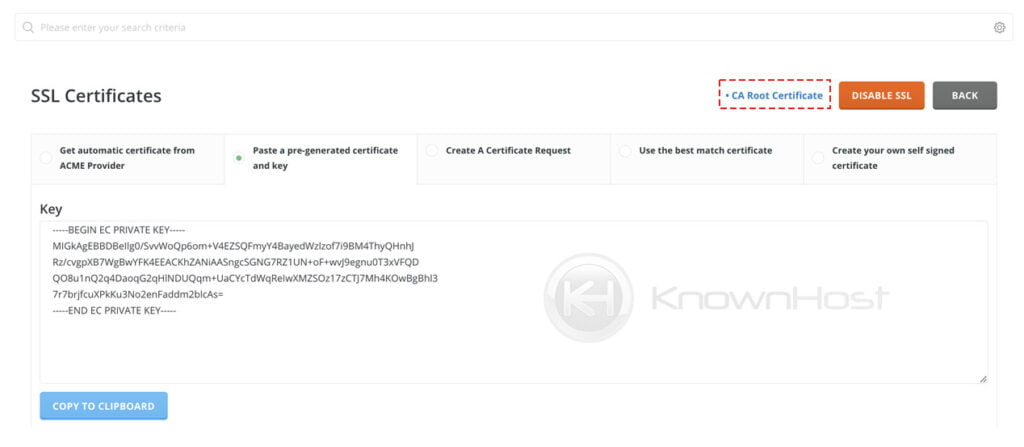
You’ll want to ensure that you have the “Paste pre-generated’ box checked as outlined in the following screenshot:
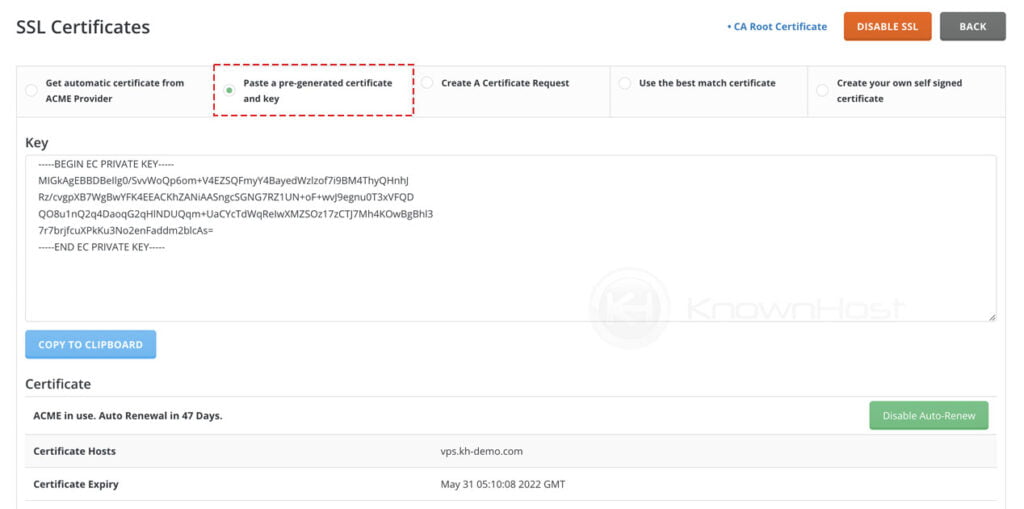
You’ll see two boxes in this window, the “Key” box and the “Certificate” Box.
The “key” box is for the Private RSA Key
The “certificate” box is for the actual certificate or .crt file
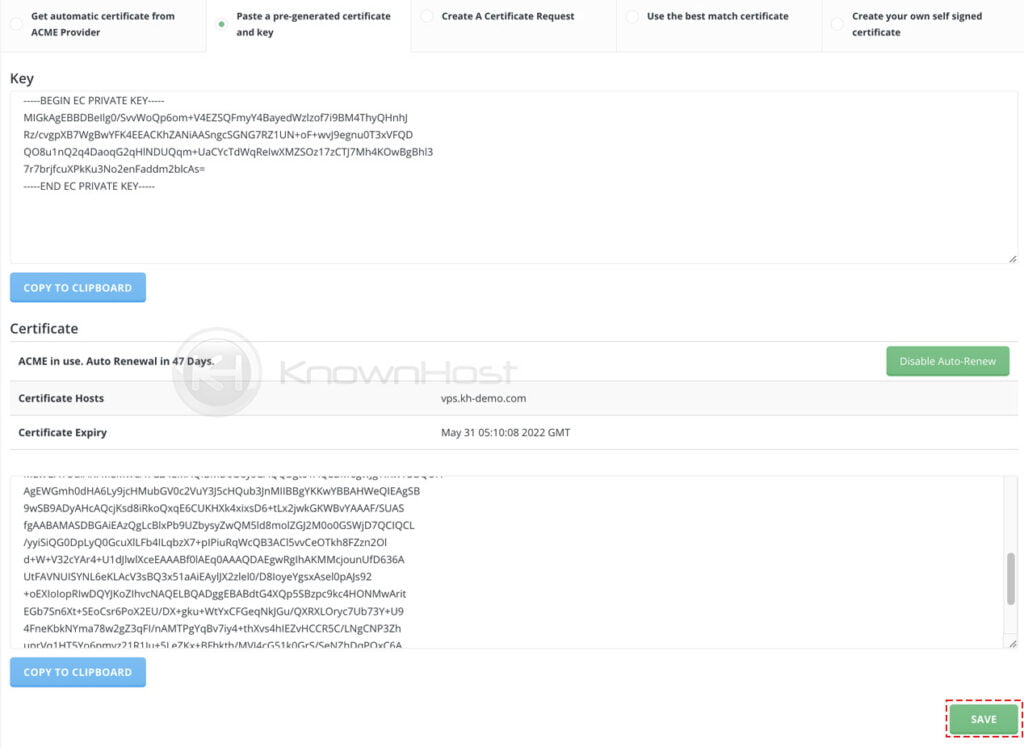
Please see this example:
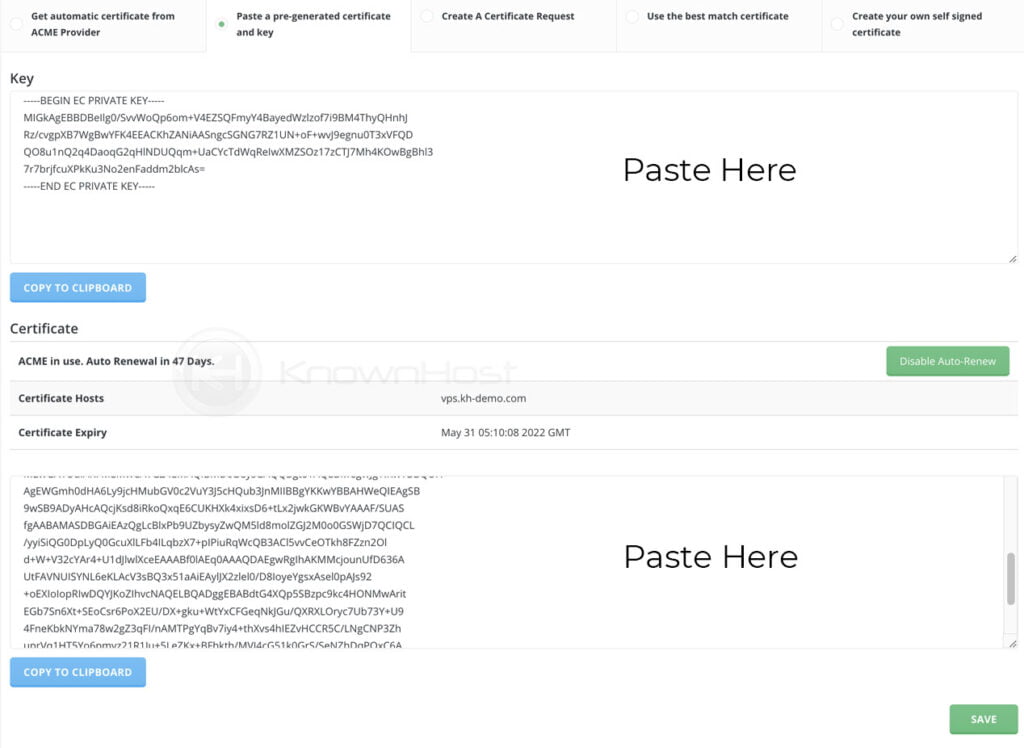
Once your certificate is entered, click “Save” for it to take effect.
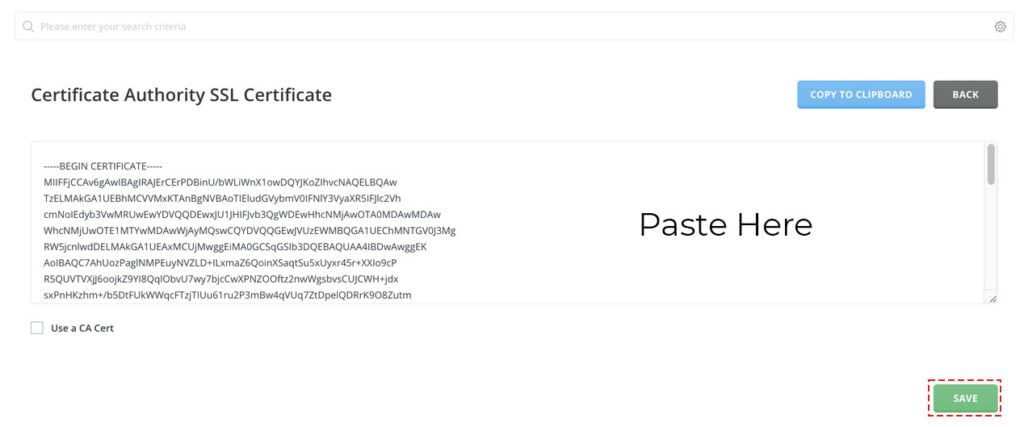
Setting DirectAdmin CA Root Certificate
To set the CA Root Certificate, you’ll want to click “CA Root Certificate” within the SSL Certificate area:
This will take you to the “CA Root Certificate” window to apply for the certificate.
You paste it and click “Save” – simple as that!
Your SSL certificate at this point should be installed properly.
Conclusion
An SSL Certificate helps encrypt the communication between browser and server during a users interaction. We hope that this helped you install the certificate you’ve purchased or if it’s helped you in some other manner.
KnownHost offers 365 days a year, 24 hours a day, all 7 days of the week best in class technical support. A dedicated team is ready to help you should you need our assistance. You’re not using KnownHost for the best web hosting experience? Well, why not? Check with our Sales team to see what can KnownHost do for you in improving your web hosting experience.