Installing an SSL Certificate
Last Updated: March 28, 2023
Before you can install your SSL certificate after purchase you need to generate a Certificate Signing Request (CSR) and send it to your SSL vendor. If you purchased your SSL from KnownHost the CSR can be entered at my KnownHost panel. If you purchased your SSL certificate somewhere else you’ll enter it on the website where you purchased the certificate.
These certificates can be installed via three methods. (Click to Expand)
All SSLs purchased through KnownHost come with a token. This token can be used for easy installation only on our shared hosting and reseller hosting packages.
Finding Your Token
You can get your token in one of two ways:
My KnownHost (https://my.knownhost.com)
When you login to my.knownhost.com click on the manage button for the SSL you want to get the token for. Click on Certificate Details on the left and you’ll be presented with the token.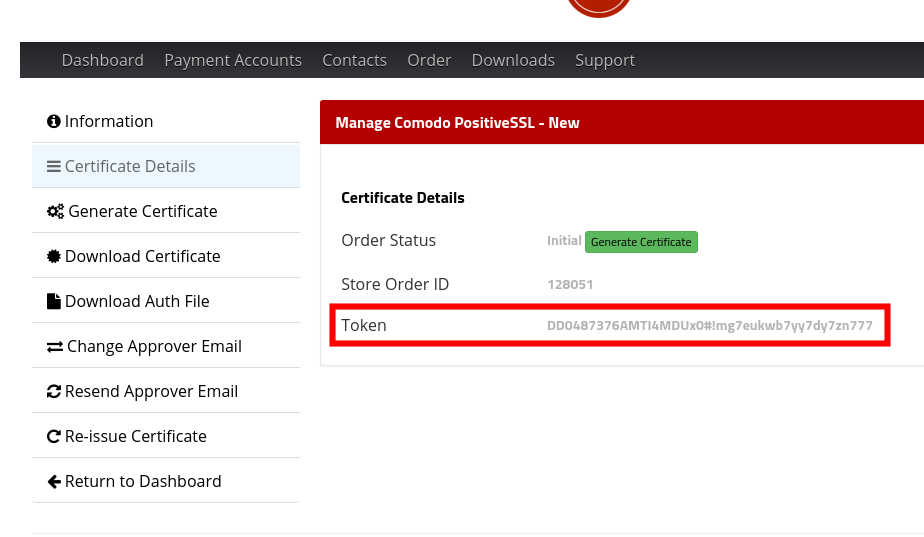
Email
The token is emailed to you when you purchase the SSL certificate. Within the email you’ll find a snippet similar to the following:
Token : DD0487376AMTI4MDUx0#!mg7eukwb7yy7dy7zn777
Using The Token
Tokens can be used within the cPanel interface by clicking on the AutoInstall SSL icon.
Enter your token here and click Verify Token.
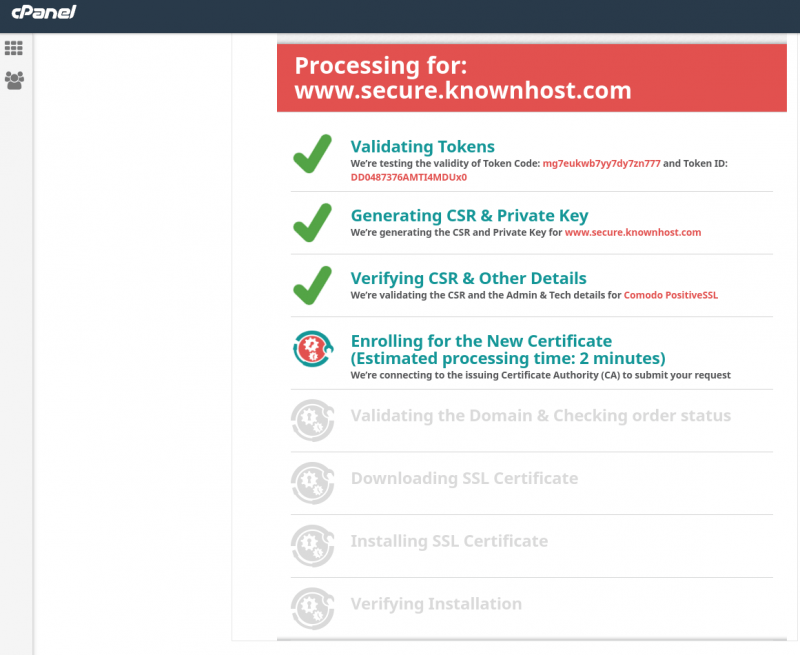
Once you enter your token here you’ll be guided through every step of the SSL setup process.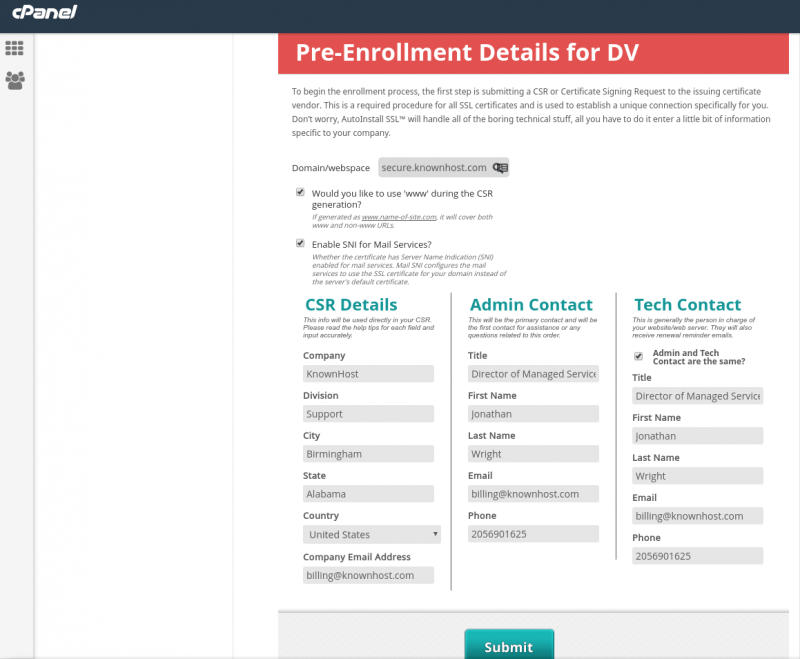
You’ll need to login to your DirectAdmin user through the DirectAdmin Panel – or if you’re the Administrator, you can drop in through the admin user. Once at the user level, go to “Account Manager” and click “SSL Certificates”: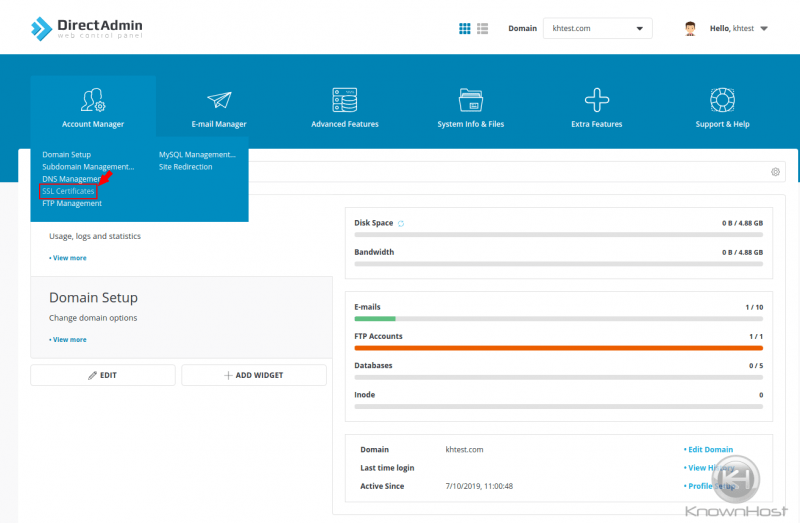
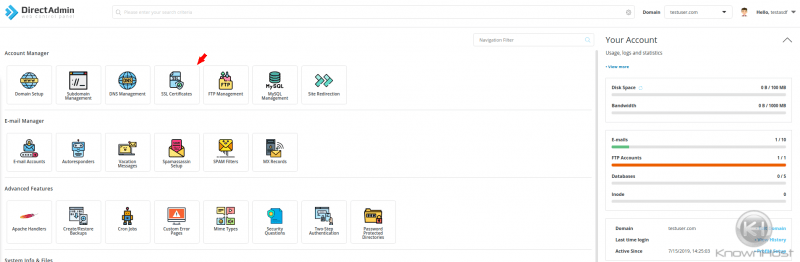
Once inside the SSL Certificate area, you’ll see many different choices:
* Let’s Encrypt
* Paste pre-generated
* Certificate Request
* Self Signed
You’ll want to ensure that you have “Paste pre-generated’ box checked as outlined in the following screenshot:
You’ll see two boxes in this window, the “Key” box and the “Certificate” Box.
The “key” box is for the Private RSA Key
The “certificate” box is for the actual certificate or .crt file
Please see this example:
Once your certificate is entered, click “Save” for it to take effect.
Setting CA Root Certificate
To set the CA Root Certificate, you’ll want to click “CA Root Certificate” within the SSL Certificate area:
This will take you to the “CA Root Certificate” window to apply the certificate.
You paste it and click “Save” – simple as that!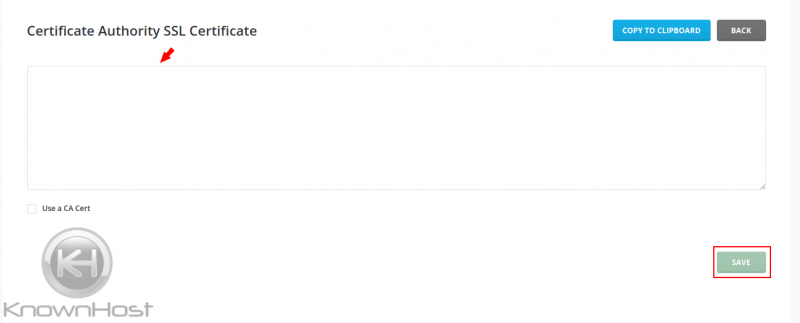
Your SSL certificate at this point should be installed properly.
This guide assumes that you have already generated the Certificate Signing Request (CSR) and the private key is already stored on the server. If the private key has not been added, you can do so in a below step. In cPanel, click on the icon labeled SSL/TLS.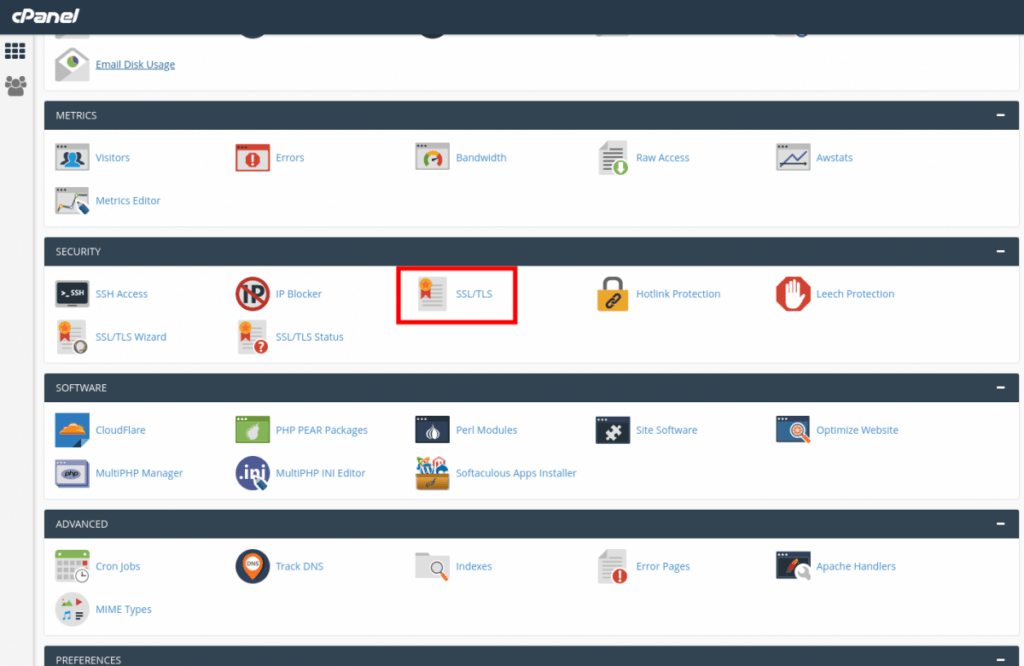
From this screen, click on the link Generate, view, upload, or delete SSL certificates under the “Certificates (CRT)” heading.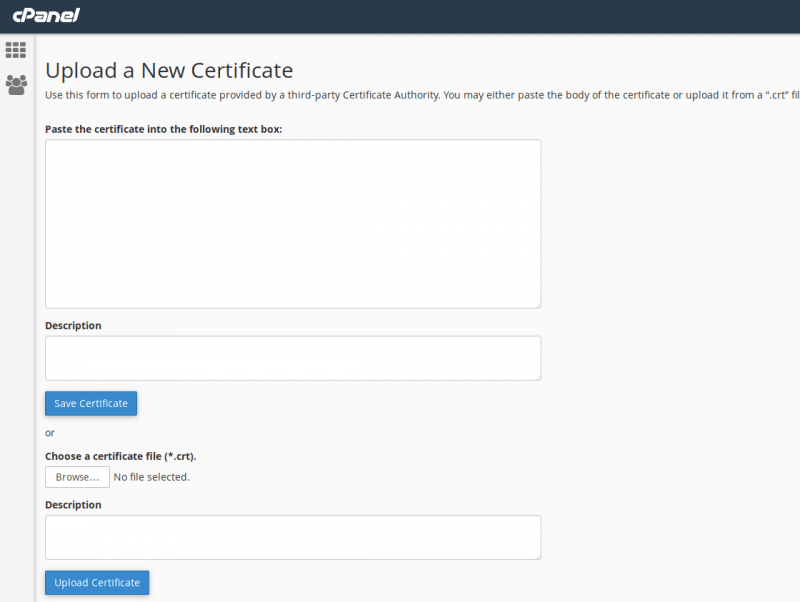
Saving the SSL Certificate
Copy & Paste Certificate
You can copy and paste the entire certificate (including the —–BEGIN CERTIFICATE—– and —–END CERTIFICATE—– lines: they are important) into the provided text box. If the certificate was pasted correctly, cPanel will show more information regarding the certificate like so:Domains: yourSSLdomain.tld Issuer: CoolSSLIssuer Key Size: 2,048 bits (c031337 …) Expiration: Feb 13, 2018 9:30:42 AM
You can enter a description with the provided box as well – entering a date and description can help you keep your certificates organized. Once the certificate has been entered (with an optional description) you can click on Save Certificate. If it was successful, you will get a message from cPanel saying the certificate has been saved.
Upload “.crt” Certificate File
If your certificate was provided in the .crt file format (you may need to extract this file from a zip archive) you can choose the Browse… button to select the file from your computer (or other device) and upload it to the server without having to copy and paste the information directly. Once you have selected the file (and entered an optional description) click on the Upload Certificate – if the certificate is in the right format, cPanel will automatically save the certificate for you.
Installing the Certificate
From the SSL/TLS screen in cPanel, click the link Manage SSL sites under the “Install and Manage SSL for your site (HTTPS)” heading.
Scroll down to the Install an SSL Website heading, and click the drop-down box under the section called Domain (with the text “Select a Domain”) and choose the domain that you wish to install an SSL certificate for.
If you installed the certificate according to the steps above (and the private key is already on the server after generating a CSR) you can click on the Browse Certificates button and select the certificate you just entered and click on Use Certificate – this will fill in the appropriate information for you. If you only have one domain or a single certificate uploaded, you can click on Autofill by Domain and cPanel will automatically select the appropriate certificate, private key, and certificate authority bundle (CA bundle).
If you did not previously upload the private key to the server, you can copy and paste it into the private key field now.
Verify that the information is correct – especially the Domains(s) and Expiration Date fields and click on the Install Certificate button below.
If the SSL certificate was installed correctly, cPanel will give you a confirmation message. Now that you are more familiar with how cPanel’s SSL Manager interface works, you can save some time when installing your next certificate by using the Manage SSL sites link directly.
Installing from WebHostManager / WHM
SSL certificates can also be installed as the from within WHM as well, though the interface can be somewhat less intuitive than installing via a cPanel account (but it is faster if you already have the certificate, private key, and CA bundle extracted and ready for installation – or if you’re just more comfortable with WHM.)
After a Certificate Signing Request (CSR) has been generated and you have received the certificate, you would navigate to WHM Home → SSL/TLS → Install an SSL Certificate on a Domain (you can type in ssl on WHM’s search bar for easy access):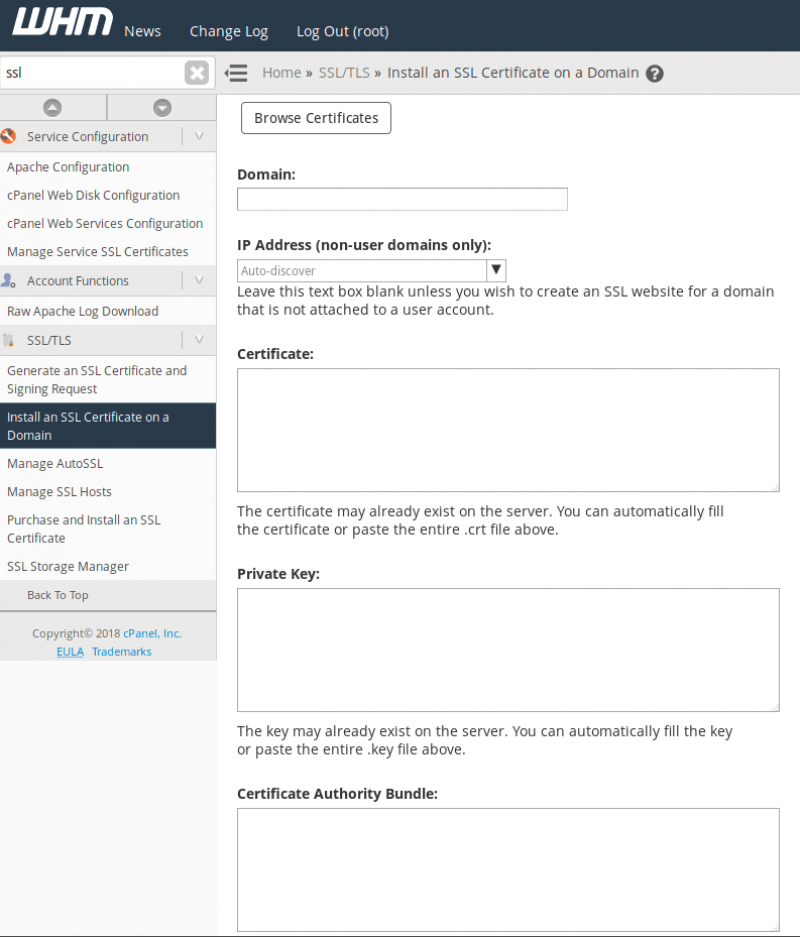
From here, you would type in the domain in the Domain field and copy and paste the certificate, private key and your CA bundle into their respective fields – you should leave the IP Address field blank (for auto-discover). The certificate can then be installed by clicking on the Install button at the bottom of the page.