How to set mail signatures for Horde & Roundcube
Last Updated: December 1, 2021
In this guide; we will be showing how to set Webmail signatures for the available webmail services for cPanel servers.
Signature for Horde
Here we are going to document the steps to set up a horde webmail signature for those who primarily use email over webmail.
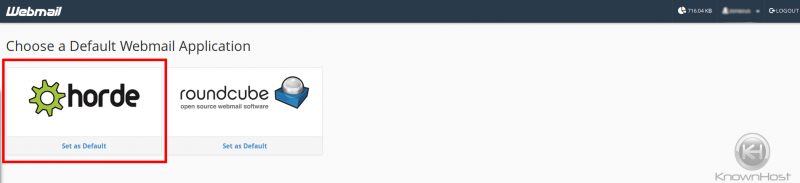
Step 1. Login to your Horde Webmail; if this is your default and it logs in anyway – skip to Step 2.
Click the Horde Webmail; highlighted.
(CLICK TO ENLARGE)
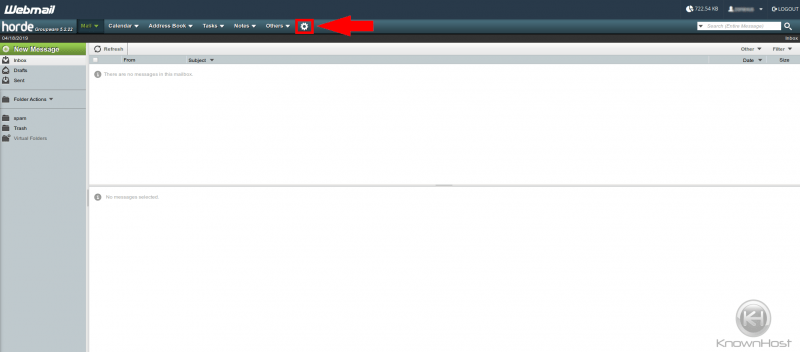
Step 2. Once logged in; move your mouse over the cog-wheel and a drop down should appear.
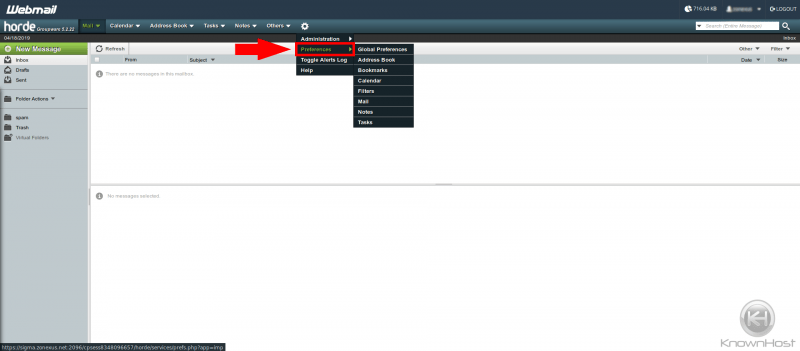
Step 3. Click the ‘Preferences’ button – it will take you to an overall settings page.
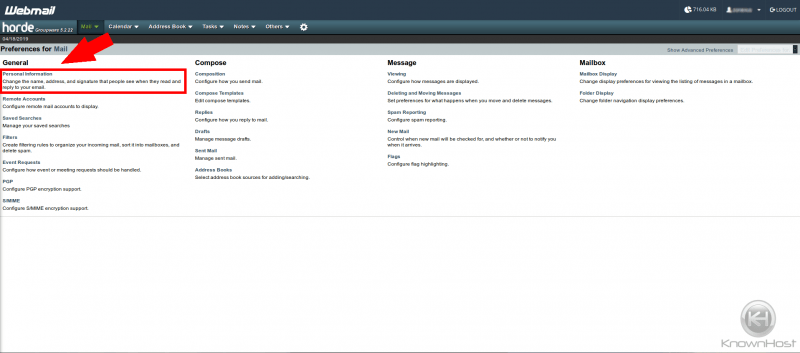
Step 4. You’ll see the highlighted area “Personal Information” – You’ll go here; this is where you can modify your personal settings.
Step 5. In this screenshot; you’ll see the signature box highlighted with arrows – you’ll set your signature here, using any customization you want.
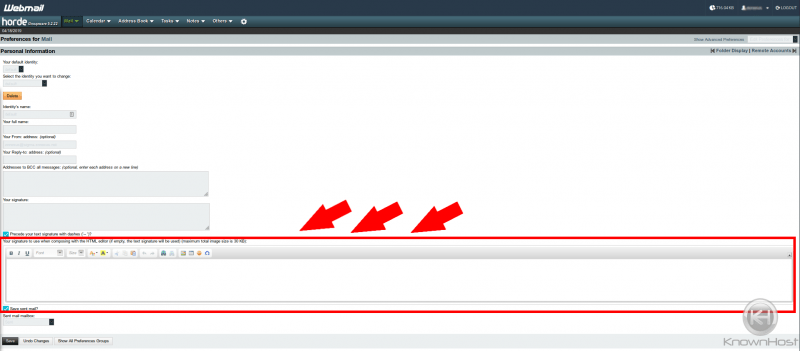
When completed; click save.
You’ve now set up your signature in Horde Webmail
Signature for Roundcube
In this section; we’ll go over how to set up a mail signature for Roundcube’s webmail.
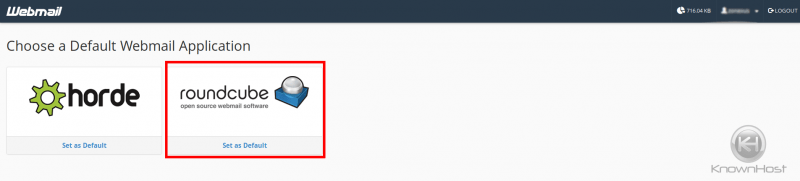
Step 1. Log in to your webmail and choose Roundcube; if this is your default and it logs in anyway – skip to Step 2.
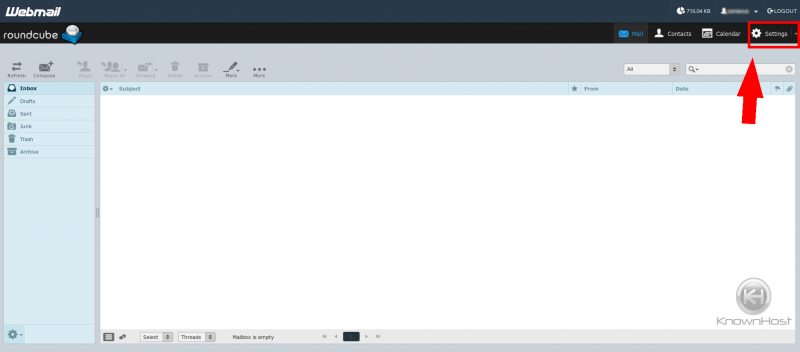
Step 2. Click settings and it’ll take you to a window with configuration options (step 3.)
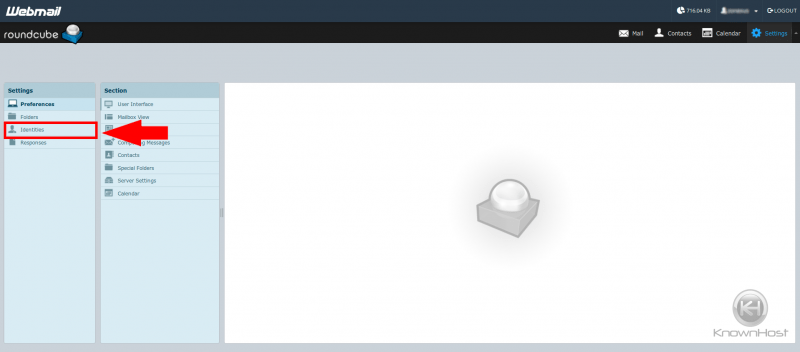
Step 3. We’re going to want to click “identifiers” in this step; as it is where your personal setup will be for your email identity.
Step 4. Once you’ve clicked it; click your identity and the screen should look like this
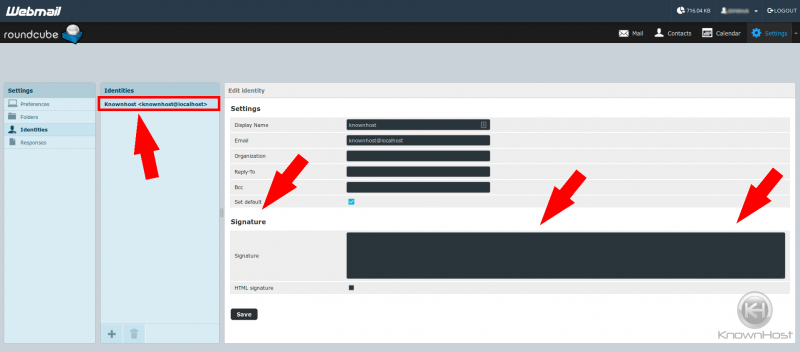
This will allow you to ensure that;
- Your name is right
- Your email is right
- Any other related inputs you want to use
- Modify your signature
Once you modify your signature, click save and you’re done!
We here at KnownHost hope that this guide helps you set up your email signature for both respective webmail clients.