How to set up a WordPress Blog with KnownHost in less than 30 minutes
Creating a WordPress website with KnownHost is very easy, we created this step-by-step guide to make the process even easier. Follow the steps below and get your self a fully functional website in no-time.
Have problems or something is confusing? No worries, get in touch with us and our experienced support team will guide you through the process.
Step 1 – Select a VPS Package for your new website
The first step in the process is to register for a VPS account with us. There are a number of VPS packages available, the most common option for beginners is our VPS-2 plan.
#1 – Go to www.knownhost.com/
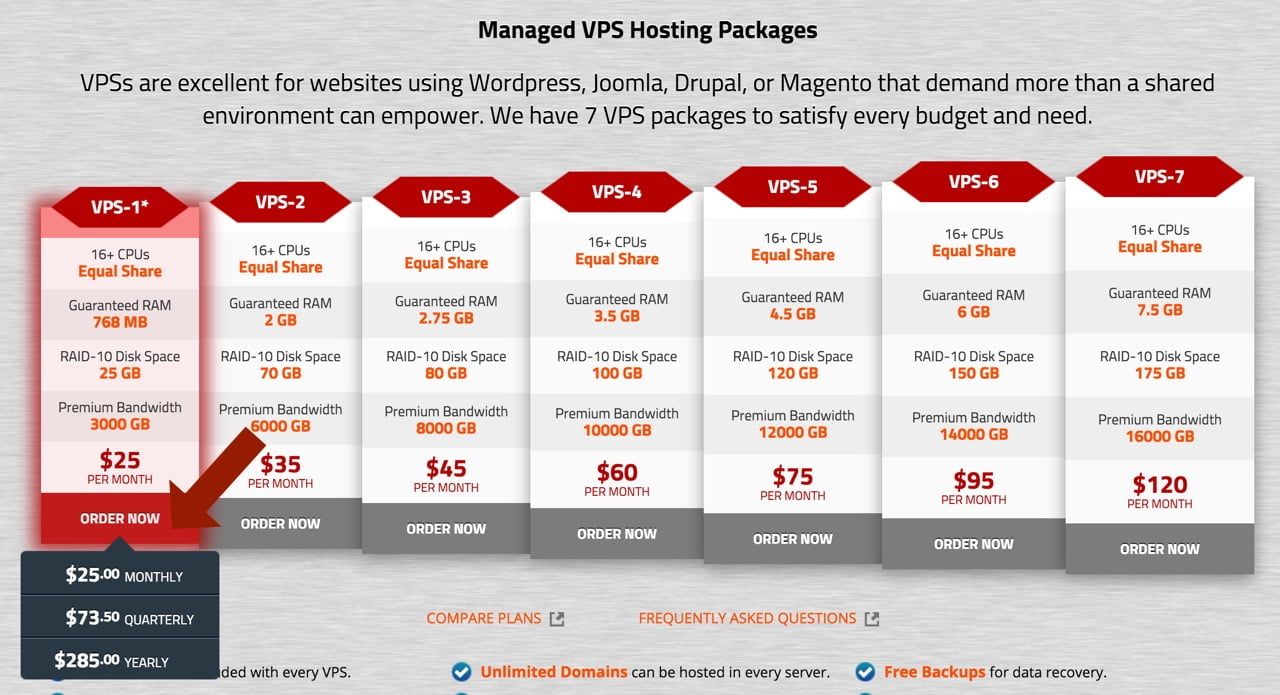
# 2 – Locate the VPS-1 package and click the ORDER NOW button.
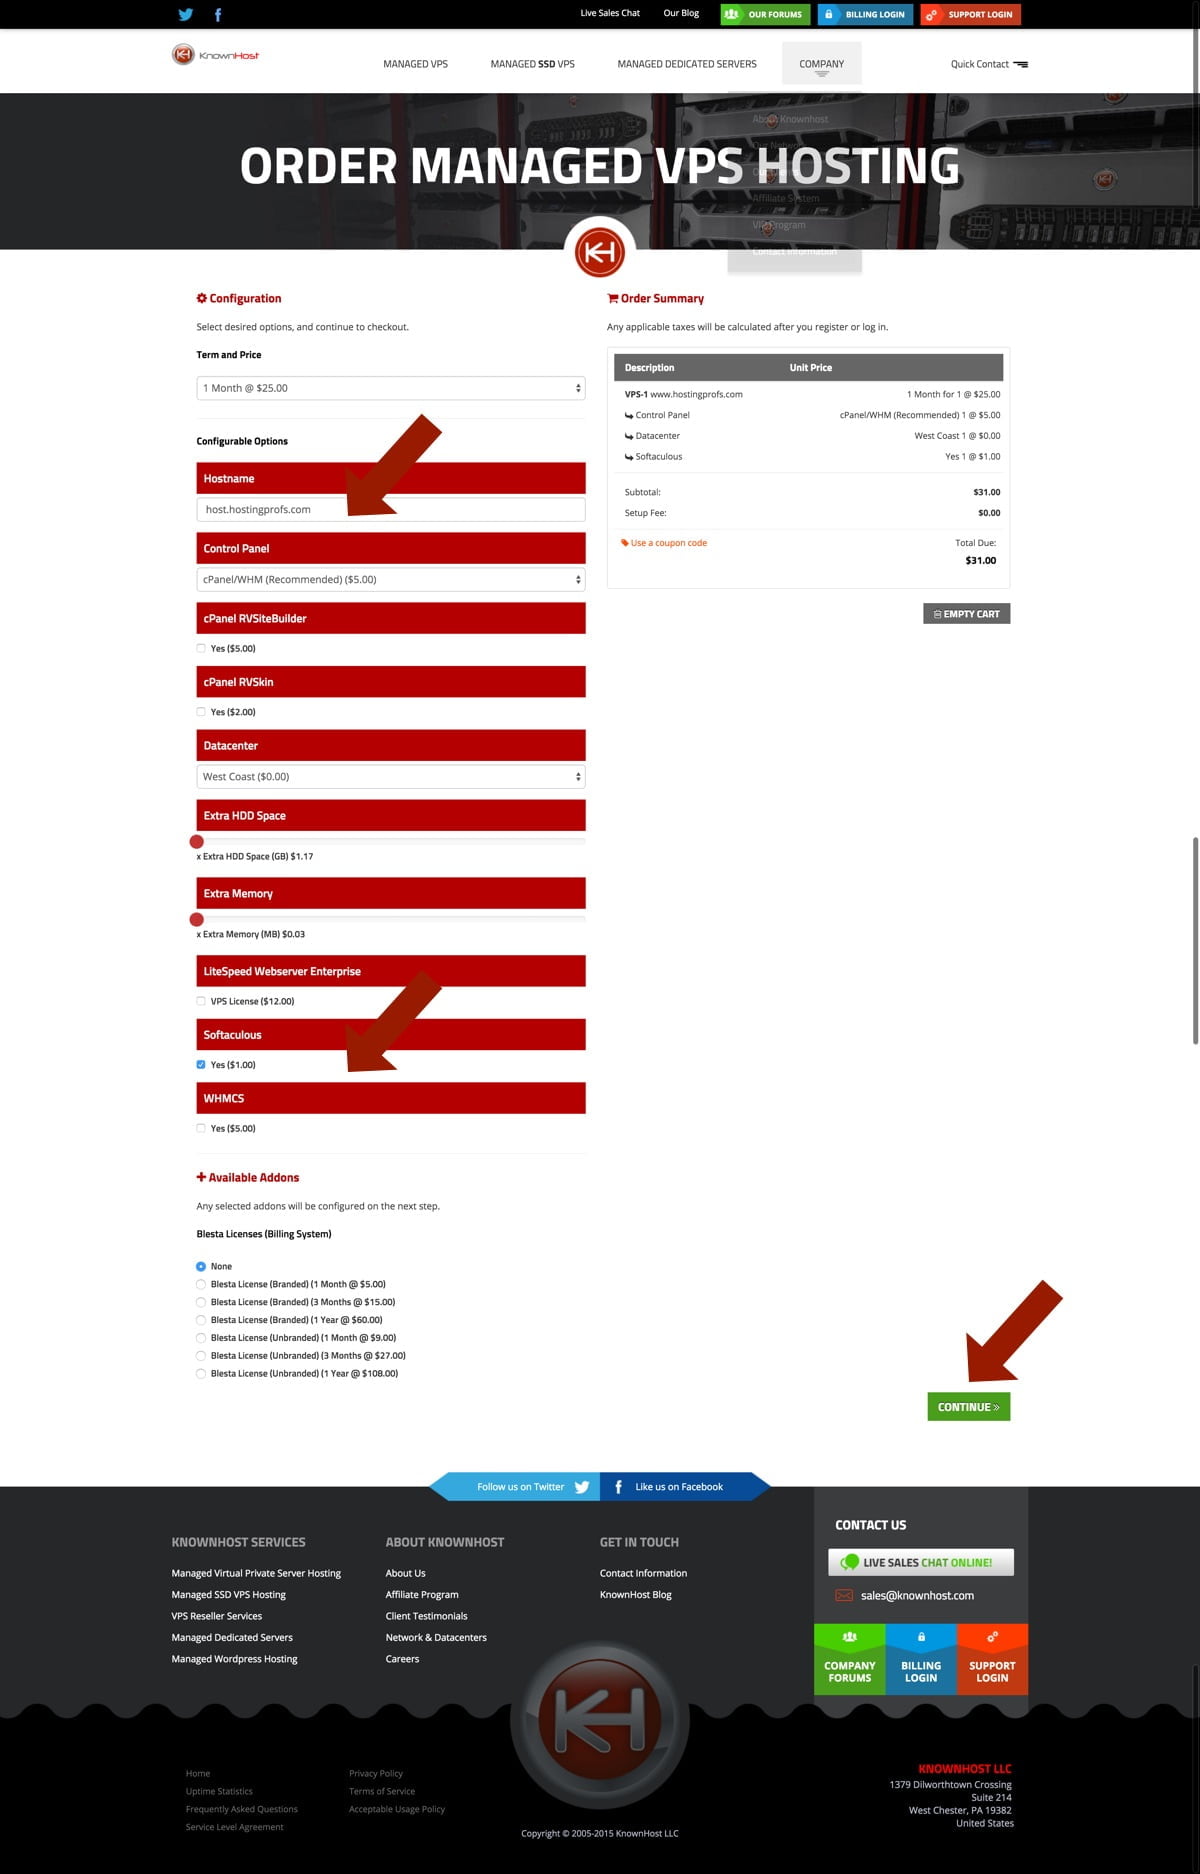
#3 – You will be presented with a number of options. To start with, leave everything in their default value except the following:
Hostname: Enter the domain name of your website. In this example our domain is hostingprofs.com so the fully qualified name to enter in the hostname is: host.hostingprofs.com. In general in the hostname use the following format:
Host.yourdomain.com
Softaculous: Check the softaculous option. This will add ‘Softaculous’ to your VPS which is the tool we will use later to install WordPress in a super fast way.
Review your order (Details of the order are displayed clearly on the right) and if all ok click the CONTINUE button below.
Your screen should look like the screenshot below.
Get rock solid reseller hosting from KnownHost.
Step 2 – Register for an account
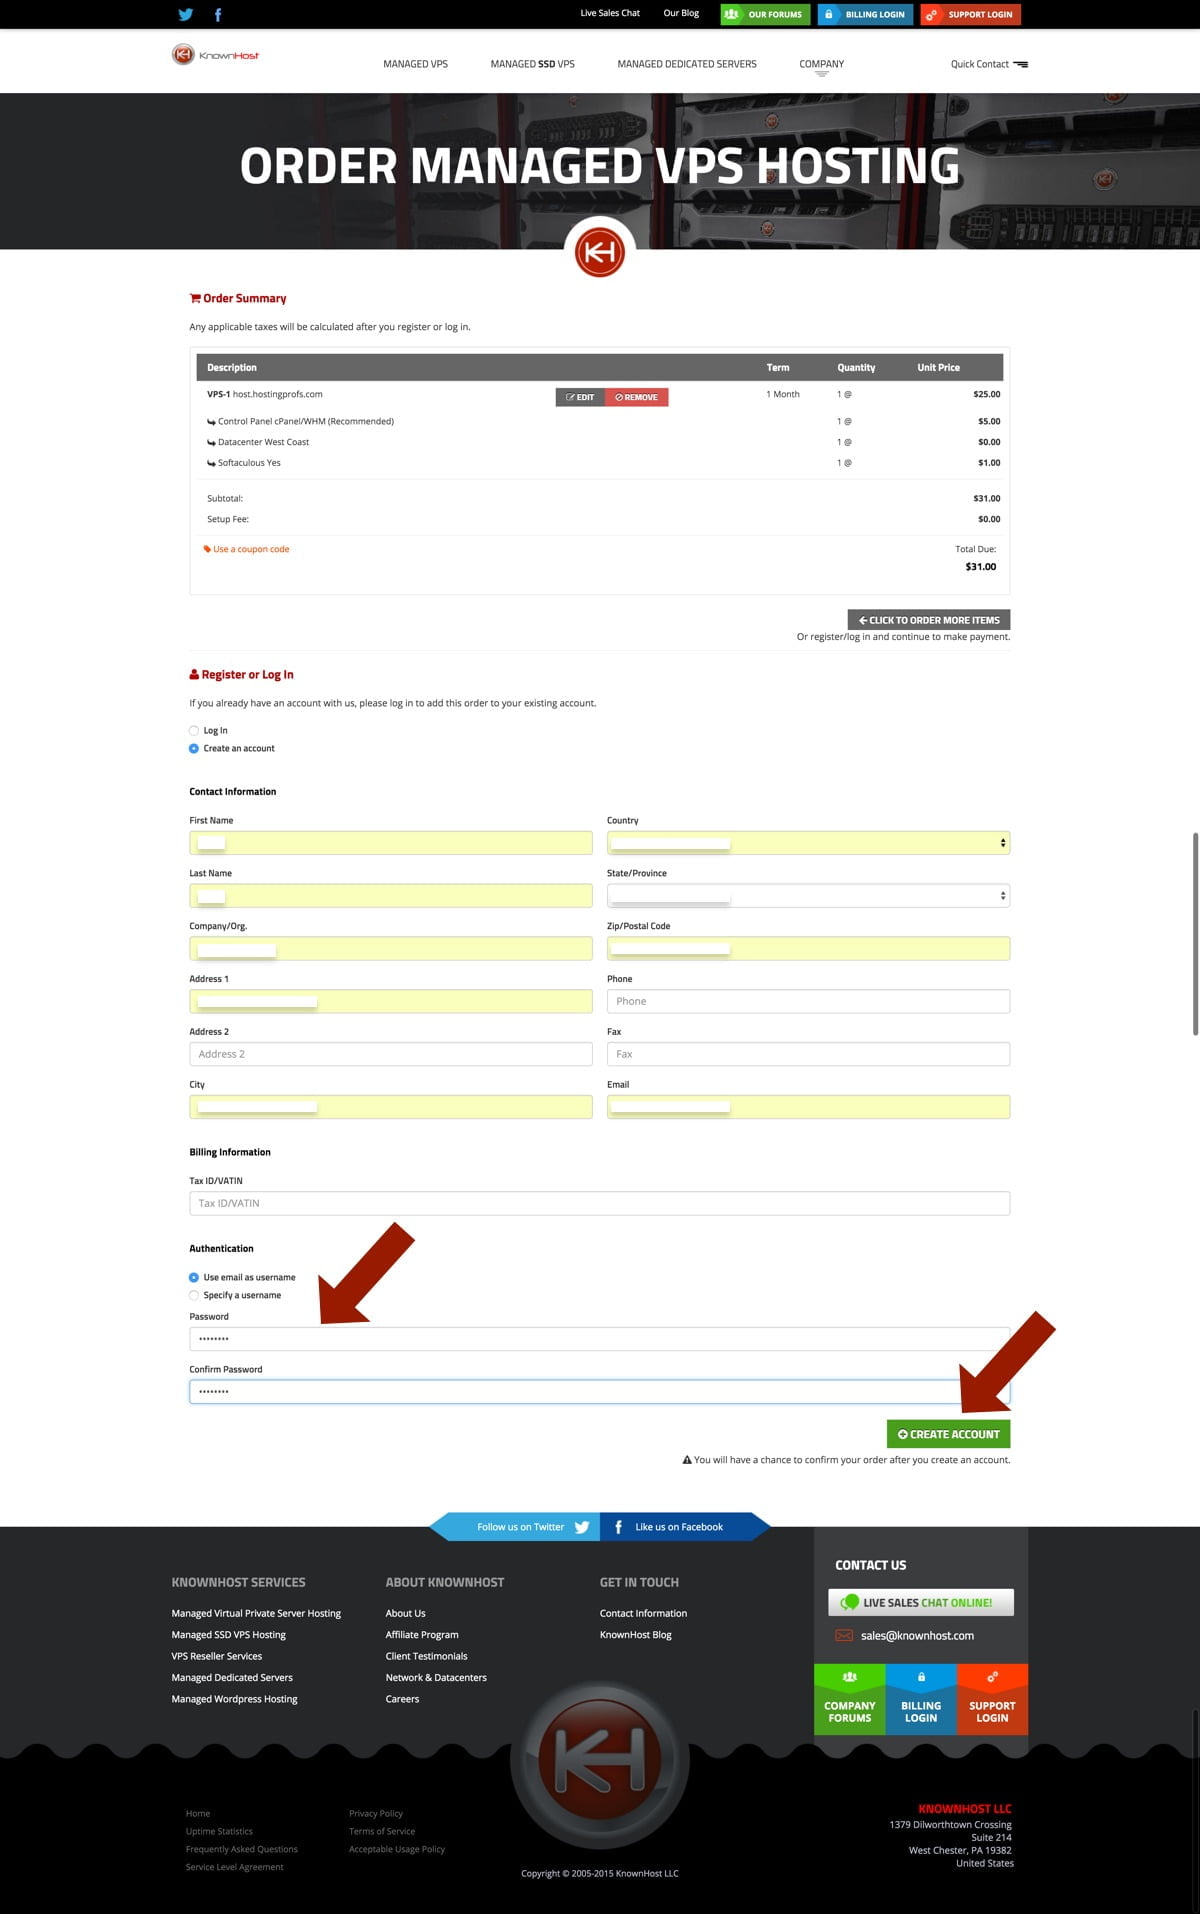
The next step in the process is to register for an account. Fill in your contact and billing information and choose your password.
When ready click the CREATE ACCOUNT button.
Your screen should look like this:
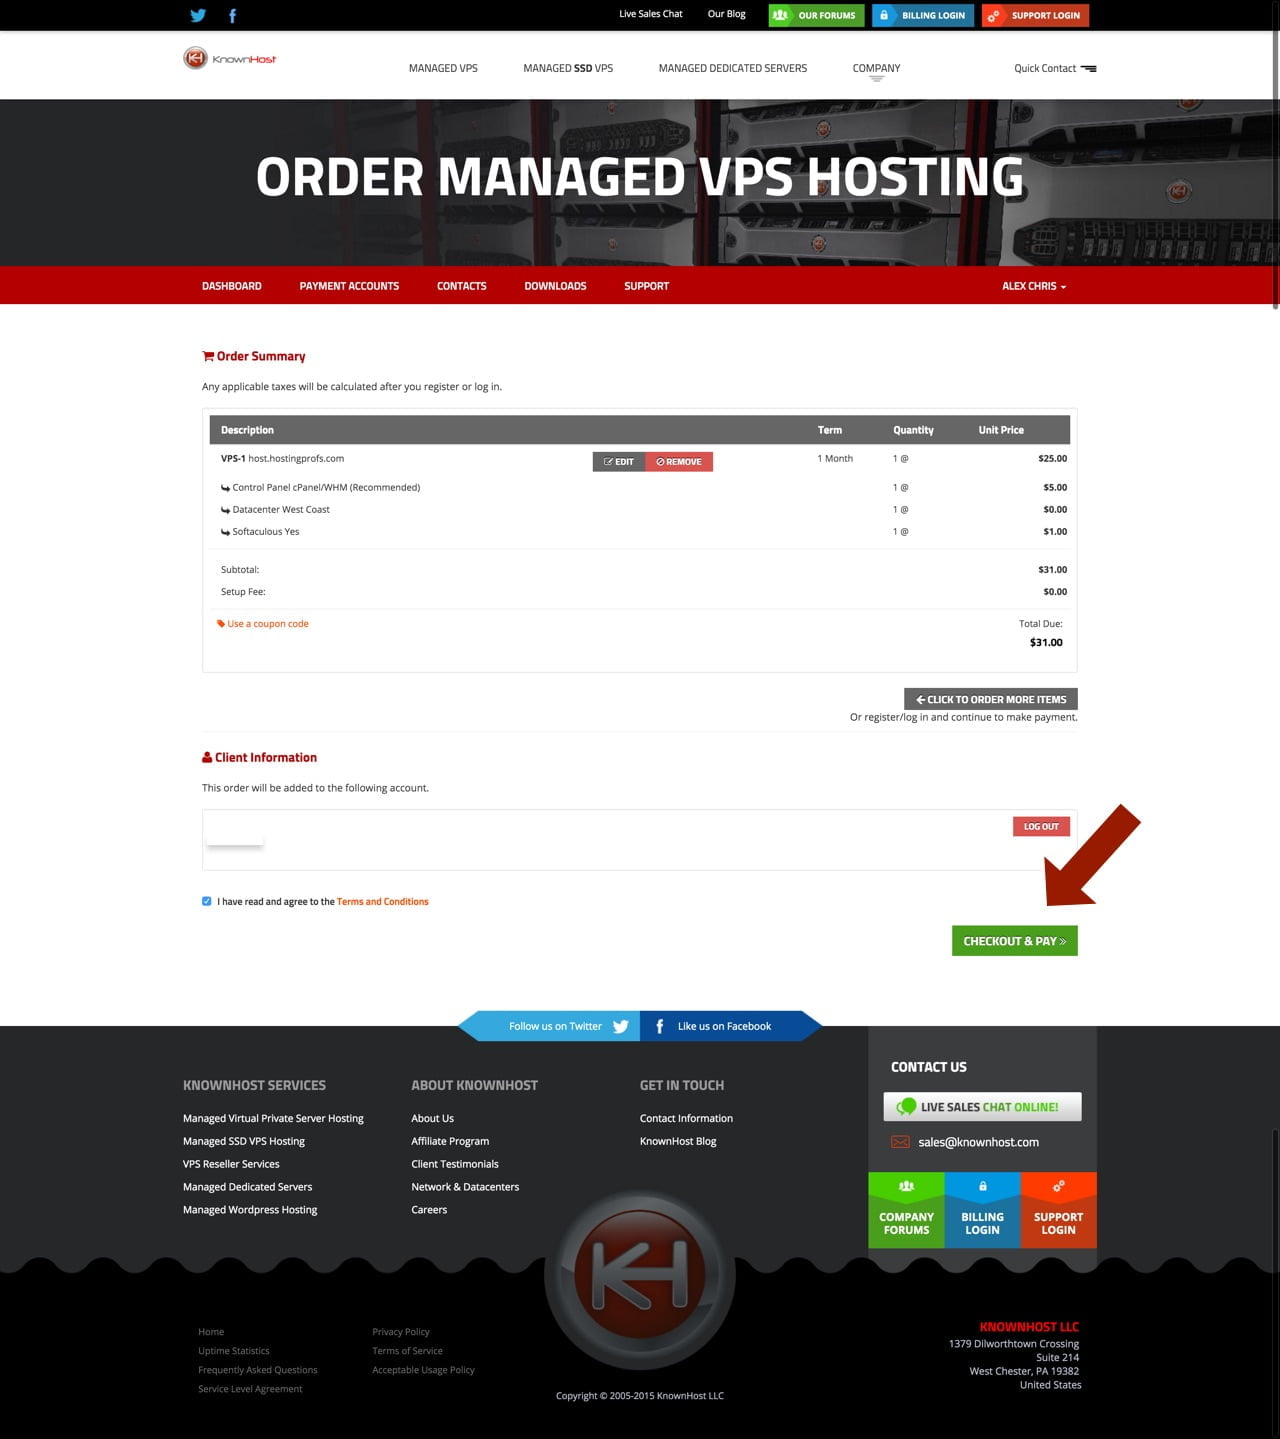
Step 3 – Confirm your order
Before proceeding with payment, you have another chance to review your order. If everything is ok just click the CHECKOUT & PAY button.
Step 4 – Pay for your Order
You can now choose how you want to pay for Order. You can pay with Credit Card or Paypal.
Choose whatever method you prefer and click the PAY&COMPLETE ORDER button.
Step 5 – Wait for your activation email
Once payment is processed, you will receive a confirmation email and your receipt.
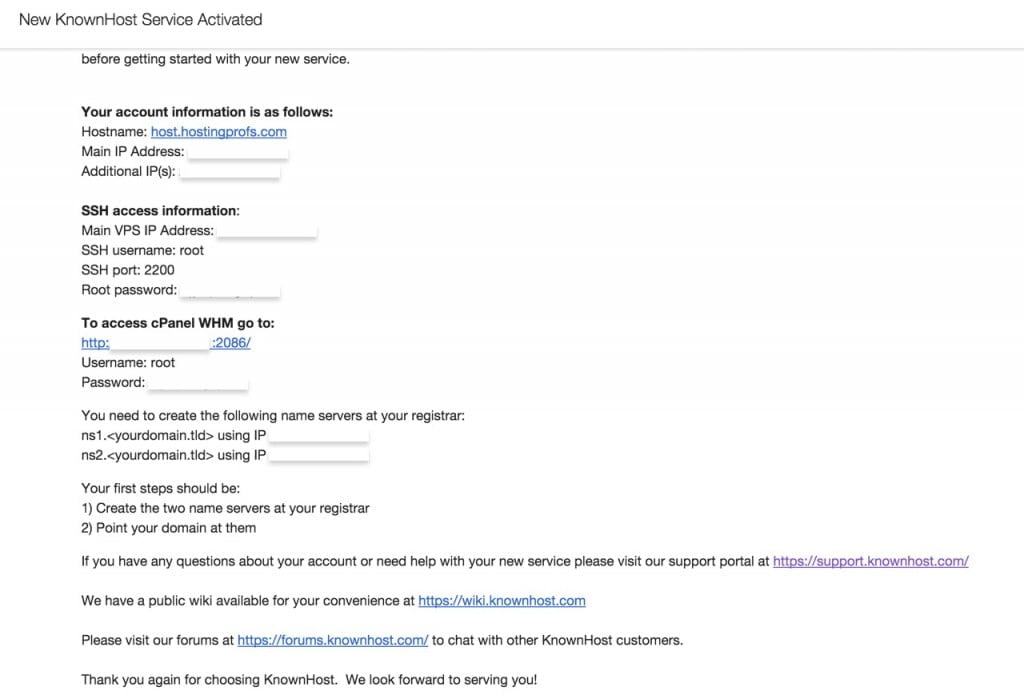
In a few minutes your account will be fully activated and you will receive another email with all the details (Example shown below). Save this email for your records since it contains important information about your account.
Step 6 – Activate your WHM cPanel
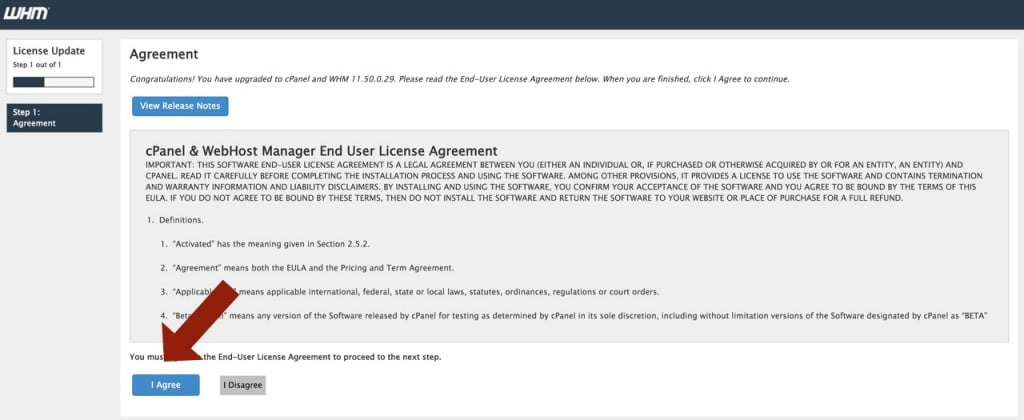
In the email there is a link under the heading “To access cPanel WHM go to:”, click and login with the details provided.
You will then be prompted to accept the End-User License Agreement. Click the I AGREE button to proceed.
Welcome to your new KnownHost VPS Server!
The WHM console is your server management console. With WHM you can configure may options for your server, create a number of accounts and many more.
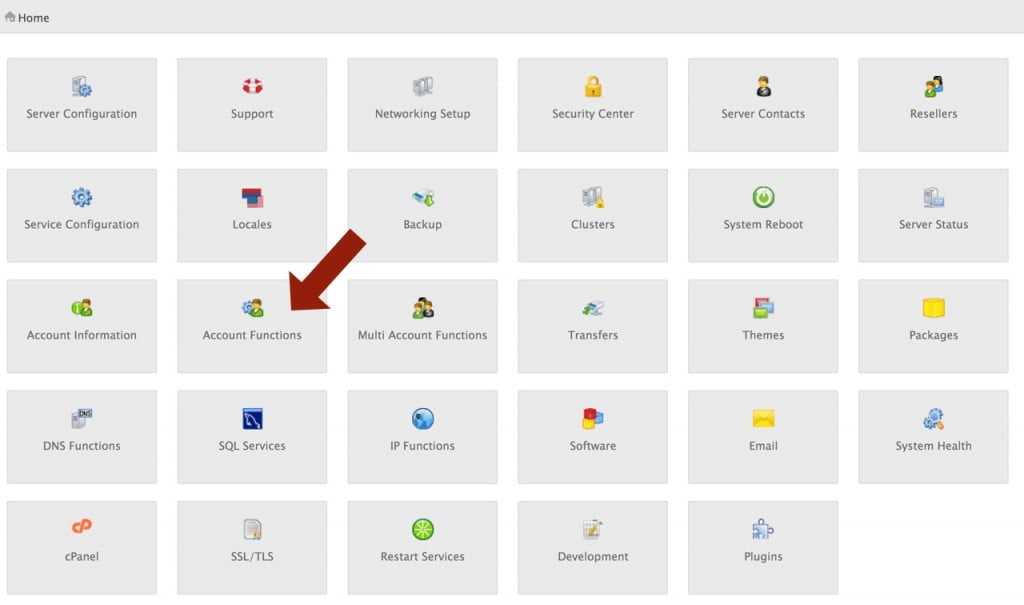
Step 7 – Create an account to host your new domain
Click the ACCOUNT FUNCTIONS button from the WHM home screen.
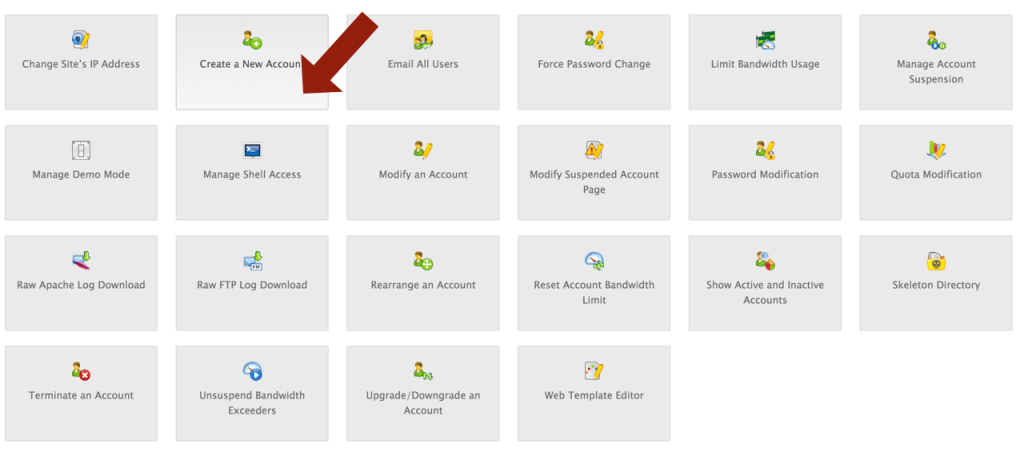
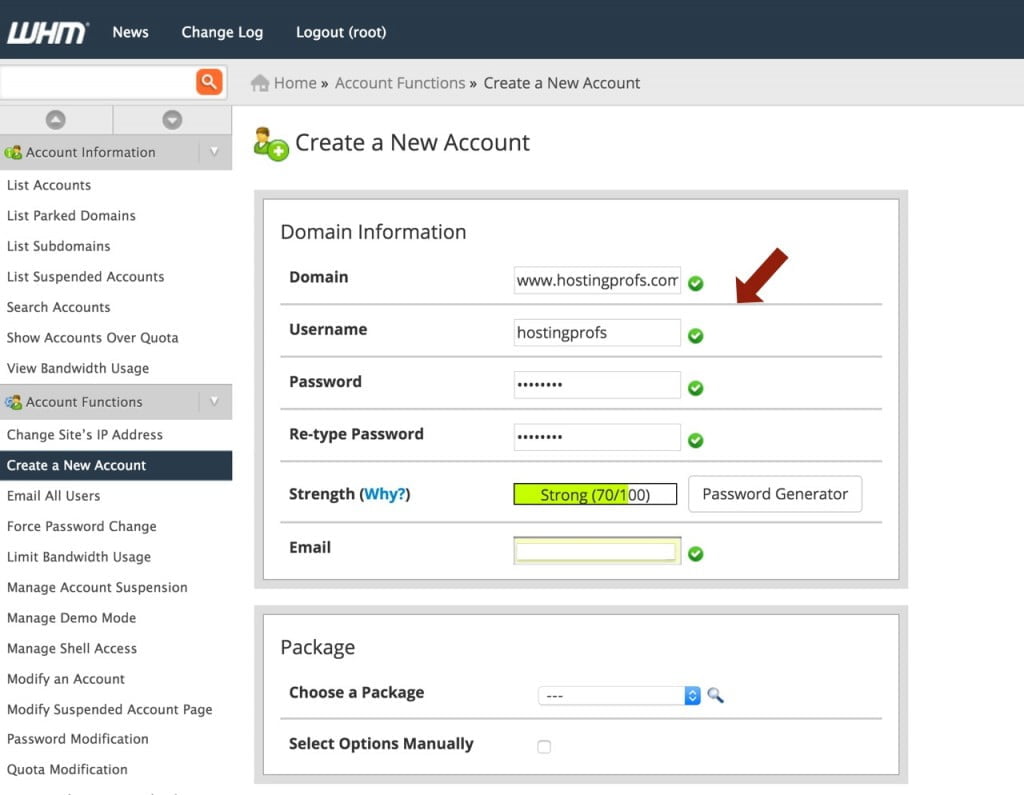
Click the CREATE A NEW ACCOUNT button.
Enter the details of your domain, choose a username and password and leave the other options as they are.
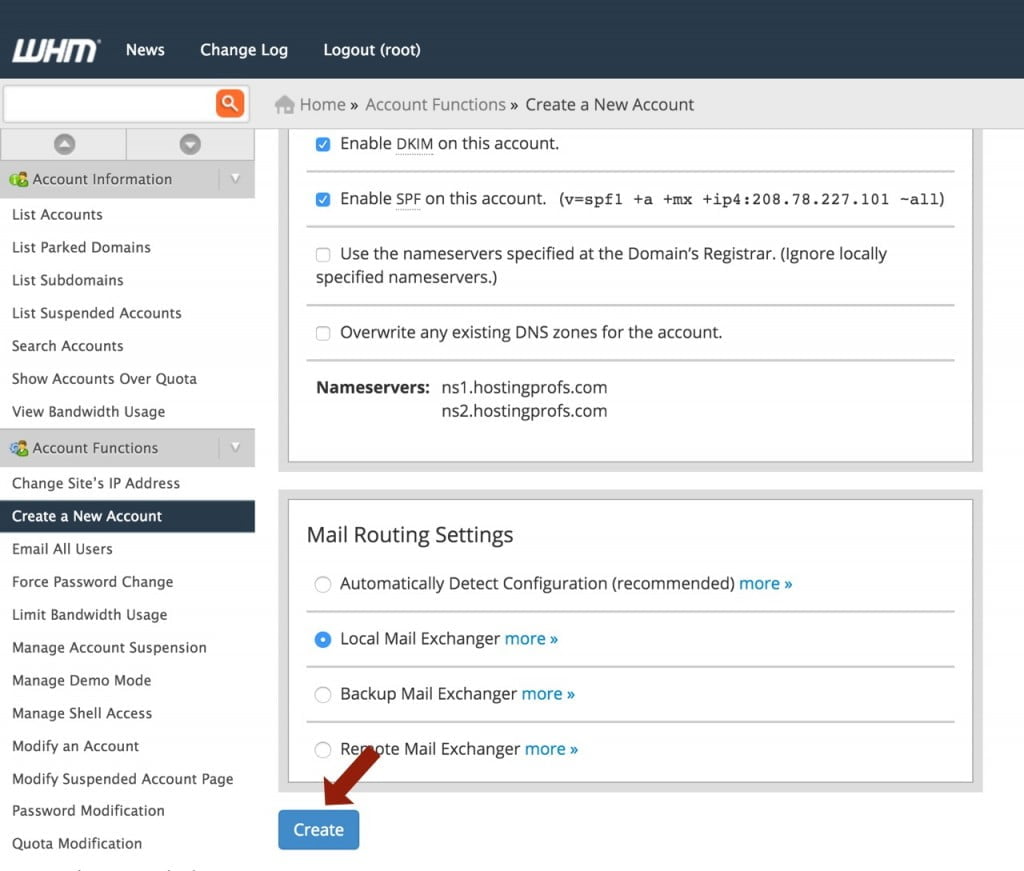
Scroll down to the bottom of the page and click the CREATE button.
Your new hosting account is created!
Step 8 – Install WordPress
Now that you have your account up and running, the next step is to setup WordPress.
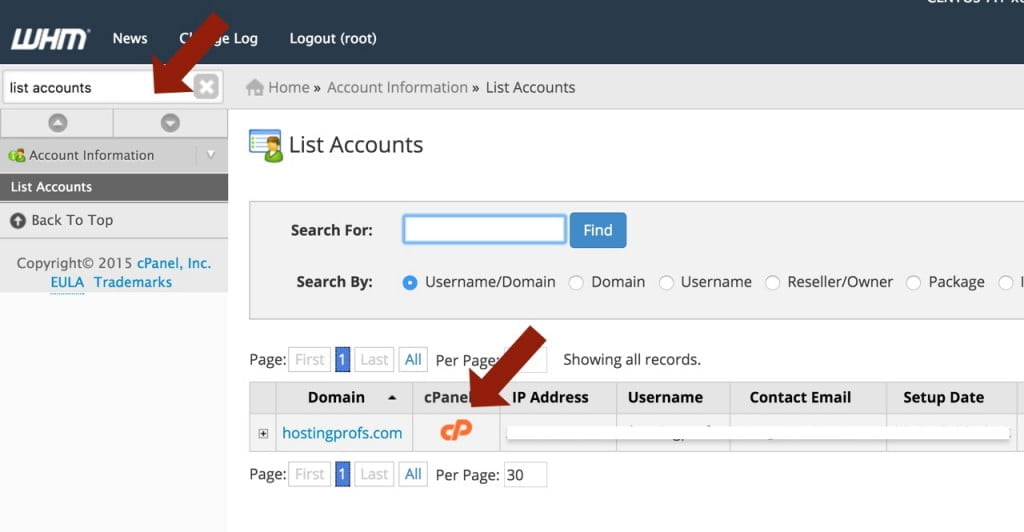
Type LIST ACCOUNTS in the WHM search box and click the Control Panel icon to go to your account control panel.
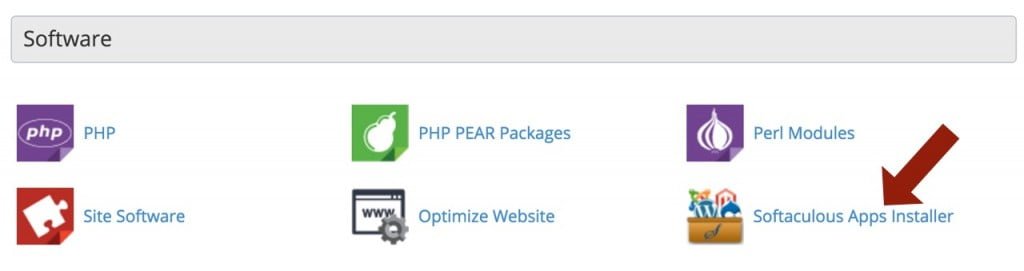
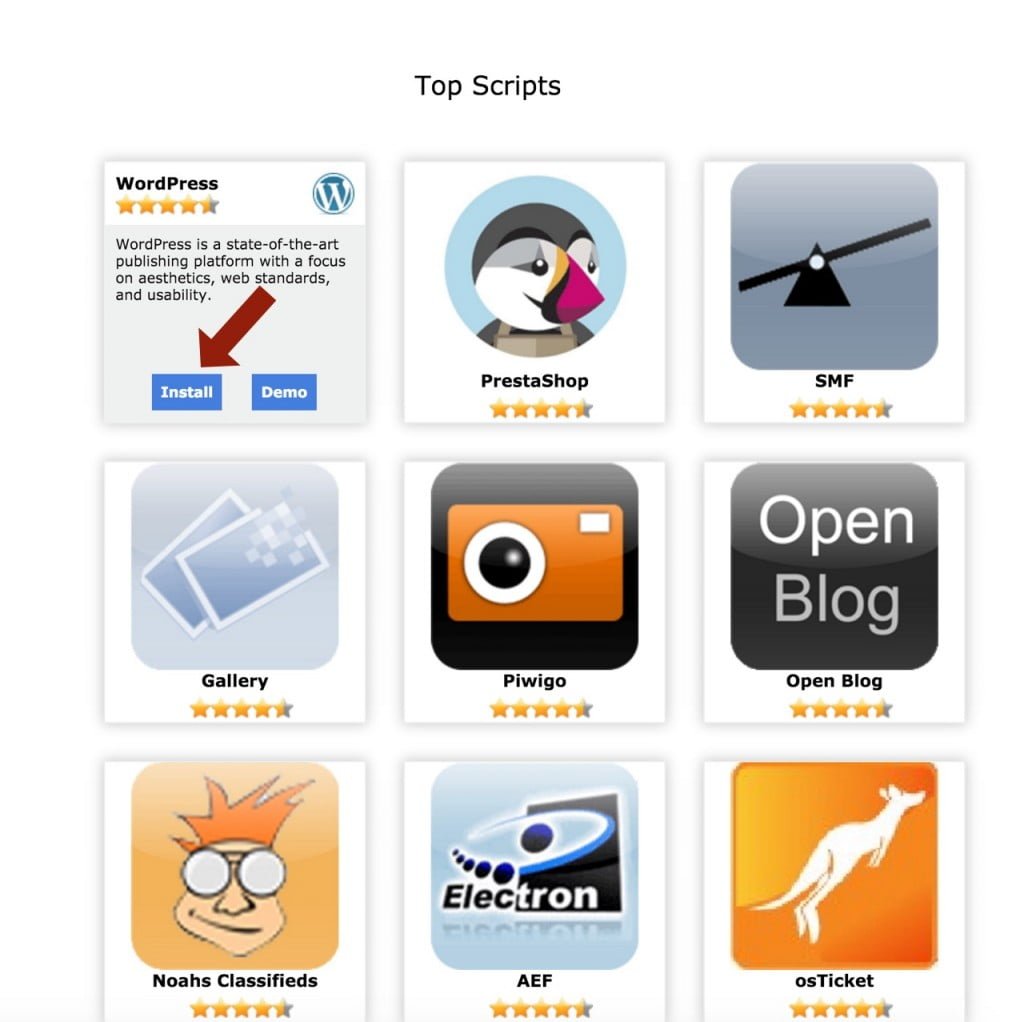
Scroll down to the SOFTWARE section and click the SOFTACULOUS APPS INSTALLER
Move the mouse over the WORDPRESS icon and click INSTALL.
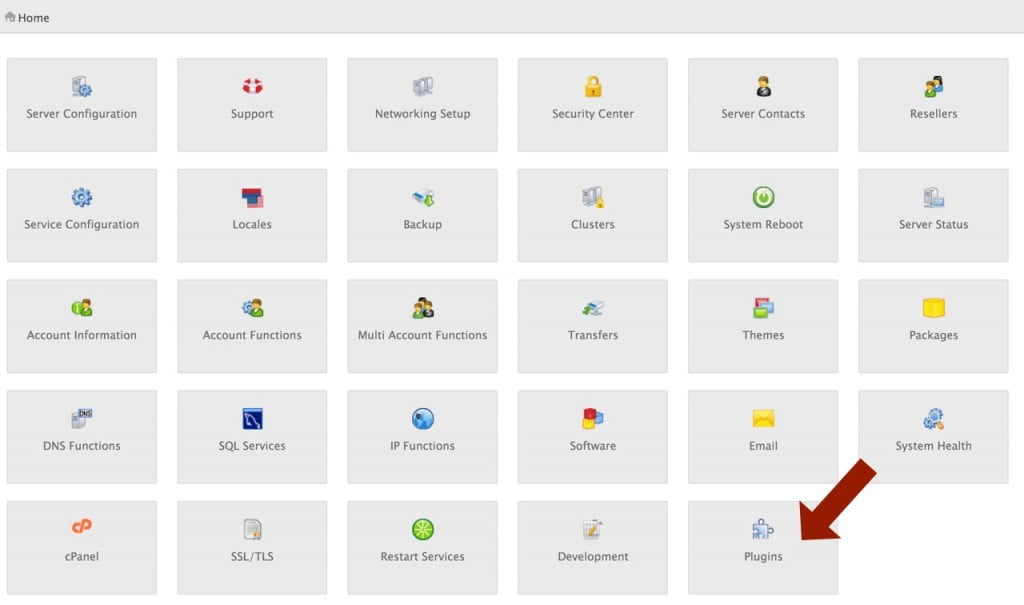
From your WHM home page click PLUGINS
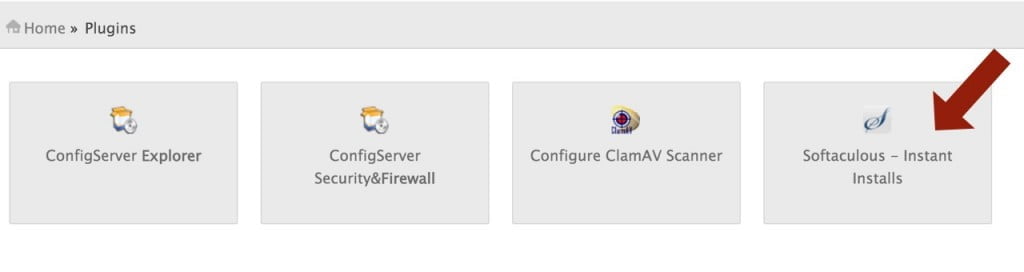
Click SOFTACULOUS INSTANT INSTALLS
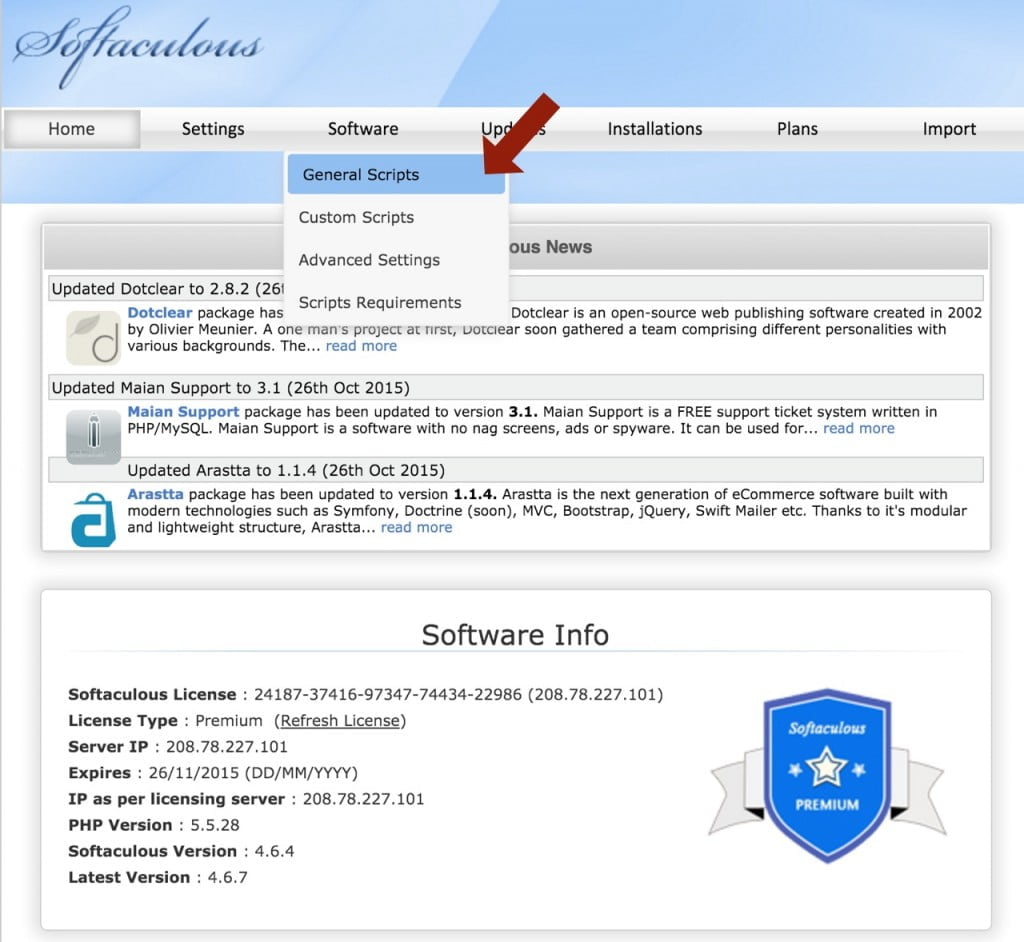
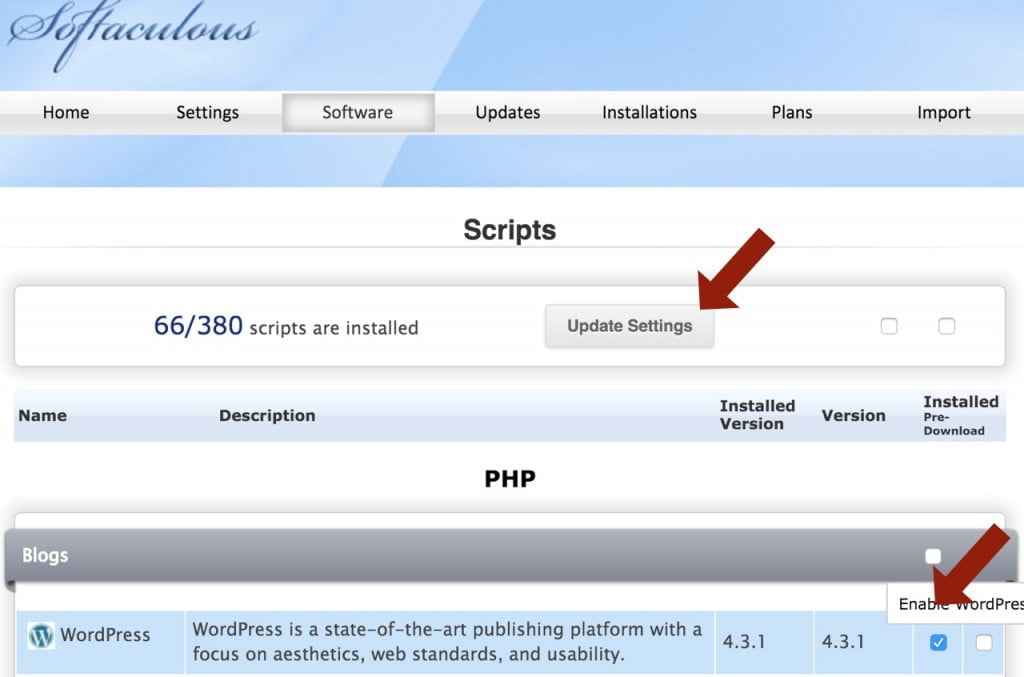
Click SOFTWARE / GENERAL SCRIPTS
Click the checkbox next to WORDPRESS and then click the UPDATE SETTINGS button.
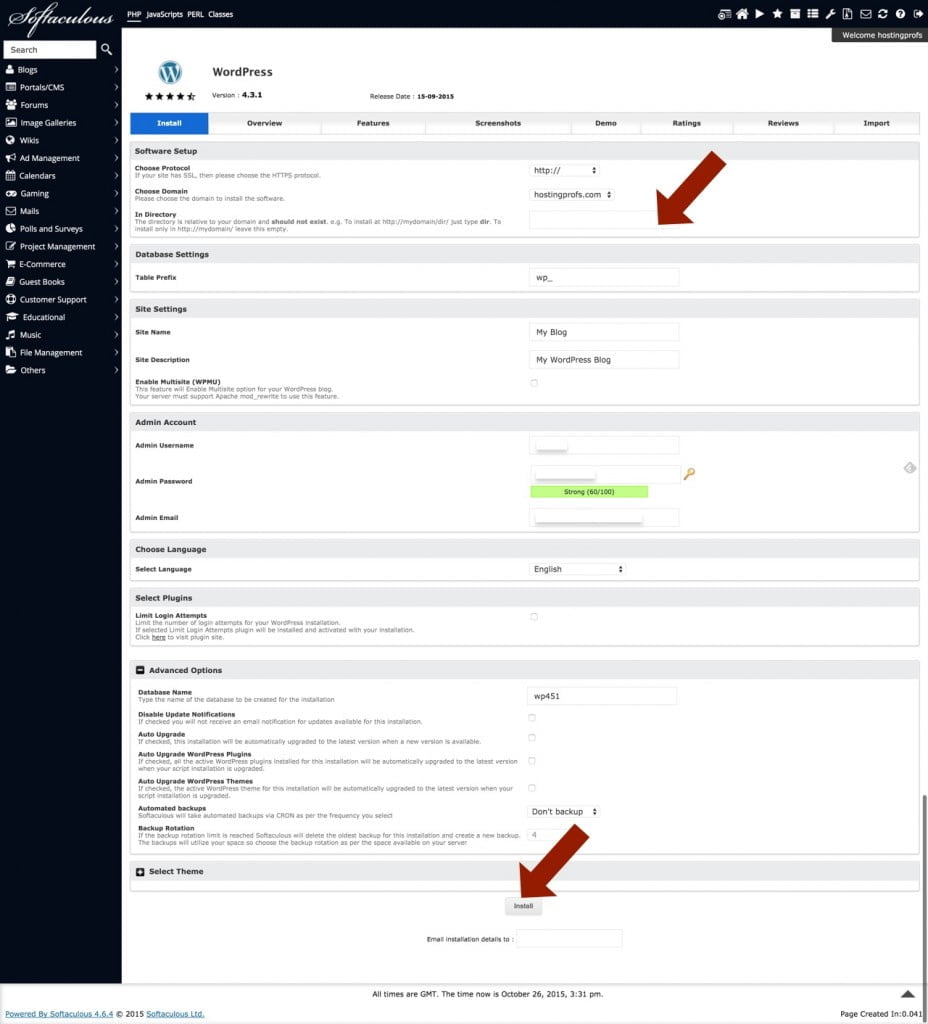
STEP 10 – Configure WordPress Options
In the next step you can configure basic WordPress options. You can leave everything in their default state except:
In Directory: If you want to install WordPress in your root directory make sure that this field in empty.
Site Name: Add your website’s name
Site Description: Add your website’s description
Admin Username: This is how you will login to WordPress.
Admin Password: This is your WordPress password. Make sure that you choose a strong password for better security. Write your password down before proceeding to the next step.
When you ready click the INSTALL button. Your screen should look like this:
That’s it! you have successfully installed WordPress on your new KnownHost VPS Server!
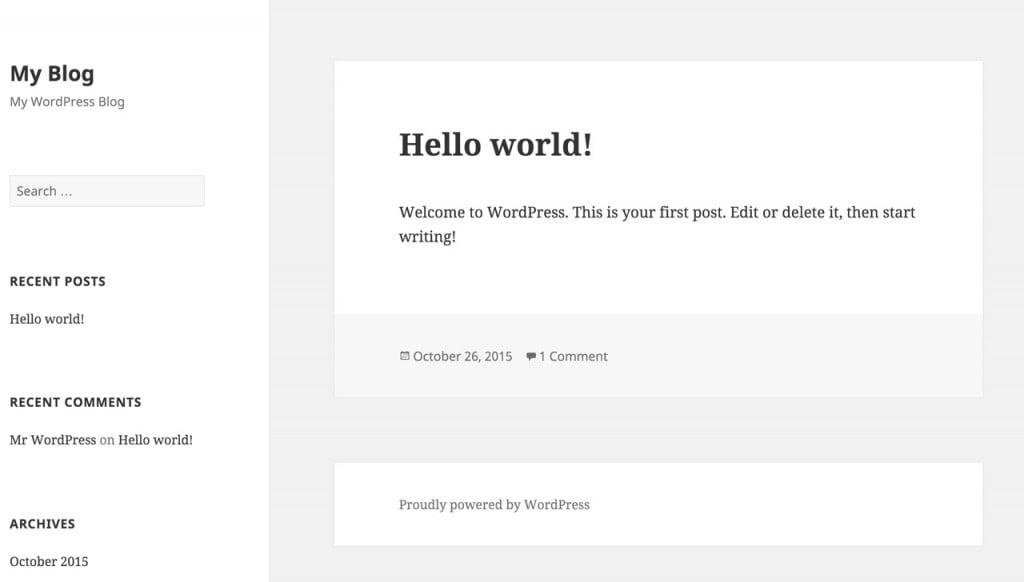
To VIEW your website, open a new browser and type your domain.
To LOGIN to WordPress, go to yourdomain.com/wp-admin and login with the username and password you selected in the previous step.
You can now choose your theme and customize your new WordPress website in the way you want.
IMPORTANT
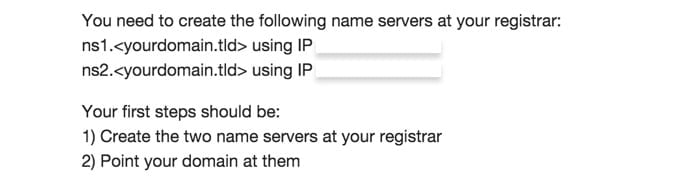
If you get a “NOT FOUND” page when you try to view your new website it’s because your domain name is not pointing to your KnownHost server.
In this case you need to create two name servers at your domain registrar to point to your server IP.
You can find the details of your name servers in the first email we have send you:
For detail instructions on how to change your nameservers to point to your KnownHost click on of the links below:
Note: If you domain registrar is not in the list above, contact our support team to guide you through the process.